I was very excited when Apple announced their AirTags. I’ve been looking into getting some trackers for years, but I didn’t like the existing options. They were expensive, and the options for when the battery inevitably died were not satisfactory. I am so pleased with the price of AirTags and the expected experience for when the batteries die next year. Plus, I already like and use the Find My app!
I recommend buying the 4 packs of AirTags. They are cheaper purchased in a multipack than they are solo. A 4 pack retails for $99, which comes out to roughly $25 a piece. That’s a lot better than $29 for individually sold devices. Especially since, if you’re like me, you’ll want to stick them on everything!
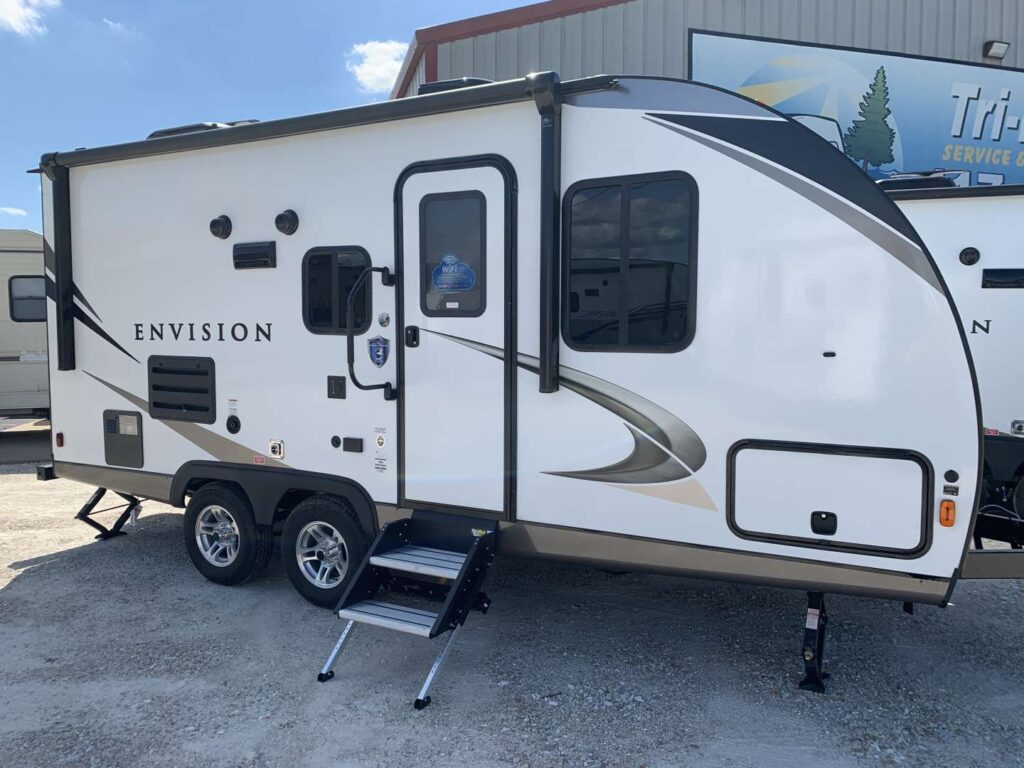
#1 – In My Trailer
Hidden inside a cabinet just to make sure it doesn’t move.
If you’ve been reading my blog, you know that I travel a lot, and when I’m not working, I’m living in my RV. That’s a big ticket item that I leave unattended for long periods of time – sometimes months at a time – so naturally I try to use every resource available for securing my trailer and preventing the unthinkable. First thing I did when I got my set of AirTags was to put one in my trailer as a “low jack”. Now, I can see it’s position while I’m away.
One key to this is to make sure that it is somewhere out of site. If a thief can find the tracker, then they can disable it or toss it out. I hid mine inside the trailer, way in the back of a cabinet that is deeper than it looks. Also, I don’t want it to be too difficult to get to for myself because I will have to change the battery eventually. I do check the trailer’s position every once in a while just to make sure it is where I expect it to be.
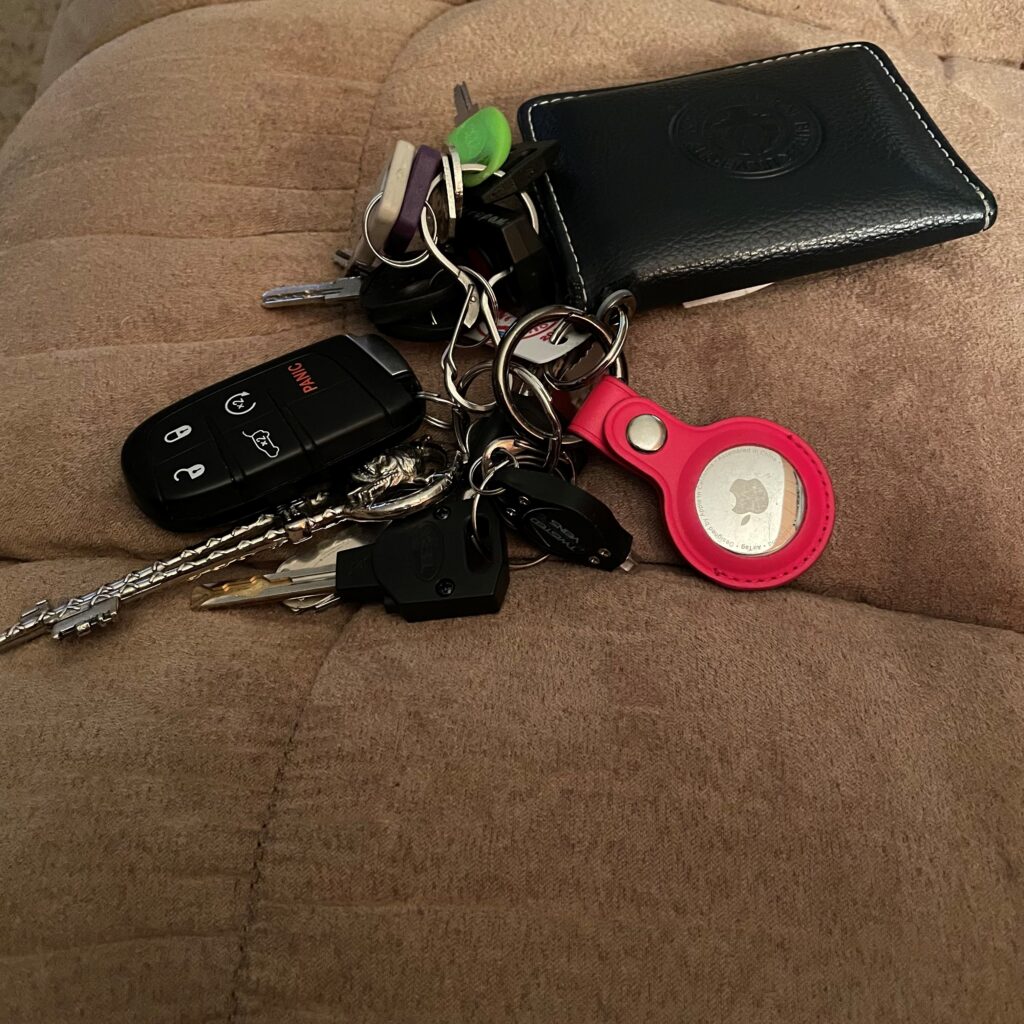
#2 – On My Keys
I have so many keys because all my trailer locks are different!
Wow! What a surprise. I know this is one of the most obvious places an AirTag is going to go, but it was my number 2. I don’t lose my keys very often because I usually put them on their hook right away, but it also can’t hurt. Plus, whatever the keys are in now has a tracker in that too.
#3 & 4 – On My Luggage
I guess I should say in my luggage.
Like I mentioned before, I travel alot. I basically live out of suitcases for work, and I fly several times a month. At the time of writing, I’m actually in an airplane right now waiting for takeoff. It’s also my second flight this week! So knowing where my luggage is located is essential so #3 & 4 went into my suitcases.
A couple tips. It is not ideal to attach the AirTag on the outside like a luggage tag. Not so much for risk of being stolen, but it is likely it could be ripped off in the baggage process. I actually had mine on the outside right next to my luggage tag, but the clerk at the desk told me to put it in a pocket so it wouldn’t be ripped off and lost. In my large bag, I have it in the large front pocket. In my Briggs and Reilly carryon, I have it in the pocket for the portable charger on the back. There are more and more accessories coming out for AirTags, and I’ve seen some luggage tags on Amazon designed to also hold an AirTag. Again, just keep in mind it runs the risk of being ripped off and lost in transit.
#5 – In My Car
Yes! I did buy a second pack. I tested out my first pack, and decided I liked them so I bought another. I actually found them on Woot! for a $5 discount off the 4 pack. Score! It may not be much, but for a brand new Apple product, I’ll take it.
So yes #5 went to my car. I liked the idea of the “low jack” in my trailer so much, I decided to put one in my car. Again, placement is key so it’s not in immediate view. I put it in my glovebox. Not the sneakiest of hiding places, but I didn’t want to forget where it was, and that’s out of the way.
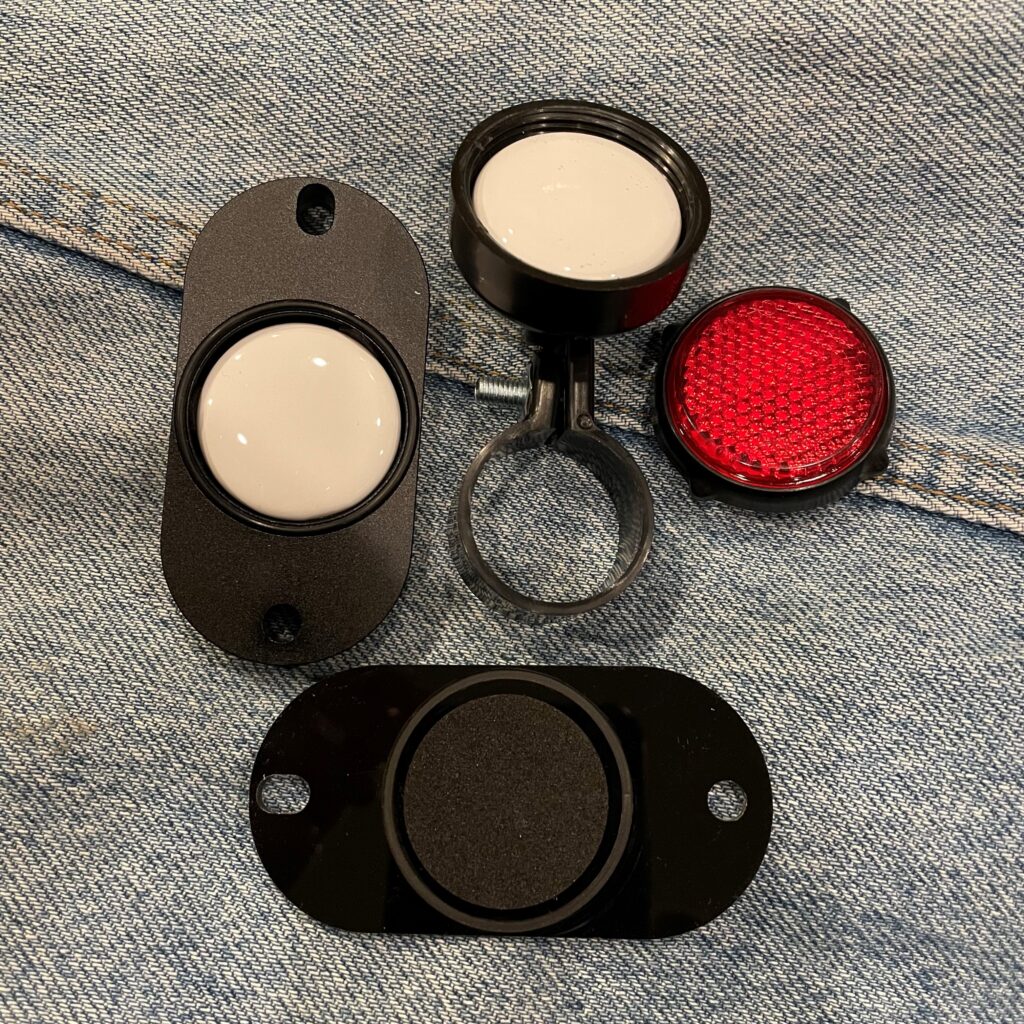
#6 & 7 – On My Bike
The 2 bike options opened to show where the AirTags go.
I have been buying some equipment to be able to transport my bike with me, but this does require it to be outdoors and vulnerable. Of course, I’ll be locking it up, but…..just in case.
I have 2 tags on my bike. I had a spare, and I liked the backup of having 2 on there. Incase one of them is found, the other is still there. One of the cases I used looks like a reflector for the back of the bike. I have had an issue with this style. The first one I bought had a weird connection design, and it didn’t fit anywhere on my bike. I replaced it with the other reflector I found on Amazon, and it was also too small. Luckily, I had a longer screw and could use it to connect the second one. It is frustrating that out of the box they don’t fit.
The other style I bought seems to be the most popular on Amazon. It goes under the water bottle holder and is really unassuming. It is more secure than the reflector, and it kind of just blends into the bike because it’s so boring you just ignore it.
The AirTag holder is bolted under the water bottle holder.
#8 – On My Backpack
AirTag on the outside of my Osprey.
I have an Osprey Backpack I use at work, and plan to use when I get the chance to hike again. I use my keychain case to hook it on the top handle. I know, I know not hidden like the others. Here’s the thing, AirTags have an awesome feature where if something is lost, anyone with a modern smartphone can tap their phone to it, much like they might do for Apple or Google Pay, and then it shows them contact information to try to reunite the bag with its owner. This is actually the original reason I left the AirTag on the outside of my suitcase as well, but I heeded the staff’s warning. In the case of my backpack, I think the risk is enough to keep it visible.
There are some fun cases starting to emerge on Amazon. So if you want to be a little more discreet, you could get a case that isn’t as obvious as to what it contains and just looks like a keychain.
Some Other Ideas I’ve Seen
On Your Wallet
Not a bad idea I have to say. I know that should be the #1 place for my brother. I’ve considered it for myself as well. I’m just concerned it will make it that much more bulky. There are some clever holders for sliding your tag into a card slot like these, or I’ve seen someone at work who just attached one of the classic keychain type to the outside. There are even some wallets popping up with a dedicated slot built into the design like pictured. Definitely, a top priority item you don’t want to lose.
On Your Dog?
One of the most popular cases I’ve seen for AirTags are designed to go on a dogs collar. Personally, I think the ones that are made to have the collar slide through them like this are better than the dangly ones. I’m not so sure about putting one on my dog. I’ve considered it, but it’s not priority on my list.
On Your Child!
Looks like mom & dad’s Apple Watch
I’m not making this up! There are AirTags cases that are designed to help you track your kid. I have to say, this really isn’t a bad idea once you think about it. The best ones, I think, are the ones that look like watch bands and the AirTag slides right in to look like a watch. Better yet, if you buy the AirTag off Apple’s website, you can get free engraving. You could put essential “if found” information such as your phone number or name. If your visiting someplace where kids are likely to go off on their own or wander, this could be a great idea. I can’t help but think of The Children’s Museum when I see these bands. I would definitely strap some kids with these if I were to take them there.
On Your Scooters
Similar to bikes and cars, you may want to tag your scooter or other mobility device. I read an article about how a guy from NYC was able to track down and recover his stolen electric scooter using AirTags. That’s part of why I double tagged my bike. He made sure it was incognito so the thieves couldn’t find the tracking device before he could find the scooter again. There are some cases that are adhesive that could work well in this case. Or another reflector option could be ideal. I’m hesitant on the adhesive styles because of 2 reasons. I don’t know how well they’ll stick, and are they one time use? Knowing I’ll have to change the battery once a year, I want to make sure I don’t have to change out my cases also. Plus, they are more obvious in my opinion.
On Your Remotes
If I would have had this, I wouldn’t have lost my remote for so long.
This one has tempted me. I’ve even looked for a case for my Fire TV remote. I lost it for a long time once, and I wished so bad it had a “find my remote” function. I mean, come on! why isn’t this a built-in thing yet? I digress. Remotes are one of the common uses for the stickable cases I mentioned before. My hesitancy comes from how bulky they are. I haven’t seen a remote solution that isn’t just totally bulky looking and functionally. Maybe if they come up with a design that isn’t so bulky or when the tags get thinner, I’ll add it. If this doesn’t bother you though, it would be a great addition to one of the most misplaced things in your household.
On Your Other Apple Devices
Trick heading! This is not necessary. I’ve been seeing cases and accessories for iPhones and AirPods, but these devices have Find My tracking inheritantly built in. The only exception I’d make is that I have noticed that my AirPods have find my for each earbud when they’re out of the case, but anytime I’ve lost them they were inside the case and they wouldn’t show up on tracking when in the case. While I can see that lending the solution to get an AirTag case for your AirPods, personally I would just prefer Apple to fix that so I can track the case too. I don’t want to have to give up my Capt. Jack Sparrow AirPod case.
As always, there are no rules on the best uses for where and how to use your AirTags. If you have any great ideas not mentioned here, please add them in the comments! These are more like guidelines anyway.
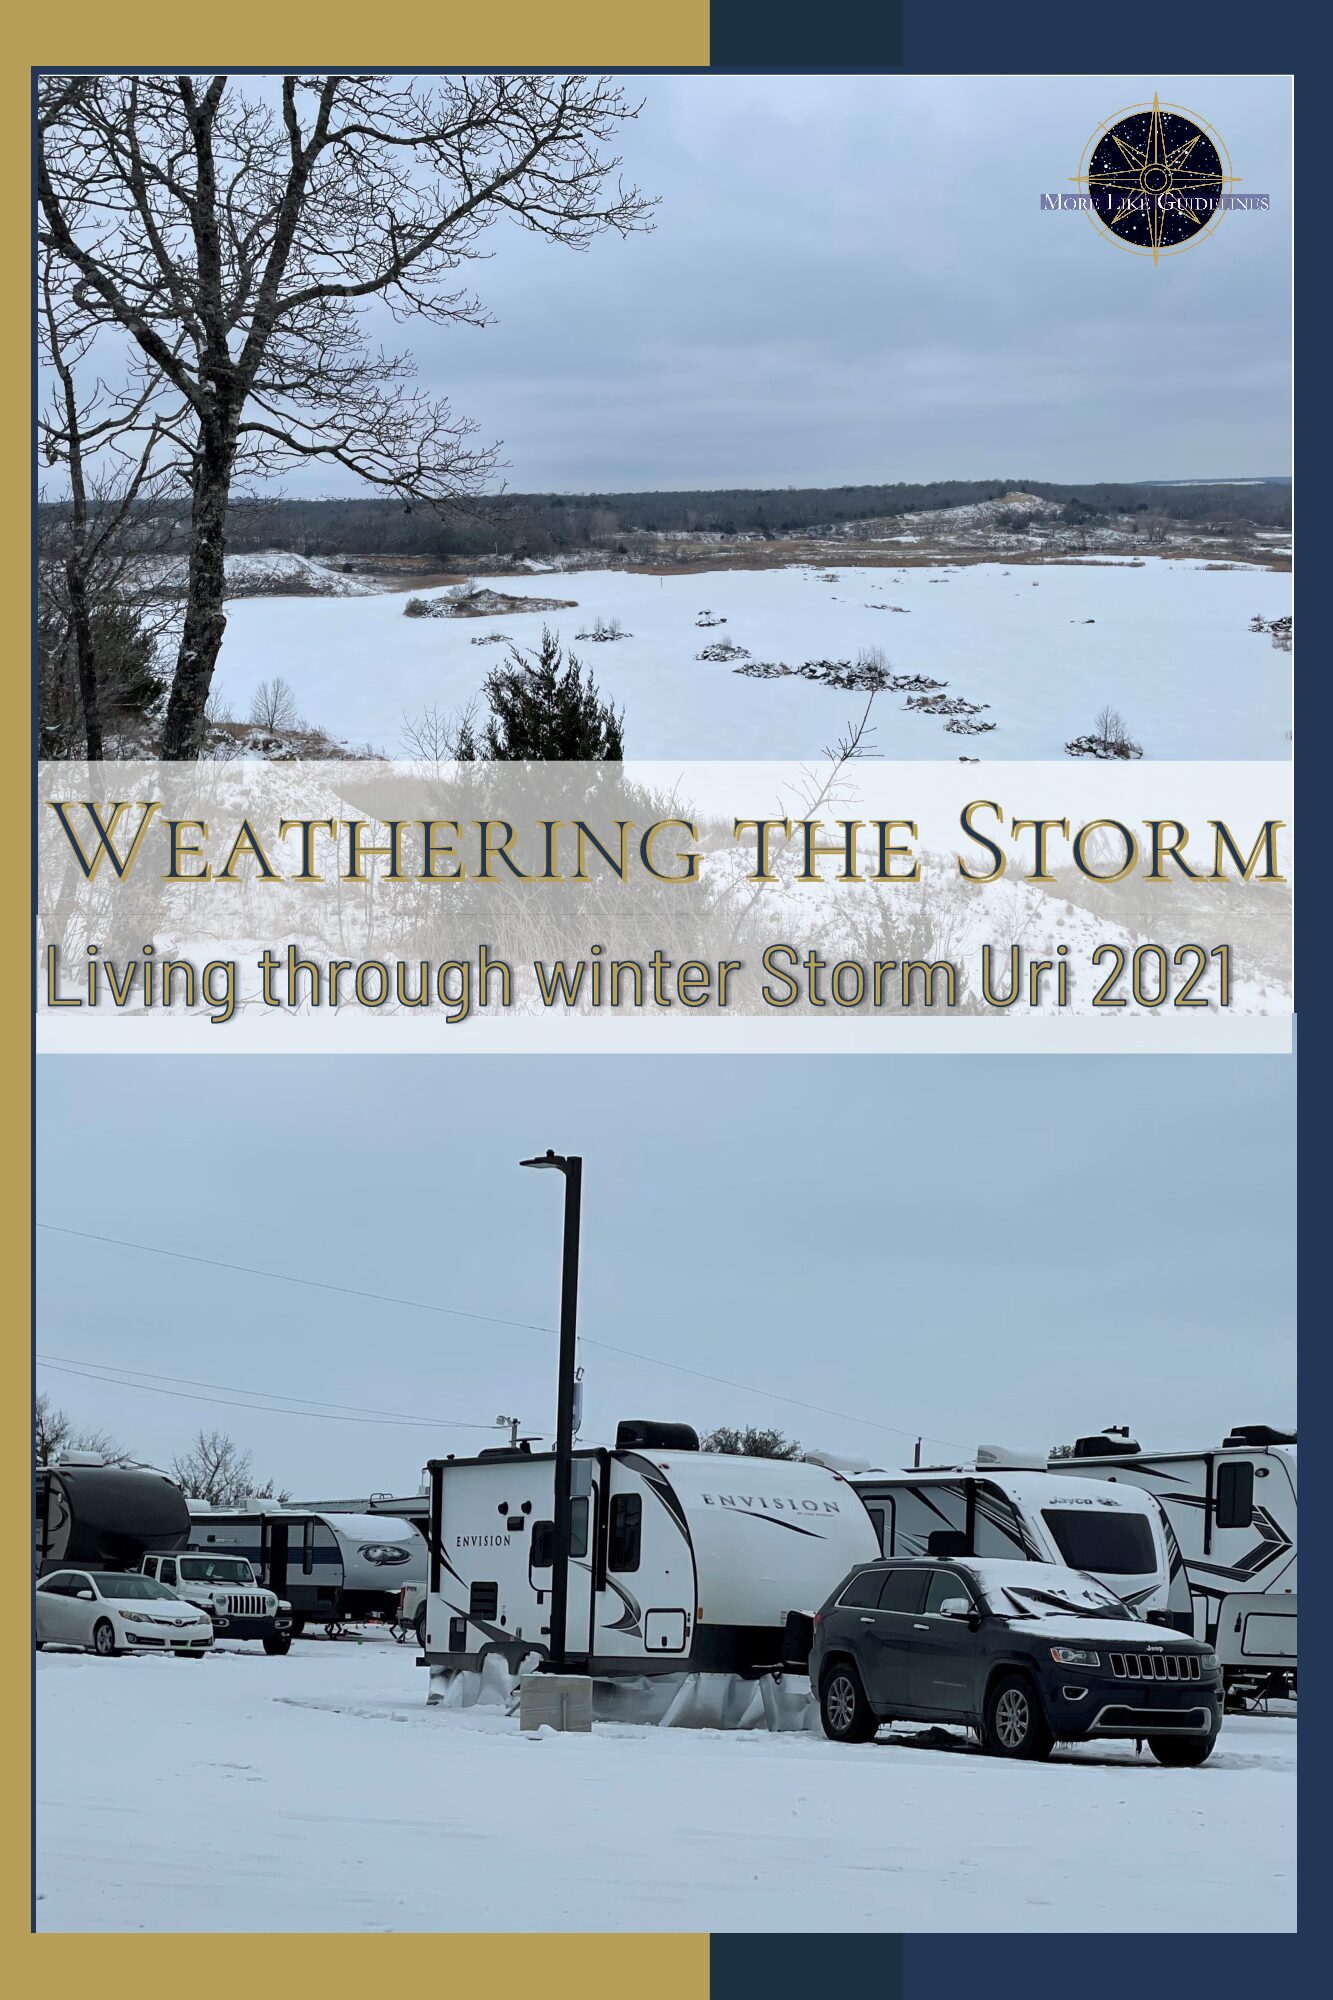
As part of my first full timing trip, I decided to drive down to Texas. When people asked, “Why Texas?” I’d say it was because it was warmer, there were no mountains between me and Texas, and I’ve never been there. Since I’m from the Midwest, we were in below freezing temperatures for the long term. I didn’t want to try living in an RV in freezing temperatures, especially since I don’t have a 4 seasons unit. As it turns out, Texas had another idea. Only 2 of my 3 reasons ended up being accurate. This is the story about what it was like to live through freak winter storm Uri, and what I learned.
I am not the best at paying attention to the weather. I’ve known for a while, and I’ve tried to get better. The way this started for me was finding out Texas was calling for snow. I befriended the lady who owns a food truck that comes to our campground on Tuesdays. She told me she had only had 1 customer the whole time she’d been here. That’s how I found out the temperature was around freezing. I had been working inside all day and just didn’t realize how cold it was. She then said she wasn’t coming the next week because they were calling for snow. I came to Texas to get away from snow! Luckily, I had already read up on all the ways to protect the RV from the freezing weather.
Lesson: Always check the forecast so you aren’t caught off guard.
Expecting to hit some cold weather in the Midwest, I bought supplies to try to protect my trailer back in September. I purchased 60 ft. heat tape – which is just a weird name for an electric cord you wrap around pipes and hoses to keep them from freezing, silver insulation, and a grommet kit to make my own RV skirt. Skirting an RV allows you to keep some heat under the RV and keep the wind from blowing under the rig. You can purchase RV skirting. You can even have it custom fitted and installed, but it’s expensive. I thought the silver insulation would be much more cost effective and easier to install than lots of other DIY solutions. I wanted to fit it before the cold weather came around, but my RV was in the shop for 3 months. When I got it back, it was below freezing and I didn’t want to try to do it in the cold. Since I was still winterized, it wasn’t essential at that time to have it skirted. When I got to Texas, I was planning to use the warmer weather to start working on the skirt. I had the materials, but they would need to be put together and attached to create the skirt. I’ll make another post about how I made my skirt. When I arrived, however, the staff I was talking to said I wouldn’t need a skirt around here. I noticed no one else in my park was skirted so I thought maybe I shouldn’t. I wish I had. When the cold weather rolled around, I wasn’t ready to skirt. I had to quickly punch all the grommets into the material (my hands were getting so tired), figure out how to attach the skirt, and hang it in the cold like I had intended to avoid.
Lesson: Never let anyone talk you out of your plans.
I used some heavy duty magnets that I already had on hand to attach the skirt to the metal frame under the trailer. They worked ok, but I definitely had to stay on top of any that came unattached. It is so windy here. I hadn’t got a chance to weigh the skirt down. I would have used some stakes, but I was parked on concrete so that wasn’t an option. I also needed to add a heat source for the skirt to keep inside. I got a work light from Walmart that puts off some heat and is made for outdoor use. I also put the light on a couple leveler blocks to keep it away from any potential water that might find its way under the trailer.
Day 1 of Winter Storm Uri – Valentines Day
First thing I did when the weather changed was open all of my cabinets. There’s even these openings you have to unscrew to get to the plumbing and other functional parts of the RV. These areas aren’t well insulated so removing the barrier between them and the warmth of the RV is just one more way to try to protect them. Once the furnace was running, I put a space heater in the bathroom to help focus on the plumbing there. Last thing to do when the weather turns, let your faucet drip or run slightly. The moving water will help slow down the pipes freezing.
Lesson: Education & preparation ahead of time is invaluable.
I let the pipes drip, but they were driving me crazy. I had been tracking down some loose pipe connections the weeks before so the sound of dripping water was the last thing I wanted to hear. I had turned it down as low as I could without turning it off. However, the temperature was so low it wasn’t enough. That evening I realized my water had frozen. First thing I did when the water froze was take some of my empty pitchers outside and scooped up snow. Then I set them in the shower so they could melt. I wouldn’t recommend drinking this, but I could use it for flushing the toilet and washing my hands. I was so stressed it was somewhere under the rig where there could be damage. Lucky for me, it was just the water filter that was frozen. I brought it inside to work on thawing it. I used hot water from my electric kettle to run through the filter to melt the ice inside. I kept a cup under the filter to catch water as it came out and poured it back through. That was the only way there would be enough to keep going. All the water I had were the two ice pitchers, and some water that was still in my Brita. I managed to get the filter thawed, then I had to get the small bit of ice out of the end of my hose. I chipped away at it with my Leatherman. I managed to get enough of a hole that water could come through. When I hooked everything back up, water sprayed everywhere. Not ideal for freezing weather. No matter how much I tightened, it still sprayed. About that time one of my neighbors stopped by to check on me. I didn’t think I needed help, but he gave me a rubber seal to help with the leaking. When that didn’t work, we realized the hose on the filter had busted a ring. Without the filter, it worked fine. For now, I decided to forgo the filter and just attached the hose directly to the RV.
Lesson: Accept help, even if you don’t think you need it.
Day 2 of Winter Storm Uri
I woke up around 2:30 a.m. because the power went off. I could hear it turn off because the heater turned off. I didn’t realize it at the time, but I think the campground’s streetlights suddenly going dark also contributed to waking me up. The spot I was in had a light directly outside the front door and windows so it lit up the camper a little bit. At first, I thought I blew a fuse. My fuses inside weren’t tripped so I went outside to check the electric pole for my spot. That wasn’t tripped either so I realized that the campground was dark, and it wasn’t just my lights off. I’m really glad I had my winter coat with me or I would have been in big trouble. I always carry some winter gear in my car just in case. I crawl back in bed because there’s nothing I can do. The lights come on, and then go back off a few minutes later. By this point, I’m getting really cold. My space heaters aren’t working since the power is off, and it seems that my furnace isn’t working either. Turns out, I had run out of propane. I finished my first tank a few days earlier and switched to the second. The first one lasted since September, so I never thought the second would run out in just a couple days. It couldn’t have run out at a worst time either. I keep my coat on, and pile as many blankets on as I could on myself in bed. I check our campground Facebook page to see if anyone has posted what’s going on. This leads to messaging another camper who was also up. Neither of us could go back to sleep so we end up messaging most of the night. He offered to let me tag along with him and his wife in the morning to get propane. I was quite thankful since I hadn’t changed my propane since buying the unit. I’m really wary of gas so I wanted to be sure I was doing it correctly. We went first thing in the morning, and we still had to try several locations before we found someone who had propane. We stopped at a couple hardware stores as well to pick up supplies. This is how I first met Jeff & Amanda from We Live Free RV. They are really great people, and have lots of cool videos on their YouTube. Be sure to check them out and subscribe!
Lesson: Always help out fellow campers when you can. & Never be afraid to ask for the help you need.
Day 3 of Winter Storm Uri
The next challenge was regarding my battery. While the propane runs the heater, the blower is run by the battery. We had been without power for over an entire day, and my battery was getting really low. I saw a lot of my neighbors using their cars to charge their trailers, but I didn’t really like that. I did give it a go a couple times, but I didn’t want to get stuck without gas. I chilled in the car for about an hour and it barely helped that battery at all. I then decided to go out and pick up a solar panel from Harbor Freight. When I arrived, they had just lost power and closed. No where else around me had solar panels. I tried to get food too, but everything was closed. I’m so thankful the electricity came on while I was out. It was off and on a couple times that evening, but at least that meant my battery was getting re-juiced right when it needed it. It’s bad to let your battery get too low so it was a relief that it wasn’t getting ruined. Not to mention, I got my heaters and appliances back. Lots of people around me had generators so they didn’t have to deal with the loss of power in the same way I did, but they were constantly running out for more gas. I decided a while back I don’t want a generator, I don’t have room anyway, and I would go with solar. I just hadn’t decided which panels to buy, and wasn’t in a rush.
Lesson: Be prepared to boondock even at a full hookup site.
Once I had my propane situation handled, I needed to deal with my water. With how crazy low the temperature was, and my heat tape not working because the electricity was off, my water froze again. I picked up a different hose while we were out. Jeff recommended a Zero-G hose instead of the normal RV hoses. I do really like the new hose. It’s much more pliable which made wrapping the heat tape around it easier. The hose was frozen in the same place as last time, where it connect to the trailer. That section was the section I couldn’t get the heat tape or the insulation around to protect it. The heat tape wasn’t working with the electricity out, but the insulation would help too. So there’s ice going into the water line at the connection point, and into the hose at the same connection point. Our electricity was still off and not coming back on so I couldn’t use hot water or any electric source of heat to thaw the hose. This is where I decided I was a mad genius. I keep some vodka water around as a cleaning product in a spray bottle. From what I understand, vodka has a lower freezing temperature than water. So I took it outside, set it to the direct spray, and sprayed it into the water inlet. It worked!! The ice melted right where the vodka-water hit. I was able to clear the whole inlet from ice. I did the same thing to the hose, but it had a longer chunk of ice so it took longer. I managed to get a tunnel through the center of the ice for water to flow through. I then took it inside to melt the rest of the way, and switch the heat tape to the new hose. I wanted to make sure it was done right this time. I lined the tape along the whole hose taping it with electrical tape every so often. Then I went back up the hose wrapping it around the hose. Then I took my pipe insulation and wrapped it as far as I could on each end of the hose being sure to cover the connection points. I didn’t have enough to do the whole hose because the stores ran out, but I could leave the center parts of the hose under the skirt. I had enough to cover each exposed end of the hose. The water took a little while to get through the pipes. There may have been some additional freezing that needed to be melted. Once the water came back to the faucets, I turned them both on high.
Day 4 of Winter Storm Uri
Everyone was saying this day was supposed to be the worst of it weather-wise. However, the temperature was supposed to be warmer than the previous days, but still below freezing. Of course, with my background with winter, I thought a bad snowstorm would be like 6-9”. However, when I looked at the forecast, it was calling for 1-2”. Let’s just say that made me chuckle. Frankly, in the morning I could hardly tell a difference from the day before. I was able to get the water on in the evening before, but the toilet water hadn’t returned for flushing yet. This morning, I found water shooting out the back of the toilet! It seemed to be coming from the hinge or a water connection. When I flushed the toilet, it stopped coming out the back. I also hand tightened a connection on the back for good measure. What seemed to happen in my opinion, was that there was pent up pressure, and when I flushed, it released the pressure. Then I just had to mop up the water from the floor and make sure there was no residual moisture. Thank goodness that it was the clean, incoming water and not the *ahem* outgoing water. As I flushed to release pressure, I noticed the black tank was so full there was no where for new materials to go. This didn’t really make sense to me because I had just dumped recently and this was too fast for it to have filled, I thought. I dumped and there seemed to be no problem, then a couple hours later the black tank was full again! Turns out, I was misinformed about my plumbing system. My understanding was that the toilet goes to the black tank, and both sinks and the shower go to the grey tank. What I discovered was that in many rigs with 2 sinks, the bathroom sink will also go to the black tank. I had been letting both my sinks run very strong to avoid any more freezes. I thought this was safe because I left the grey tank open to drain directly and not retain any water. Once I turned off the bathroom sink, the black tank stopped filling at this crazy fast rate. I would have maybe never figured out this misunderstanding on my part without this strange incident.
Lesson: Keep an eye on your plumbing for leaks and anomalies, but don’t drive yourself crazy like me.
Day 5 of Winter Storm Uri
By today you could feel this adventure slowly coming to a close, but only cautiously optimistic that the worst was behind us. The power and water stayed on consistently through the previous night, and ended up staying on all day. It was actually my birthday so I decided to go into town and get all those Birthday rewards restaurants and stores send. I thought it would be fun, and I had some errands I wanted to run to get some supplies. Honestly, it turned out to be a bummer of a day. The errand locations didn’t have anything I was looking to pick up, and all the places with rewards were still closed due to the weather and electrical situation. I was quite disappointed by the time I returned home. But my new friends Jeff & Amanda stopped by to surprise me with some cupcakes and a card. It was exactly what I needed at just the right moment. I’m again so thankful I met them. They are great people.
I have to talk about going to Walmart on this day. First of all, I don’t know why I thought they’d be restocked and back to normal by now. My mistake. They were crazy picked over. People were still in that apocalyptic mindset even though we were supposed to be above freezing the next day. At one point, there was an announcement that a shipment of milk had come in. They were requiring everyone who wanted milk to stand in line to get it, and there was a limit of 4 per family (which I was surprised as it seemed like a lot). The frozen pizzas were almost completely obliterated. I got a couple of the last ones. I only stopped by because there was a couple things I wanted, but by no means did I need to go grocery shopping, good thing. The things I wanted were weird. I was going to grab some real parmesan, microwave popcorn, and some random supplies. I couldn’t get hardly anything. Apparently, real parmesan and popcorn are priorities to more people than I thought. You should have seen this milk situation though. Herd mentality is strong. They were lined up along the whole side of the store and getting longer. The milk section itself was completely empty with 1 employee standing at one of the fridge doors being passed single gallons at a time from the back. I can’t really understand why everyone was so anxious to get milk. Especially, 4 gallons per family. That’s so much. Even my family of 7 never bought more than 2 gallons of milk at a time. We would never go through 4 in just a couple days (until weather was to return to normal). I don’t actually remember seeing anyone with 4 gallons, but I’m still shocked that’s what they decided to set the limit at. I still had milk at home, I don’t go through it very fast. Even so, I still felt that urge to join the herd. If they are all so desperate that it has to be tightly controlled, then certainly I should need it to, right? In the end, my logic won out and I waited. That was the correct choice for me. Like I thought, I didn’t run out of milk and picked some up the next time I went out.
The popcorn thing is what I really want to talk about. When I walked into the popcorn aisle, I couldn’t find it for a moment. It took me a second to realized that I couldn’t find it because they were all gone. Literally every single bag of microwave popcorn was picked clean off the shelf. There were still some packages of kernels for machines, and jiffy pop. I still don’t understand this. Microwave popcorn was completely useless during this emergency because we had been without power so the microwaves weren’t working. I was not picking it up in response to the emergency, but because I had run out before and had wanted some. I grabbed the jiffy pop because I could use that when the power was out over the stove or later at a campfire. Now this is what really baffles my mind. That same aisle was split into 3 parts: popcorn, nuts, and beef jerky. THE NUTS AND BEEF JERKY WERE UNTOUCHED!! Seriously, they looked just like they do every normal day of the week. The whole store is picked over, but these two items. Does no one in this area know the staples of survivalist food? There’s a reason trail mix/nuts and jerky are thought of as hiking snacks, because they are go-to for good nutrient, low prep, and shelf stable foods. Seriously, if you think you need to react to an emergency and stock up on food, these should be the first things to go. Now you might be saying, “well, you did the same thing. Bought popcorn and not nuts/jerky.” You’re right, but the only reason I didn’t is because I already have a lot of nuts, trailmix, and jerky in my trailer. Even so, I still thought about whether I should grab some because I know the value of them!
Lesson: Don’t get drawn into the panic frenzy. Know what you have, what you need, and don’t let your emotions get the best of you.
The next day was above freezing, and the snow melted so fast. You couldn’t even tell there had been snow there at all. The way the weather bounced back was about as crazy as how it came in. That weekend I was invited to bonfires, worked outside on my skirt, and was wearing shorts. 4 days later, it was 80 degrees and I was visiting a local park with waterfalls. People were wading in the streams, and I even walked through in my sandals. I’ll post about that later.
I know this was a long post. Thank you for reading. My biggest advice would be to research and prepare for freezing weather ahead of any inclement weather. Once the forecast predicts trouble, it becomes difficult to secure the supplies you need. Having them already in your possession is the first step to outlasting the storm. There are a lot of so-called rules floating around for freezing weather, but remember they’re more like guidelines.
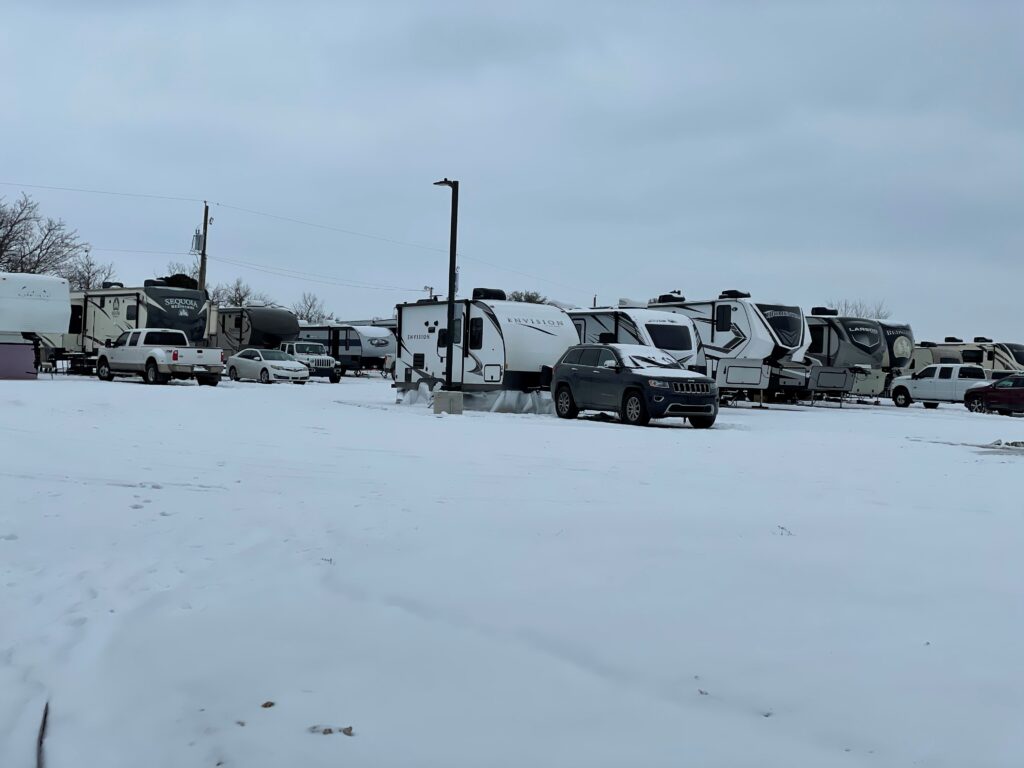
As I mentioned in another post, I recently purchased a new travel trailer. When I came by to pick it up and do my walk through, the dealer had a folder with a voucher for free camping from Outdoor Adventures. Free camping??!!! Right? Um yes, please! He told me that the rep who gave it to him said it’s just a 90 minute tour the first time you come and then they validate your certificate for 21 days of free camping. Kind of like a timeshare meeting, but he promised it wasn’t super pushySounds pretty good to me! So I thought I’d write out what my experience was like.
First of all, the folder says to call in order to to activate your 21 day voucher. Lies! Well, not completely. It’s the first step, but it won’t activate your voucher. They will then try to schedule a time for you to come take your tour. They won’t validate without the tour, even though the paperwork and indicate it just takes a call. I’m not mad though, I suspected as much. They want you to take the tour so they can make the pitch for their membership. That’s fine. She said when you confirm a tour reservation, they will send you the voucher for 21 days of free camping, your parking pass, activity wristbands, and a $50 Walmart gift card! Sweet. She also said if you were just coming for tour and not staying to camp, they’ll give your lunch and ice cream.
It just wasn’t convenient to me because most of their resorts are in Michigan with 2 in New York and 2 in Ohio. I don’t live in any of those states so popping over for a tour isn’t exactly easy. I hoped to do it when I was ready to use my first campsite, but my camper was stuck in the shop for awhile. Then it was winter so I wanted to make use of my passes when it’s warmer, and I can use all the amenities. However, while I can use the passes 21 times anytime for up to a year, they said I needed to activate the pass as soon as possible. I was in the area around Thanksgiving so I just did the tour then with no overnight stay.
I visited the Arrowhead Lake campground for my tour. Ok so I’m going to clarify something now that was a little confusing to me. So I was given information, and was in contact with someone from Outdoor Adventure Resorts, but when I arrived the company name everywhere was Venture Out Resorts, and then they started talking about Coast to Coast which I’ll talk about later. So basically these are all their own individual companies that like partnered up as one thing? I know that Venture Out is an affiliate of Outdoor Adventures and you can get all the same benefits. Coast to Coast isn’t a name I heard until I met the sales guy. Yeah so that came out of nowhere. Here’s what I learned.
Apparently, Coast to Coast is a travel company owned by Good Sam. They have campgrounds all over the country, hence the name. They also have some in Canada and Mexico. So with the membership you can camp at the campgrounds in your home network for free, in this case Outdoor Adventures and their affiliates. Then you can use all those other campgrounds for $10/night.
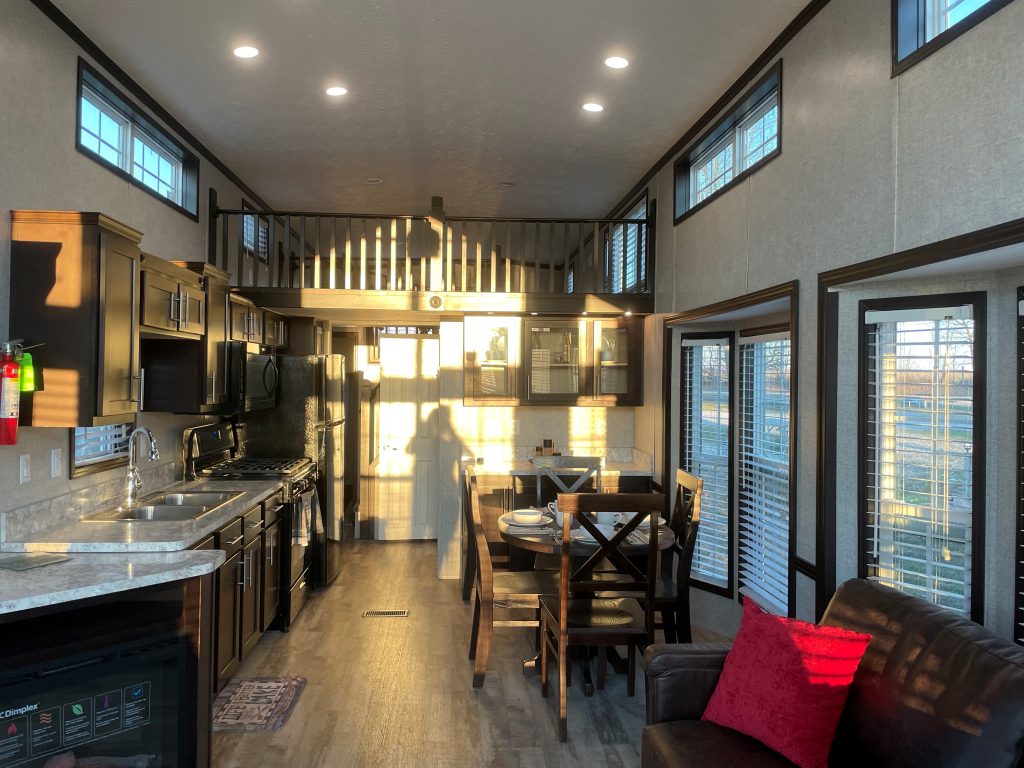
The tour was mostly just a sales spiel. We did take a drive around the campground. The one I visited was a new addition and had a lot of upgrades planned to make it as fancy as the others. You can see a couple pictures I took below. The cabin-trailer was really cute. It was more like a tiny home. After the long explanation of everything they do and then breaking it down to show me “how it would work for me” they offered me lunch. It was just a cold turkey sandwich with a store bought cookie, chips, and string cheese so don’t get too excited. They didn’t offer me any ice cream, but it was a bit cold out. They did give me the $50 Walmart gift card first thing when I arrived, and at the end they gave me the 21 day punch card for the free days of camping.
These trailers make such cute tiny homes to stay in.
All of the highlights they push are as follows:
Camping & Cabins Free or $10/night
Discounts on vacations including condos around the world as low as $100/wk
Bring friends/family to use with you. 3 campsites or a campsite and cabin. Up to 10 people per spot.
RV Storage – I never heard a price. They implied free.
They’ll move it to a spot for you the night before you arrive.
24 hour security
Open yearly (not all campgrounds)
Ok not gonna lie. That sounds pretty good. Of course, the sales guy starts doing the math. The national average (according to him) is $45/night. That seems to be about what I’ve found. So it sounds like you’d be saving money, but of course this all cost money. They have 3 plan tiers. They’ll only tell you about the top one at first, then they’ll bring the other ones out to hook you on. You’ll think that sounds great, but too expensive. Then they’ll say you can have it all for this much cheaper and it suddenly seems like a no brainer, but it’s still a lot of money. The tiers they showed me were as follows:
Top tier: $17,000 You get all the things I mentioned before and it’s a lifetime membership and it’s transferrable to your children if you so choose along the line.
Middle tier: $13,000 You get all the benefits except it’s a lifetime membership that is not transferrable.
Bottom tier: $8,000 All the benefits for 10 years and it’s not transferrable.
You do have the option to upgrade one of the lower tiers to a higher tier and the money you’ve already paid will count towards that higher tier.
They only broke down the lowest tier for me because they acknowledged that the others didn’t make sense (and that I wasn’t going to even consider spending almost $20,000!) so those are the numbers I’m going to use now.
The way it broke down according to the sales guy, it would break down to $96/mth. Assuming $50/night, you’d only have to stay 2 nights to save money. Well, he conveniently forgot to factor in that extra $10/night because I won’t be staying exclusively in Michigan. Still seems like a good deal, maybe.
So….what’s the kicker. That’s what I’m trying to figure out the whole time. The first thing that is a red flag is that they want you to buy right there and then. They told me that the offer is only good that day. I asked multiple times if I could think about it, maybe wait and try out after I use those free camping days they’re giving me (why give it to me if I don’t have a chance to try it out, right??) They said that they couldn’t because they tell everyone they have to buy that day so if they didn’t make me, other people would get mad. I don’t see why they wouldn’t let everyone think about it if there isn’t some kind of catch I’m not seeing right then and there.
Then you have to notice that the $94/mth is only the first year. Why? Because there’s a yearly maintenance fee of $492 at the time of writing. That’s on top of the $8,000+ and it doesn’t go away even after you pay off the membership fee. There was no guarantee that price would stay consistent either. He said that in the past current members haven’t been required to pay the additional fee when the prices increase. He said there are current members who signed up the first year who are still paying under $200 for their yearly fees. But like I said, there’s not guarantee that’ll be true for you.
Finally, they really bury the lead on this one. It’s not so much a yearly membership subscription as it’s a purchase. Meaning those numbers are financing numbers! It’s a loan. I only figured this out because I asked what the cancellation policy was. He told me you cancel up to 3 days after. When I pushed for the long term cancellation, then he said that the bank isn’t going to just forgive the note. So it’s a loan. So all those numbers aren’t taking the interest price into consideration. They kept talking about the numbers for good vs bad credit ($94/mth is the good credit price). They told me that for bad credit the interest is 15%. 15%!!! That’s a really high interest rate. Of course, I asked what the lowest rate for good credit was because I do have good credit, and it was 14%! That’s basically no difference! That’s it, that’s the catch. My uncle said “so they’re loan sharks” when I told him about it. He’s not wrong. They are definitely making money off the poor financial decision to open a loan at that rate. The salesman said if it were him, he’d take the 6 months of no interest and then refinance with a personal loan from his credit union. While that sounds like a smart plan, certainly smarter than sticking with 15% interest, I don’t feel comfortable with all the uncertainties in that plan. I’d want to do my research and I’d probably just open a loan from the get go to get a rate I’m comfortable with, but honestly I’m not comfortable with any interest rate for this kind of purchase.
As you can guess, I walked out without making a purchase. I’m not upset that I went. They were really nice, and I got a gift card and free camping out of it. They never did send me the package in the mail with the passes and everything.
I tried to look up reviews online. They are definitely mixed. I saw one lady comment that she was excited to mostly use the international condos and vacation discounts, but later comment that after a year they never were able to use it because Coast to Coast’s prices were always higher than the other local options. I’ve also read reviews that said when they booked campsites in network that were supposed to be $10/night, the campgrounds blindsided them with additional fees that ended up costing them more than if they had just booked it normally without going through Coast to Coast. I find these quite concerning on top of everything else I already felt uncomfortable with. Makes me happy I didn’t get pulled into their sales pitch.
This was just my experience with one sales staff and your experience and pricing may vary. If anyone has used Coast to Coast, I’d love to hear your feedback!
I’ve finally taken the first BIG step towards the RV life! I signed for my trailer!!! I’m picking it up on Friday, so it doesn’t feel quite real yet, but also I feel like there’s a lot to do to be ready.
I’ve actually been thinking about moving to a semi-full time RVing life for about 2 years. I can’t believe that much time has passed; it may even have been a little longer. It all started because I was in a terrible job situation that was always meant to be temporary trying to find a career that I would love in my field. There were a few different paths I could take, but I finally decided I wanted to pursue a career as a Cruise Director. That’s when the idea of full-timing was born for me. As a CD, you don’t have the usual work schedule. You live at work and work full time for weeks in a row, and then you are sent home for breaks for a few weeks or even months at a time. You can think of instead of getting a weekend every week, you skip your weekends and cash them in all at once every couple months. This allows for a lot of opportunity to travel, and it didn’t really make sense to pay for an apartment or house I’d never be in. So why not just drag around my apartment with me?
I say first big step because there were a lot of little steps that got me to this point where I was ready to commit. Over those 2 + years, I did constant research. I probably exhausted the Pinterest search engine for RV tips, hacks, and got-to-knows. Thank goodness so many full-timers make a living blogging about being full time! I went from only having camped in a tent or once in my aunt’s pop-out, to having a good working knowledge of all the terms and differences in RVs. I still don’t feel ready to actually start using the trailer on my own, but I’m confident at this point I know as much as I could without having done it myself. At this point, it is time for some hands-on learning. Having all this research in the back of my mind really helped me know what I was looking for, and to see the things that made this camper the right choice for me.
Once I had researched as much as I could online, I started visiting dealerships to confirm what I thought was my limits and preferences. One nice thing about this pandemic is I ended up having a really free summer. I dragged my mom to a couple different RV dealers to explore units with no intention of buying. Never buy an rv on the first visit. Even if you end up falling in love.
I went thinking I wanted:
25’ or less trailer
It’s GVWR must be lower than my Jeep’s limits
with a full fridge – I wanted plenty of freezer space which meant looking for 2 door fridges
a real bed – none of this “fold-down dinette is the only bed” nonsense
I didn’t care about a dinette, I’d prefer a sofa
Murphy bed was a plus as it combined the last 2 into a smaller unit
I preferred a shower with a tub. I thought it’d be good for washing feet or doing laundry by hand
I ended up deciding a folding bucket would do this just as well
I wanted an oven. I bake and cook pizzas myself, among other things, frequently.
I want solar eventually. If I could find that included, it’d be ideal.
I wanted a dry bath (In a truck camper I was ok with wet, but not in a trailer)
Needed plenty of storage – I’m living in it full time!
I didn’t want slides – I worried about maintenance, limited use, and it blocking functionality when closed
The trailer I ended up signing for is 22’ 6”. Light enough for my Jeep to pull safely. It has a full fridge although not the biggest we saw, the freezer space is enough. The shower doesn’t have a tub, but it has a little bit of a lip mostly so water doesn’t get out. The bathroom is dry and with some of the best storage I’ve seen in a unit of this size. It has a proper queen bed, not a camper size, with cabinets all around and it lifts up for storage under it! It has an oven included and a nice size sink. I sacrificed counterspace, but I didn’t at the same time. I ended up buying one with the shortest slide I’ve ever seen. In the slide there is a sofa instead of a dinette located in the slide. Since there’s no dinette, it comes with a folding table that can be put in front of the sofa. If I use that table as a counter, I actually ended up with way more workspace than any other 22 foot or maybe even 25 foot. Of course, it won’t store things permanently, but the kitchen has some nice sized cabinets in it to make up for that. It also has pass thru storage. I thought pass thru was standard, but a trailer I almost bought didn’t have it. That lack of storage along with a lack of storage throughout the whole unit ended up being why I moved on.
As you can see, really knowing what I wanted and understanding the reasons for or against different things helped me make an informed decision. I could explain exactly why this was the right unit (and I did explain as I talked it out with my parents over the phone). I wanted to make sure I wasn’t making an impulse buy because it was a little higher than the price range I originally was putting myself in. However, really understanding my finances and taking a good hard look at the numbers helped me know I wasn’t putting myself in a hole I couldn’t climb out of.
You also have to keep in mind basic things you may overlook especially if you’re full-timing. It’s easy to not realize that a unit has no place for clothes, linens, or pantry because they’re such a given in sticks and bricks homes that you don’t notice they’re missing, until you go to put things in them. A lovely woman I met gave me such good advice, when you look at a trailer, imagine where you will put your clothes. It’s the quickest way to notice if it’s missing a wardrobe and adequate storage.
If you want to see what a loan will cost you over the life of the loan, check out my post here.
As I mentioned before, don’t buy a unit on your first visit. The unit I ended up getting, we looked at and were really impressed. I didn’t even bother to sit down and discuss price. We talked about it next to the unit, and he offered to give me his “best price”. That’s it. We thanked him and walked away. Turns out, he ended up emailing me in the next couple days. Since it was the end of the month, he emailed me ready to make a deal. Luckily, I read up on tips for negotiating for a RV with a dealer. He wasn’t able to come down as much as I’d have liked, but he threw in a distribution, sway control hitch – something I was going to have to buy before picking up the trailer that comes with a hefty price tag. He wanted a confirmation that I would buy it if he could get me that deal before he’d check with his boss. Don’t worry too much about these kinds of tactics. You haven’t signed a contract, and he’s just doing the old song and dance to try to make you feel like you’re getting a better deal. I also had researched this make, model, and year around the country to see the average price. This helps you see if you’re getting a good deal, and gives an idea and support for you to negotiate the price lower. If you can find it, you also want to know what the MSRP is. If the asking price is above the MSRP, then you’re looking at an inflated price. In my case, I discovered this specific model was rather unique. I only found a couple units over the entire country! In most other models, I found dozens of listings. With that information, I can feel better about the deal I as negotiating.
All in all, I’m very excited. Now I have to decide where I’m going first! Remember, these are more like guidelines.