A very important step towards financial independence is an emergency fund. It can be hard to take this step when you’re living paycheck to paycheck, but it’s such a relief to have that safety net. Eventually, you’re living paycheck to paycheck with a couple thousand of backup dollars which is a very different experience. There are no hard and fast rules to get there, but here are some guidelines.
First, lets start by talking about priorities. You will never achieve financial freedom without first evaluating your priorities. We’ve talked before about using Credit Cards to your advantage, paying off Student Loans and other debts, and about Planning for Retirement. All of these things are important and could rank higher in your priorities than an emergency fund. I would recommend prioritizing keeping your credit card debt at zero and paying off your loans aggressively. However, planning for retirement and emergencies are both forms of planning for the future and you may find a balance between them as priorities. Of course, required bills like rent, utilities, food, etc. have to be top priority, but you must be careful to differentiate between needs and wants. It is hard when you’re just starting out to live below your means and resist temptation. It is important though so you can build up funds for a rainy day.
Second, you need to commit to treating your Emergency Fund like an Emergency Fund. Basically, once you put money in, you are not allowed to take any money out for any reason. Now, I’m clearly exaggerating slightly, but I choose to think of my Emergency Fund as untouchable money. That way I truly only use it for emergencies. I haven’t needed to touch it even when I had periods between jobs. I would find other ways to afford my bills first. If it comes down to not paying a bill or incurring debt, then its time to tap into your emergency fund as needed. Adjust this mentality to what works for you.
Ok now that you have evaluated your priorities, let’s get to it. It may be difficult to know where to start. Let’s break it down into goals.
Goal #1: Aim to have $1,000 in your account.
It may not seem like much, but it is an achievable goal. You will also be relieved to have it if you ever need it. If you do have to use it for an emergency, make sure to prioritize restarting your goal. While you have achieved goal number 1, don’t stop contributing to your account. Then you’ll be on your way towards achieving goal number 2.
Goal #2: Aim to have the amount equal to 6 months of expenses.
This is an ultimate goal so if you need to make another smaller goal between the 1st and 2nd goal, then go right ahead. These are guidelines so adjust them to what works for you, but don’t give up. To achieve this goal, you need to sit down and evaluate your finances again. Hopefully, you have a budget in place that you’ve been using for a while. That information will make this step much easier. Be honest with yourself and don’t try to undercut your number. If you ever need to rely on this money, you will be glad you funded it properly.
First, take your housing cost, high average of your utilities, your cellphone and Wi-Fi bills, enough for refills on fuel, groceries, and required monthly payment for your loans plus the amount you have chosen to avalanche your bill like we discussed in our Student Loan Repayment article. Once you have added all these up and double checked that you haven’t forgotten a monthly expense, you will multiply it by 6 so that you then have the amount of 6 months expenses and your goal amount. I would recommend rounding up to the next round number. That way you have a little wiggle room and its easier to remember. Again, if you ever use any of the money from your Emergency Fund for an emergency, then you should restart when you can until you hit your goal again.
Once you have hit your goal, forget about it like I said before. Using your Emergency Fund should be strictly an absolute last resort. You can have another saving fund for things like new phones, cars, and other wants. After you hit your emergency fund goal, you can give more focus to other goals like retirement and paying down debt.
Benefits of a High Yield Savings Account
Something I wish I had known about years ago is a High Yield Savings account. Until last year, I had just been using the Savings Account and Money Market Account that came with my Checking Account. This was fine because it helped me sort my funds into an “untouchable account”. The Savings Account was fine for this purpose, but it only gained $0.01 in interest which doesn’t even keep up with inflation. Last year I discovered High Yield Savings that have interest returns close to 5%! This is a game changer. Once you begin your Emergency Fund, it will grow in small ways on its own. Imagine that! It is like a little reward and helping hand for taking the right step.
I personally use the CIT Bank, but there are lots of options. I saw that Credit Karma from Intuit has one, and there are plenty of others. Just make sure that you are clear on the minimum required deposit and if there are any fees for having the account or for inactivity. You should be aware that some accounts will offer $0 fees only for the first year so make sure that you only get one that stays free indefinitely. Depending on where you are in your journey you may also need to choose one with a lower deposit requirement. Make sure that the deposit minimum to receive the desired interest rate is also within your means. You’ll also want to make sure that the bank is FDIC insured and trustworthy. Do your research!
To give you an idea of what this could do for you, I’ll give you my personal example. As I mentioned before, my old account only gained about $0.01-0.03 per month so the only growth it saw was what I deposited into it. Once I discovered the HYS account, I already had my 6 months of expenses ready to deposit. For me, that was $12,000. With that money deposited in a HYS, I started earning around $34 per month! Then that $34 was added to the amount gaining interest so now I was earning $50 because of the compound interest. A year later, I have $800 more dollars than I deposited and I’m earning around $52 in interest payments each month. I didn’t even make any additional contributions and I have seen that much growth! It really is amazing, and I recommend starting one as soon as you can. I wish I had started one 10 years ago. Imagine where I’d be now.
A few additional thoughts to help you get started:
Set up a split direct deposit to automatically deposit a set amount into your emergency fund instead of having it all go to your checking account from your paycheck. That way you never get the opportunity to spend it in the first place.
Make as many smaller goals as you need. If positive checkpoints encourages you, then feel free to add more goals between $1,000 and 6 months. You could do $1,000, $5,000, $10,000, and 6 months or whatever you need. As long as you’re making progress, that’s the real goal.
Feel free to go beyond 6 months savings if you feel you need to. Most of the advice I’ve heard is after you have 6 months saved, you should focus those funds and attention to paying off debt or funding your retirement account. With that in mind, I wouldn’t recommend worrying about more than 1 year’s worth of expenses before switching your focus. Personally, I refocused after funding 6 months expenses.
6 months of expenses will change with time. Reevaluate yearly or whenever you have a major life change to make sure you still have enough to cover your current value of 6 months expenses. Moving cities, buying a house, adding a member to your family – all of these things will change how much you need saved to be able to cover 6 months expenses. Inflation will also change your total. Has your cell phone or rent increased from last year? Reevaluate regularly to avoid being underfunded.
I wish you the best of luck as you embark on the next step to financial freedom. I’m not a financial professional, but this is what has worked for me. Always make sure to consult a professional before making any major financial decisions. Remember, there are no rules, just guidelines!
This is the only app on my list that is actually branded towards Christmas, but it’s a great resource for any gift giving event. Santa’s Bag is an app that helps you organize all of the details around gift giving. They’ve thought of all the details and options – you can even change the decorative Santa’s skin tone in settings if you want.
On the summary page, you can set a budget for your holiday and the menu keeps track of your progress by gifts purchased, gifts to buy, and the total over/under budget you are. It also has a time clock counting down to Christmas.
You can also view your plans organized by recipients. You can log everyone you want to get gifts for and view them as a list. After you select a recipient, you can see more detail for that specific recipient. You can list gift ideas, links, merchants used, preferences, and even set a budget for each specific gift recipient.
Another menu lets you look at all your gifts sorted however you like. I personally like to use the status option which sorts the gifts by whether they are an idea, purchased, shipped, delivered, wrapped, and gifted. They even have an option for handmade gifts and stocking stuffers!
I love this app because it helps me remember the gifts I want to get or have purchased and keep track of where I’m at with each of them, so I don’t forget anything. The best part about this app is, it’s free! There is an in app purchase available to remove advertisement banners if those bother you.
Now that you know how to organize all the gifts you’re going to get, you going to need ideas on what everyone wants. The perfect app for that is AnyList. Now hear me out because you may know AnyList as a grocery app. That is exactly what it is, but due to its shared feature, it makes it the perfect app for wish list sharing. My family uses AnyList for a shared grocery list. It’s great because it updates the list in real time on everyone’s phone so we can all add and whoever is at the grocery can quickly see what is needed.
Another great use we’ve found is that everyone can make their own wishlist and share it so we can see ideas of what everyone would like for birthdays and Christmas all in one place. The app has built in categories that you can use to organize the items or you can make your own. You can also add notes and links to help would-be gift givers understand better than just the tagline might allow. We use this to link to Amazon wishlists or certain specific products or add sizing information.
The only thing is you have to make sure everyone understands that the only person who can make changes to a wishlist is the owner. Since everyone sees the changes, if you cross something off the list then it gets crossed everyone’s list and it ruins the surprise.
The base app is free which allows you to do everything I mentioned before plus add recipes and meal plan, but you can also opt to subscribe to AnyList complete which adds the ability to put pictures on items, sort by aisle in the grocery store, use AnyList on a desktop computer, import recipes, add item pricing, turn on a passcode lock, receive priority support among other features. There are options for an individual subscription or a household subscription that lets you add others’ emails to your subscription. We’ve been happy just using the free version, but some of those features in the upgrade do sound awesome. I think you’ll be happy with the app either way you choose.
Pack the Bag is another app I use year round to plan my travels both big and small. I’ve tried so many packing apps and this one is the one I come back to time after time. The app comes preloaded with lots of items you can choose to add to your packing list, but you can edit or add new ones to be more specific to your packing needs.
The items are primarily sorted by category. You can edit categories or add new ones if you like. You go down the list and choose which items you want to add to your packing list. If you fill out the dates of your travel, there’s even a shortcut that will automatically add 1 item for each day of travel. That’s great for things like underwear and socks that you use everyday. The best part about the categories is you can minimize them to allow for quicker navigation and reduce visual clutter when you’re using the app. Sometimes the same item is listed in more than one category, but the app will tell you if you’ve selected the same thing twice in different categories. I really like the suggestions already built in. They even had things I sometimes forget to include in my list when I do it from scratch. You can also add pictures and weight to each item. The app will actually total the weigh of your items as you pack them. Anything you add will stay in the list of options for any future lists you might create so taking the time to detail the items is nice for later trips to benefit from.
While you’re packing, you can turn on a filter that only shows unpacked items. Again, reducing visual clutter so you can see quickly what is still left to find. You can also turn it off to see everything or see just packed items.
The app is free and so useful as is, but as most free apps are there is an option to upgrade to Pack the Bag Pro. It is sold as a separate app which costs $3 in the app store.
If you are doing any traveling or perhaps going in on a group gift, this app could help you a lot. This app takes any purchases and splits them as you want. You can do one time purchases and assign who is involved, or you can make a group and add multiple purchases from multiple people in the group.
As I mentioned before, you can have the app split it equally, but you can also choose other ways to split the payments as well making it really flexible. You can also choose whether you want traditional paybacks or you can choose to simplify payments. When you select this option, the app does the math to have everyone just do 1 payment instead of several redundant ones. So for example if Susan pays for something for herself, Bob, and Jeff and it cost $90; then Jeff pays $120 for the group. Instead of Jeff paying Susan $30, then Susan paying Jeff $40; the app would just tell Susan to pay Jeff $10. That’s a simple example, the app will take even more complicated scenarios and just tell everyone what they owe and to who – it’s awesome!
Something I don’t love about this app, it requires you to put in the participants email instead of allowing just names. It confuses people sometimes and not everyone wants to download the app. Now they don’t have to, but it does still email them. I do wish there was a way to track on your own without adding emails especially when I’m just trying to track for myself or I know that others don’t want the app. It’s a really good app other than that. Plus, if everyone downloads the app, then anyone can add their own expenses in real time.
Splitwise also integrates with PayPal and Venmo so the participants can link straight from the app to make a payment. Then the app updates automatically that a payment was made and updates the status to settled. You can also mark payments manually if you choose to settle up in a different way than the integrated options.
I use this app with my friends and family frequently for group trips, splitting food costs, or going in on annual costs.
The app is free, but does have a Pro option done as a subscription for $3/month or $30/year. Pro allows you to scan receipts, go ad-free, currency conversion, itemize expenses, plus other features.
I definitely use this app more than just around Christmas, but I tend to be home, ready, and able to make all of my favourite foods in December.
I used to use a different recipe app before they went subscription only. That sparked me to find a great option in RecipeBox. The coolest feature is that it has a Focus Mode that will keep your phone from going to sleep for an hour while you remain in the app. This is great especially when your hands are covered in whatever you are baking and you want to review the instructions or measurements. It takes the most annoying part of digital recipe books and solves it!
You can categorize your recipes by categories, but also mark some as favourites to get back to quickly. You can add notes and urls in addition to the traditional things you expect to find in a recipe.
The app also has a Discover function where you can scroll through recipes or search for inspiration. There’s also a Shopping List and Meal Plan function in this app too so you have options.
I know I already said what the coolest feature is, so I’ll just call this the other coolest feature. You can import recipes directly from websites using your computer. and maybe the other other best part…the app is Free! No in-app purchases or subscriptions, you just have to make a free account if you want to use it across multiple devices or use the import feature.
Finally, I had to add this app because it is just one of the all time best apps, and it always blows peoples’ minds when I introduce it to them. The Vault is an encrypted, secure app that allows you to store valuable information such as passwords or important information. It also allows you to include pictures. It is pretty free form, but it also allows you to search through the app for test to find what you’re looking for quickly.
I store all of my passwords in The Vault. I am able to sort it into categories. For example, I have a category for my blog where I keep the important information for the accounts used to run More Like Guidelines, and less secure information like the specific color codes used for my logo. I also have a category for my wallet. I put pictures of each of my cards in there along with the credentials to login to their apps. That way, if I ever lose my wallet then I have a list of all the cards I need to pause, and I have the phone numbers I’ll need to call. I also have the numbers typed out which helps for online shopping when I don’t want to go get my wallet and it lets me copy and paste.
Now I’ve mentioned a lot of really sensitive information being typed into the app, but of course they have a great solution for that as well. The app has built in features so that when you type something next to something like password, it will block it out with green dots so if someone is looking over your shoulder it isn’t immediately visible. You can slide your finger over it to reveal what is hidden. Same thing with credit card numbers and other data.
One other little pro tip I would give for this app. If you have an account that is associated with your address or phone number, type that into that account’s page. That way if one of those things ever changes, you can just type your address into the search and it will show all of the accounts that need to be updated to the new information.
The app is free, but does have several in-app purchases for some of their more advanced features.
These are some of my favourite apps that I like to use. I hope you find them helpful or maybe they’ll inspire you to go find a new favourite app of your own because, after-all, these are More Like Guidelines anyway.
My favourite food by far is pizza. However, it can be an expensive habit when you’re young and on a budget. When I moved to Atlanta, I was searching for a great recipe to replace one of my favourite pizza places and save some cash.
The biggest change you can make to a pizza is the crust. Finding a good crust was the biggest challenge. I found some good options along the way, but this is my go-to now.
I really like this crust because it stretches and gets thin easily. That was actually one of my biggest struggles when looking for a good crust. So many doughs were too sticky or would tear too easily so it was impossible to get the kind of crust I was trying to emulate. There are so many crust varieties, and I know people have very strong opinions on them. The way I make this crust is to copy Ohio pizza, which is a thin crust, similar to Donatos if you’re familiar with that chain.
Ok first things first, what do we need. I’ve adjusted this down to make 1 large thin crust pizza for 1 – 2 people. If you want to make more, it is easy to scale up.
Supplies
Mixing bowl or stand mixer
Spatulas
Measuring Cups and spoons
Pizza stone
Pizza peel or cookie sheet
Parchment Paper
Rolling Pin
Rolling Mat (highly suggested not required)
Ingredients
1 cup Flour
3/4 tsp Yeast
1/2 tsp Salt
1/2 tsp Baking Powder
1 1/2 tsp Oregano
1 1/2 tsp Minced Garlic
1 1/2 Olive Oil
3 oz. (6 Tbsp) Warm Water
Steps
Somethings you may notice are odd about this recipe. First you’ll see yeast, but no sugar. This recipe breaks some yeast bread rules, but bear with me. Rules are meant to be broken so we’ll just consider them guidelines.
One thing that makes this easy, first step throw all the ingredients into your mixing bowl in order.
Combine ingredients. If you aren’t using a stand mixer, I find it easiest to use a spatula to combine all the ingredients. Combine until it becomes a ball. Continue to work and knead it for 2-3 minutes. If the dough isn’t coming together or is too dry, add a little more water. If it is too sticky, add a little flour.
Drizzle some olive oil over the dough ball and on the sides of the bowl. Roll the ball so that all sides are coated and won’t stick to the bowl during the rise.
Let the dough rise for 30 minutes in a warm place until doubled. Cover the bowl with Glad Press ‘n’ Seal or saran wrap. A damp towel works too, but not as well. I’ve found that you get a much better rise with a good seal like Press ‘n’ Seal gives.
Spread your rolling mat onto the counter or sprinkle some flour if not using a mat. If you can get the parchment paper to stay in place, you could also try rolling on that.
Roll the dough as thin as you can or like. Be sure to vary the direction to push the dough into a round shape. It probably won’t be a perfect circle, but if that’s important to you roll is past your max size then cut to shape.
Transfer dough to parchment paper before dressing.
A nice workable dough to make a wonderful thin crust pizza crust.
Prep Time10 minutesmins
Cook Time15 minutesmins
Rise Time30 minutesmins
Total Time55 minutesmins
Course: Main Course
Cuisine: American
Keyword: Bread, Crust, Pizza
Servings: 1Large Pizza Crust
Calories: 524kcal
Cost: $3
Equipment
1 Mixing Bowl
1 Spatula or stand mixer
1 Plastic Wrap
1 Pizza Stone Highly Suggested but not Required
Ingredients
1cupall-purpose flour
¾tspinstant yeast
½tspsalt
½tspbaking powder
½Tbsporegano
½Tbspminced garlic
½Tbspolive oil
3fl ozwarm wateror 6 Tbs
Instructions
Mix all ingredient in order to mixing bowl.
Mix until ingredients come together in a ball. Add more flour if too sticky, and more water if too dry.
Knead in the bowl for 2-3 minutes.
Add some oil to the sides of the bowl and roll the dough so each side is coated.Let rise for 30 min. until doubled in size.
Roll dough out into a circular shape rolling until as thin as possible. Cut to size if too big for your pizza stone or baking sheet.
Move the dough to parchment paper before adding toppings.
Preheat the oven to 425°F with pizza stone inserted.
Sauce and add toppings as desired.
Cook for 13-15 min. or until crust is golden and crisp.
Notes
Nutrition Facts
Servings: 1
Amount per serving
Calories
539
% Daily Value*
Total Fat 8.6g
11%
Saturated Fat 1.3g
6%
Cholesterol 0mg
0%
Sodium 1173mg
51%
Total Carbohydrate 100.6g
37%
Dietary Fiber 5.1g
18%
Total Sugars 0.5g
Protein 14.6g
Vitamin D 0mcg
0%
Calcium 175mg
13%
Iron 8mg
42%
Potassium 502mg
11%
*The % Daily Value (DV) tells you how much a nutrient in a food serving contributes to a daily diet. 2,000 calorie a day is used for general nutrition advice.
Sauce
This is my favourite pizza sauce. Of course, you can always use store bought, but I never liked the flavour. Turns out that was one of the reasons I didn’t like homemade pizza for so long.
This recipe, however, is so simple. It also is a pretty good copy of the sauce my favourite chain uses. I use this sauce regardless of the type of pizza I’m making.
Supplies
Jar or container
Spatula
Measuring Spoons
Ingredients
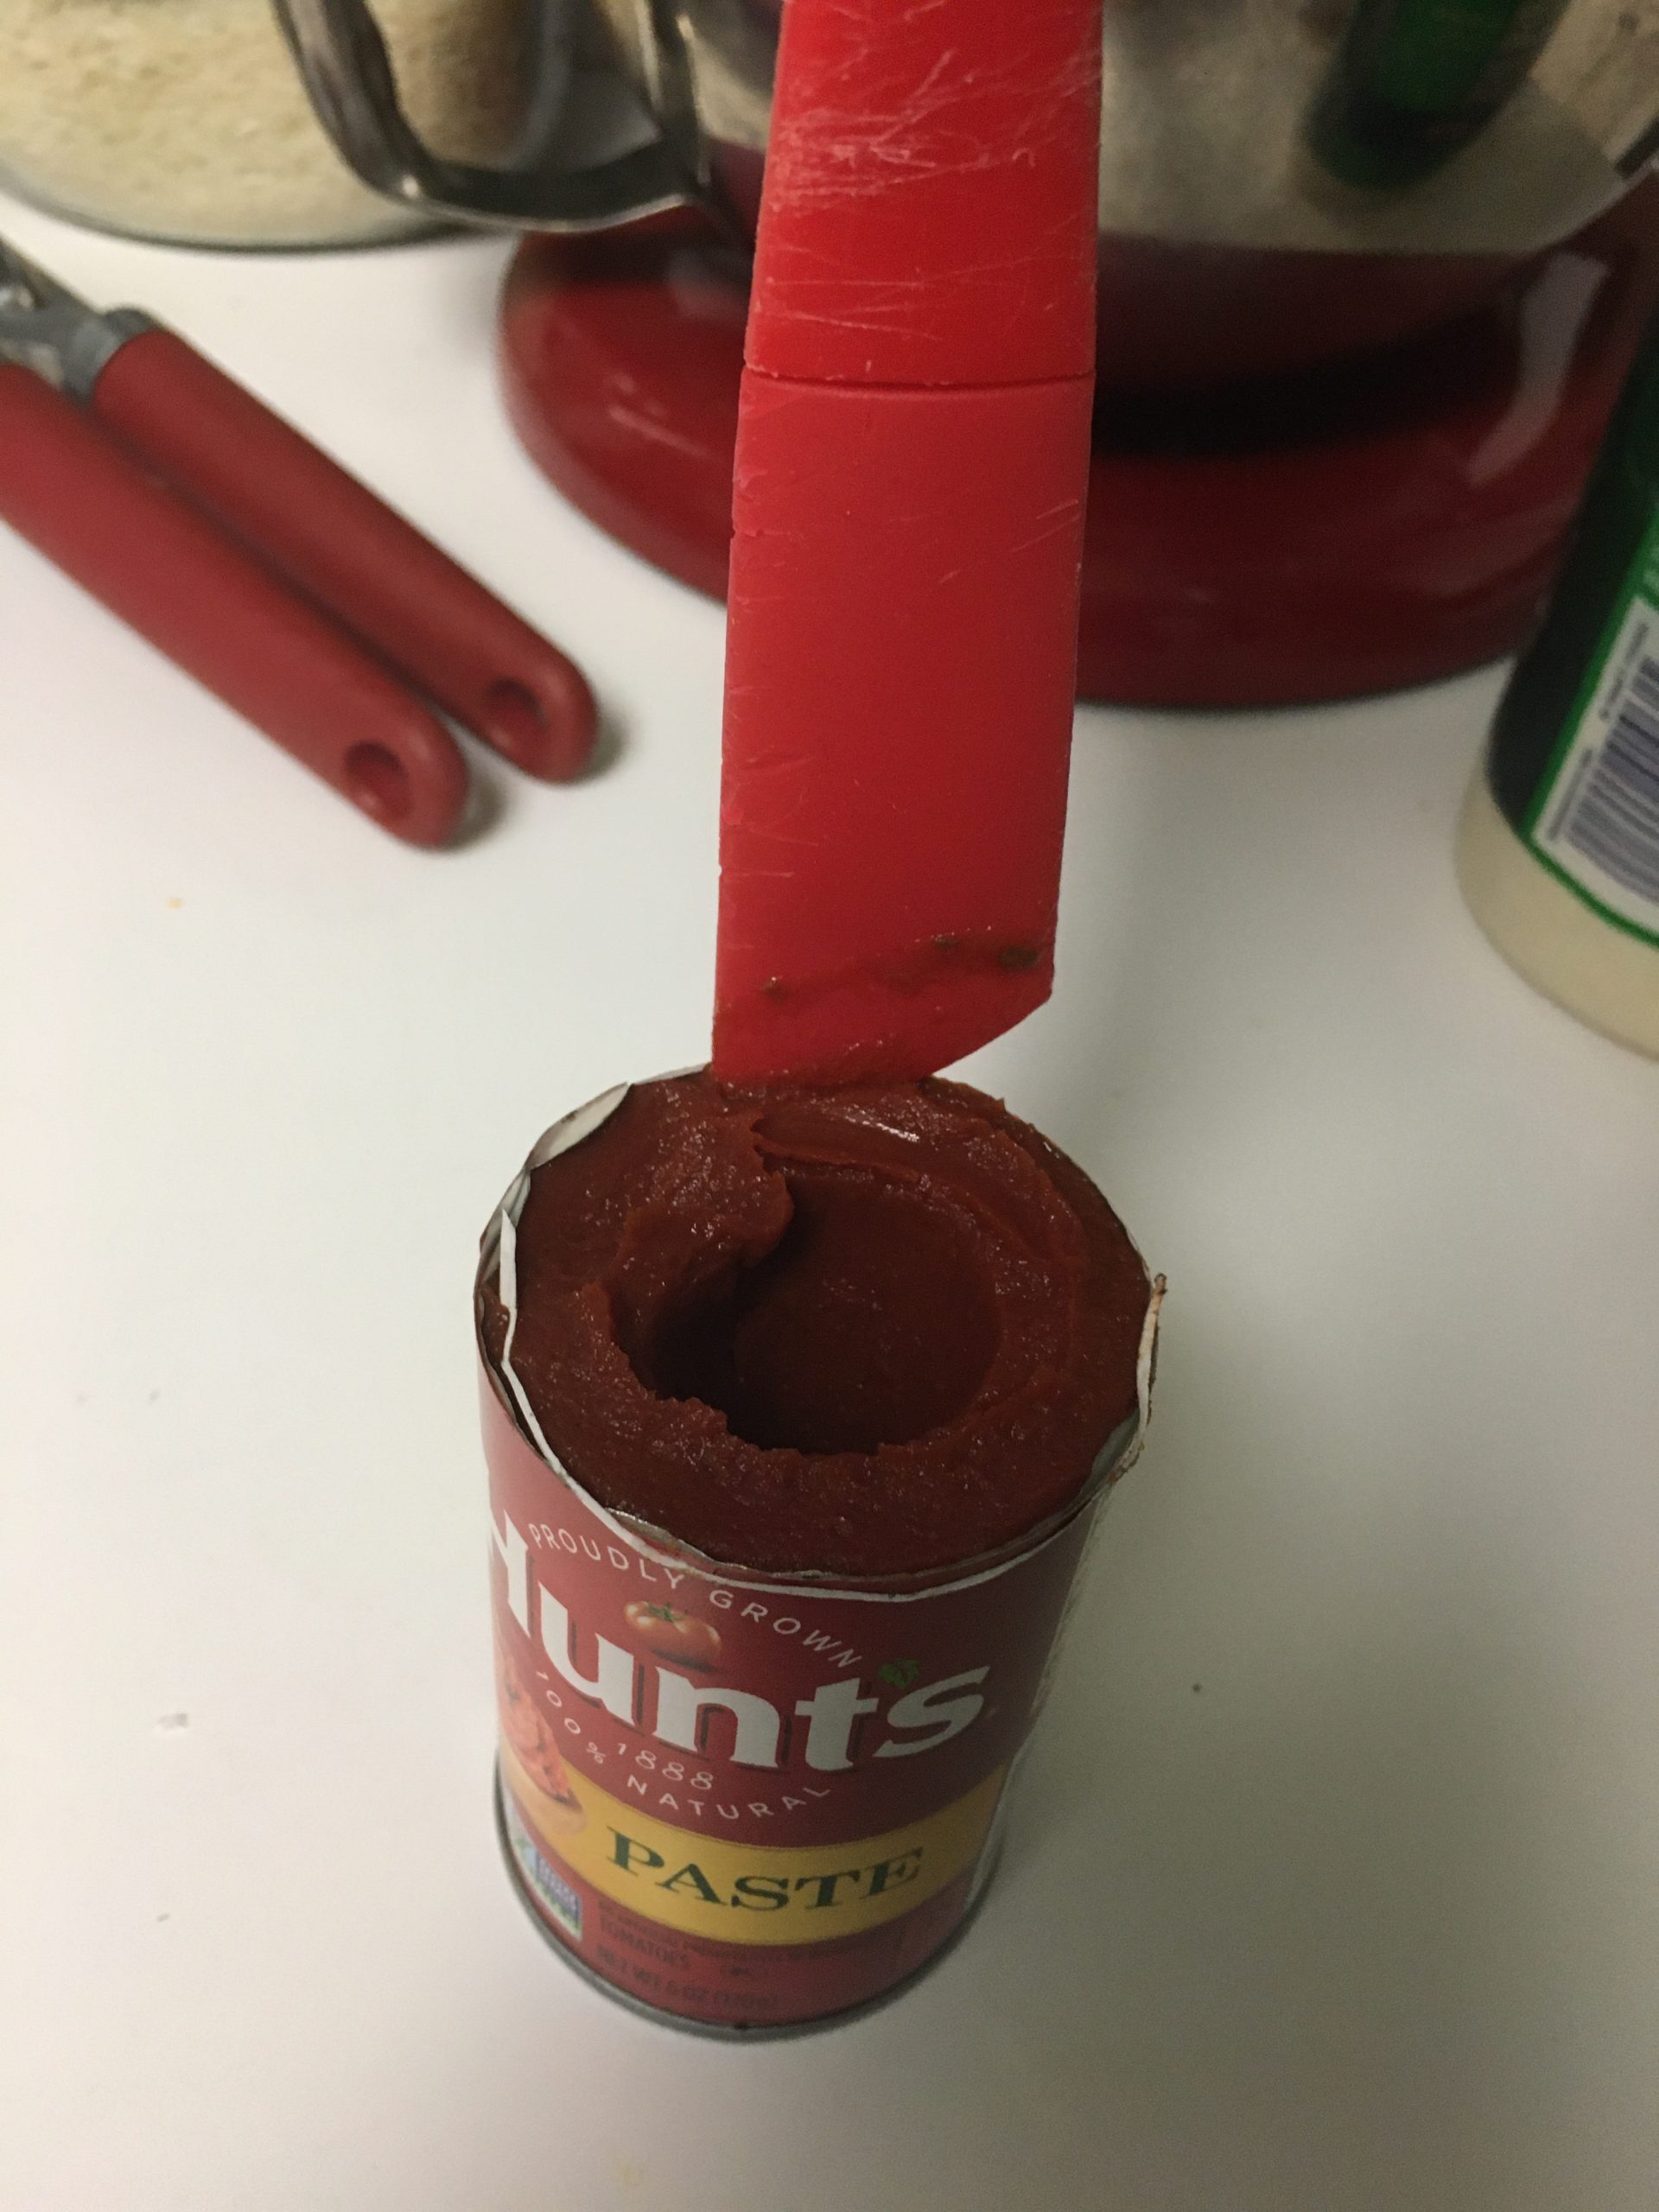
6 oz. can of tomato paste
1/2 tsp Basil
1/2 tsp Salt
3/4 tsp Sugar
9/10 Can of Water
Steps
This is one of the easiest recipes ever.
Take an empty jar. I reuse old sauce jars I’ve collected from my parents, but if you have mason jars or even pickle jars would work (after you clean them out, of course).
Scoop out the tomato paste into the jar. I have a spatula I love for this, plus it came from the Dollar Tree so win-win! It is the perfect thinness to fit in the can, plus it is double sided so you can use it for the dough too.
Take the empty can and fill it 9/10 full of water, and add to the jar.
Add the other ingredients.
Replace the lid, and shake well to combine all ingredients.
Let sit in the fridge for 3 days for optimal flavour saturation. Although, I’ve used it immediately too and it still works, but not quite as good.
Mix all the ingredients into the jar. Use the can from the tomato paste to measure the water. Fill to about 9/10 to the top of the can.
6 oz can tomato paste, ½ tsp basil, ½ tsp salt, ¾ tsp sugar, 9/10 can water
Replace the lid and shake to mix all ingredients.
Store in fridge until ready to use. Let sit for at least 3 days for optimal flavor, but can use immediately if needed.
Baking the pizza
After you’ve moved the dough to parchment paper. You can sauce it to taste, and add cheese and toppings. I have found that it is actually better to use provolone cheese instead of the typical mozzarella. Give it a try!
I also suggest after you add all of your toppings to add a sprinkle of grated parmesan or Italian cheese and oregano. It really takes it to the next notch of making it taste boughten.
Bake at 425°F for 13 – 15 minutes until the crust is golden and crisp. I find the best time to warm up the oven is after the dough rise. Make sure your pizza stone is in the oven before you turn it on so it warms up with the rest of the oven. I highly recommend a pizza stone. I use it for my breads as well.
To transfer the dressed pizza to the oven takes a bit of a learning curve. Using the parchment paper has made all the difference for me. Use a pizza peel or a thin cookie sheet. I actually bought the pizza pan from the dollar tree for this purpose. Since it is so cheap, it makes me not worried about cutting the pizza on it too.
So, take your transfer tray and line it up with the end of the pizza at the edge of your prep surface. Take the corner of the parchment paper and slide it over to the transfer tray.
Once it is on the tray, you can open the oven and slide the pizza onto the pizza stone. The paper should make it slide slowly and smoothly.
To take the pizza out again, just do the same thing in reverse. It is easier on the way out since the crust will be crisper and everything melded into one.
Cut and enjoy!
Pizza is a personal preference, there are no rules. These are more like guidelines anyway.
A great staple meal is a grilled chicken. It can be paired with so many other things and is surprisingly easy to make well.
You can keep some frozen chicken breasts in your freezer to make a cheap meal available at any time. This also works with raw chicken too, so whichever you have available.
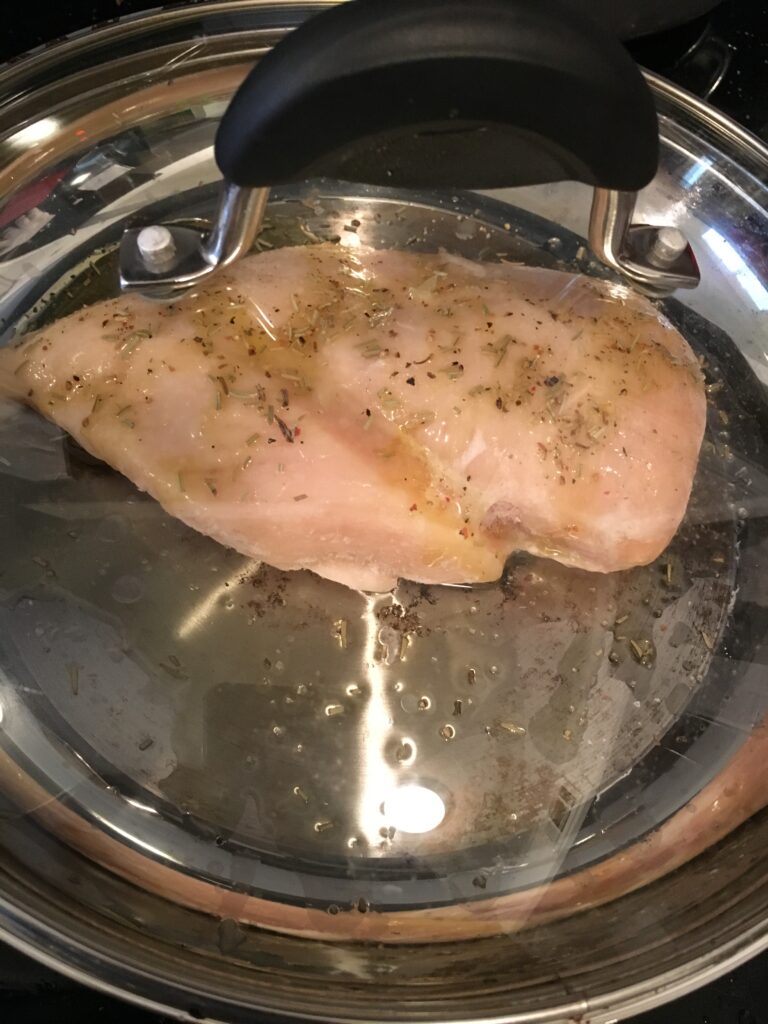
Grab a pan with a lid or you can also use a lid slightly smaller than the pan. It’s important to use a combination that allows you to have a seal when the lid is on. This helps cook the chicken thoroughly while making sure it doesn’t dry out.
Then drizzle some olive oil onto the center of the pan. This is to keep the chicken from sticking to the pan and also adds a little healthy fat and flavour.
Then you just set the chicken on the oil. I also drizzle just a little olive oil on the top of the chicken. This helps keep the seasoning on and a little oil for when you flip it.
Having a clear lid has been great for seeing how the cooking is coming along without breaking the seal.
Speaking of seasoning, this is also very simple. Just a little bit of salt and pepper, and the part that really makes it good, rosemary. Sprinkle a little bit of rosemary on there and it takes the chicken to the next notch.
Once you’re used to the basics, you’ll be able to experiment with other flavors you might want to try. I once added a slice of lemon to a dish with multiple servings. While I liked the flavour, it didn’t pair correctly with the rest of the elements of the meal.
After you dress your chicken, put that lid we talked about on. Turn the stove onto medium heat and don’t pick up the lid. The seal really is what keeps the chicken from drying out, so the less you lift it, the better. Just let it cook for a few minutes. You’ll probably hear the sizzling and see some steam. Basically, just listen and trust your gut, but try not to lift the lid more than once. When the first side is cooked well, flip it and replace the lid. I have found that it is easier to flip chicken by using tongs instead of a spatula.
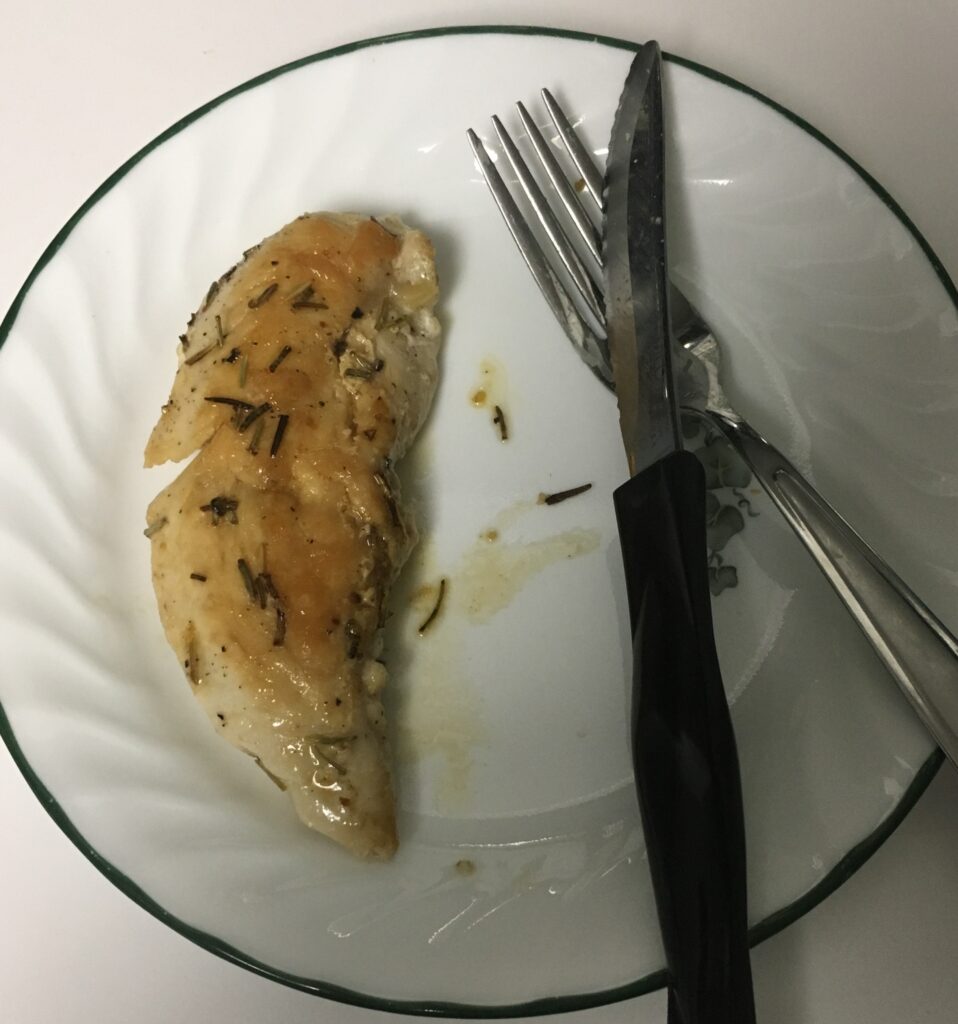
You know it’s done when the center is cooked thoroughly. I cut into the center just a little bit before taking it off the skillet. As long as it’s not pink you’ll be ok. If you see pink, it’s not done and you could get sick by eating it. To check without cutting your chicken, use a meat thermometer. It should read at least 165°.
Find what works for you, these are more like guidelines anyway.
You may be thinking “I’m in my twenties, I don’t need to worry about retirement yet”. You may think that retirement is more of a thing you do in your thirties, but actually getting started as early as possible can have a huge payout later on.
Did you know that to retire, someone our age needs to have more than $1 million saved up? It’s ok. You can panic for 30 seconds.
Ok panic is over. Now I’m going to help you get there.
Why You Should Start Early
The first and most important, yet intimating part is you must start saving. Even if you are only setting money aside for now that’s a start. Yay! That was pretty easy. But that is only a temporary solution. You want to get your money into an investment ASAP.
Even beginning investing 1 year earlier can change the final payout by a surprising amount. It’s hard to imagine yourself, but luckily I have a cool little tool that can show you the difference investing early can make. Check it out here to help gain the motivation to start. I received this tool from Robert Moritz, a certified financial planner, and I’m sharing it with you with his permission. He actually helped me set up my Roth IRA so I would definitely recommend looking him up if you’re in one of the states he services (IN, OH, AL, CA, FL, GA, IO, KY, PA, SC, WV).
Look at the difference investing at 20 vs. 21 makes.
According to this simulation, investing $1,000 every year starting at age 20, this person had $1,056,189 in accumulated value by only 48.
See what happens when they wait just 1 year.
On the other hand though, when they waited to start investing until 21, they only had $959,172 in accumulated value by 48. That is almost $100,000 in lost savings.
Now you see why it’s so important to start investing as soon as you can and as much as you can.
Two common choices for investing include 401 K and IRAs.
A 401k is usually done through your place of employment as a benefit of working for them. Companies will often offer a “401k match”. Which simply means that whatever you contribute to your 401k retirement fund, the company will also put in a certain amount. You should make it a priority to meet the maximum amount the company will match because that’s just free money. However, don’t limit yourself just to the maximum match amount. If you can, always put in as much as your budget allows.
The simplest way to describe an IRA is it’s a retirement fund for people who don’t have a 401k offered through their work. This will often happen if you work for a small organization, you’re a freelancer, or if you only work part-time. A certified financial planner can help you decide if a regular IRA or a Roth IRA is better. Basically the difference is when the government taxes the money. For myself, I went with a Roth IRA based on my advisors advice. However when I changed jobs, my advisor thought moving my 401k from the old job into a traditional IRA would be most beneficial.
Each of these accounts has a legal maximum you are allowed to contribute each year. This is just another reason you should begin investing early. You won’t be able to make up for it later as easily due to the yearly contribution limits. As of 2021 tax year, the IRA contribution limit is $6,000 for a single person ($12,000 for a couple).
Something very important to remember about retirement funds: you can not take any money out of this account after you put it in until you qualify for retirement. If you take it out early, you will incur some major penalties that will make it not even worth taking the money out. So while you should always put in as much as you can, don’t put in any money that you will need back before you’re 60. This is not the place to save for a car or a house. Keep a savings account you can access for those and for emergency funds.
Remember, a little is better than nothing. Nothing with compounded interest is still nothing. Speak to your financial advisor to find a plan that works for you and your goals.
These are more like guidelines anyway.
*I am not a financial expert nor should this advice be considered legal advice. You should always listen to a certified financial planner before me.
I was very excited when Apple announced their AirTags. I’ve been looking into getting some trackers for years, but I didn’t like the existing options. They were expensive, and the options for when the battery inevitably died were not satisfactory. I am so pleased with the price of AirTags and the expected experience for when the batteries die next year. Plus, I already like and use the Find My app!
I recommend buying the 4 packs of AirTags. They are cheaper purchased in a multipack than they are solo. A 4 pack retails for $99, which comes out to roughly $25 a piece. That’s a lot better than $29 for individually sold devices. Especially since, if you’re like me, you’ll want to stick them on everything!
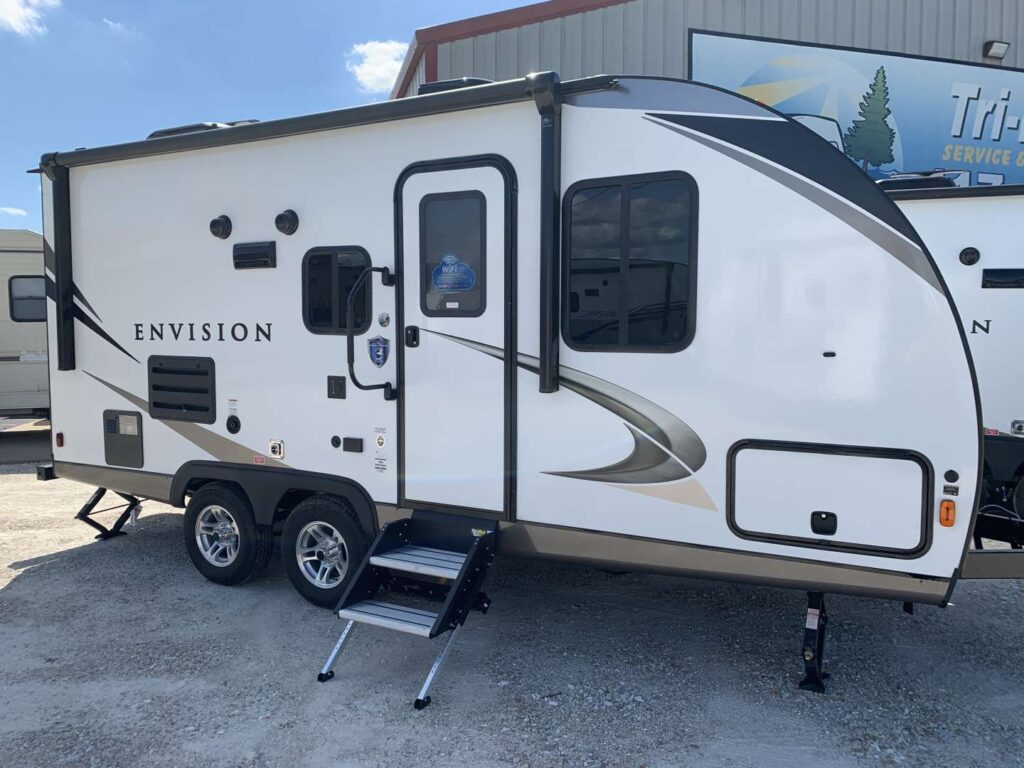
#1 – In My Trailer
Hidden inside a cabinet just to make sure it doesn’t move.
If you’ve been reading my blog, you know that I travel a lot, and when I’m not working, I’m living in my RV. That’s a big ticket item that I leave unattended for long periods of time – sometimes months at a time – so naturally I try to use every resource available for securing my trailer and preventing the unthinkable. First thing I did when I got my set of AirTags was to put one in my trailer as a “low jack”. Now, I can see it’s position while I’m away.
One key to this is to make sure that it is somewhere out of site. If a thief can find the tracker, then they can disable it or toss it out. I hid mine inside the trailer, way in the back of a cabinet that is deeper than it looks. Also, I don’t want it to be too difficult to get to for myself because I will have to change the battery eventually. I do check the trailer’s position every once in a while just to make sure it is where I expect it to be.
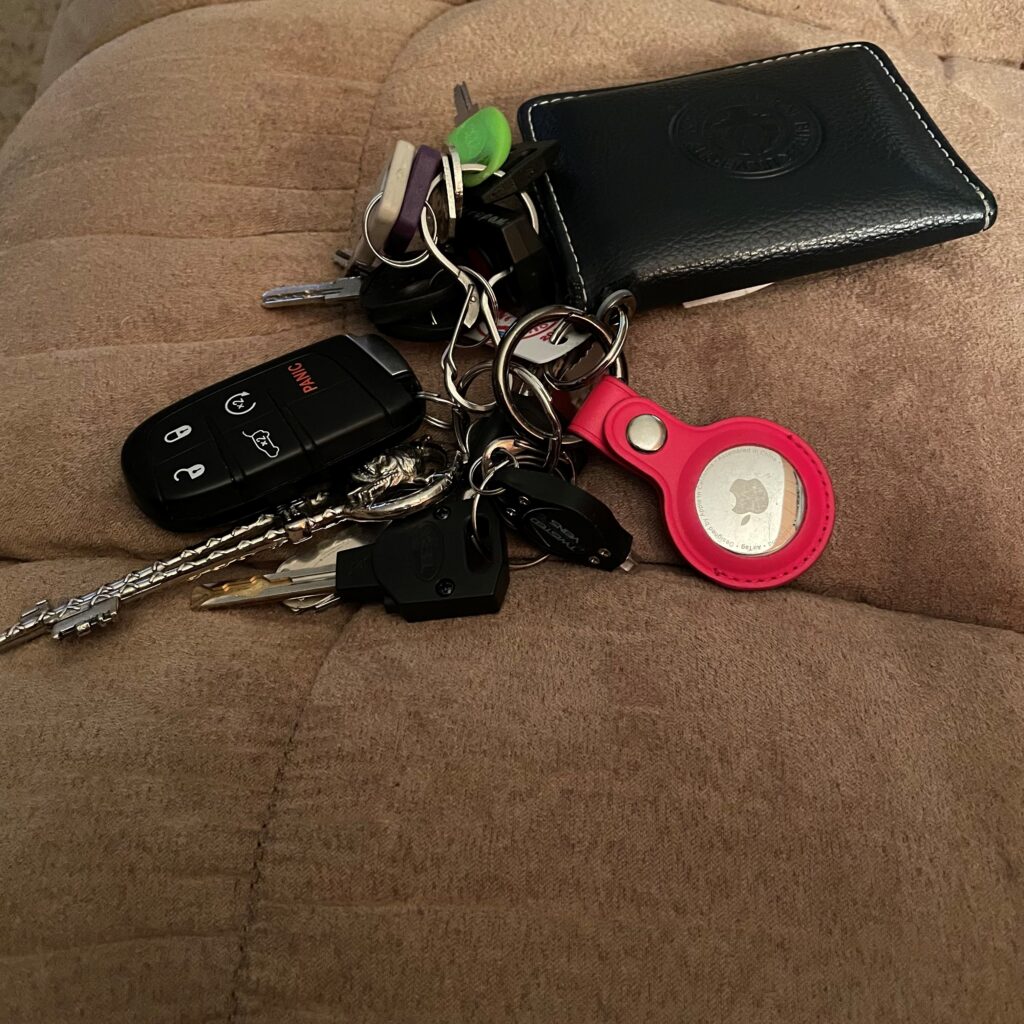
#2 – On My Keys
I have so many keys because all my trailer locks are different!
Wow! What a surprise. I know this is one of the most obvious places an AirTag is going to go, but it was my number 2. I don’t lose my keys very often because I usually put them on their hook right away, but it also can’t hurt. Plus, whatever the keys are in now has a tracker in that too.
#3 & 4 – On My Luggage
I guess I should say in my luggage.
Like I mentioned before, I travel alot. I basically live out of suitcases for work, and I fly several times a month. At the time of writing, I’m actually in an airplane right now waiting for takeoff. It’s also my second flight this week! So knowing where my luggage is located is essential so #3 & 4 went into my suitcases.
A couple tips. It is not ideal to attach the AirTag on the outside like a luggage tag. Not so much for risk of being stolen, but it is likely it could be ripped off in the baggage process. I actually had mine on the outside right next to my luggage tag, but the clerk at the desk told me to put it in a pocket so it wouldn’t be ripped off and lost. In my large bag, I have it in the large front pocket. In my Briggs and Reilly carryon, I have it in the pocket for the portable charger on the back. There are more and more accessories coming out for AirTags, and I’ve seen some luggage tags on Amazon designed to also hold an AirTag. Again, just keep in mind it runs the risk of being ripped off and lost in transit.
#5 – In My Car
Yes! I did buy a second pack. I tested out my first pack, and decided I liked them so I bought another. I actually found them on Woot! for a $5 discount off the 4 pack. Score! It may not be much, but for a brand new Apple product, I’ll take it.
So yes #5 went to my car. I liked the idea of the “low jack” in my trailer so much, I decided to put one in my car. Again, placement is key so it’s not in immediate view. I put it in my glovebox. Not the sneakiest of hiding places, but I didn’t want to forget where it was, and that’s out of the way.
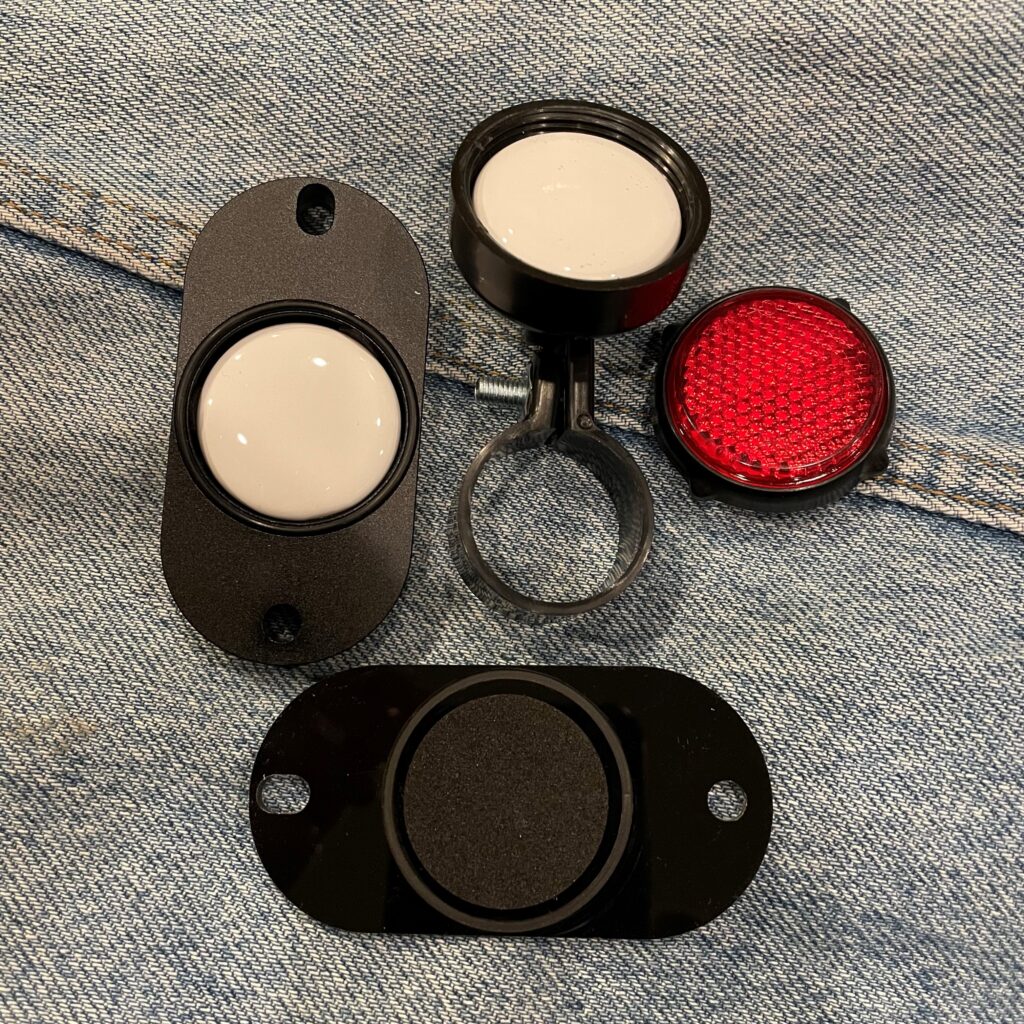
#6 & 7 – On My Bike
The 2 bike options opened to show where the AirTags go.
I have been buying some equipment to be able to transport my bike with me, but this does require it to be outdoors and vulnerable. Of course, I’ll be locking it up, but…..just in case.
I have 2 tags on my bike. I had a spare, and I liked the backup of having 2 on there. Incase one of them is found, the other is still there. One of the cases I used looks like a reflector for the back of the bike. I have had an issue with this style. The first one I bought had a weird connection design, and it didn’t fit anywhere on my bike. I replaced it with the other reflector I found on Amazon, and it was also too small. Luckily, I had a longer screw and could use it to connect the second one. It is frustrating that out of the box they don’t fit.
The other style I bought seems to be the most popular on Amazon. It goes under the water bottle holder and is really unassuming. It is more secure than the reflector, and it kind of just blends into the bike because it’s so boring you just ignore it.
The AirTag holder is bolted under the water bottle holder.
#8 – On My Backpack
AirTag on the outside of my Osprey.
I have an Osprey Backpack I use at work, and plan to use when I get the chance to hike again. I use my keychain case to hook it on the top handle. I know, I know not hidden like the others. Here’s the thing, AirTags have an awesome feature where if something is lost, anyone with a modern smartphone can tap their phone to it, much like they might do for Apple or Google Pay, and then it shows them contact information to try to reunite the bag with its owner. This is actually the original reason I left the AirTag on the outside of my suitcase as well, but I heeded the staff’s warning. In the case of my backpack, I think the risk is enough to keep it visible.
There are some fun cases starting to emerge on Amazon. So if you want to be a little more discreet, you could get a case that isn’t as obvious as to what it contains and just looks like a keychain.
Some Other Ideas I’ve Seen
On Your Wallet
Not a bad idea I have to say. I know that should be the #1 place for my brother. I’ve considered it for myself as well. I’m just concerned it will make it that much more bulky. There are some clever holders for sliding your tag into a card slot like these, or I’ve seen someone at work who just attached one of the classic keychain type to the outside. There are even some wallets popping up with a dedicated slot built into the design like pictured. Definitely, a top priority item you don’t want to lose.
On Your Dog?
One of the most popular cases I’ve seen for AirTags are designed to go on a dogs collar. Personally, I think the ones that are made to have the collar slide through them like this are better than the dangly ones. I’m not so sure about putting one on my dog. I’ve considered it, but it’s not priority on my list.
On Your Child!
Looks like mom & dad’s Apple Watch
I’m not making this up! There are AirTags cases that are designed to help you track your kid. I have to say, this really isn’t a bad idea once you think about it. The best ones, I think, are the ones that look like watch bands and the AirTag slides right in to look like a watch. Better yet, if you buy the AirTag off Apple’s website, you can get free engraving. You could put essential “if found” information such as your phone number or name. If your visiting someplace where kids are likely to go off on their own or wander, this could be a great idea. I can’t help but think of The Children’s Museum when I see these bands. I would definitely strap some kids with these if I were to take them there.
On Your Scooters
Similar to bikes and cars, you may want to tag your scooter or other mobility device. I read an article about how a guy from NYC was able to track down and recover his stolen electric scooter using AirTags. That’s part of why I double tagged my bike. He made sure it was incognito so the thieves couldn’t find the tracking device before he could find the scooter again. There are some cases that are adhesive that could work well in this case. Or another reflector option could be ideal. I’m hesitant on the adhesive styles because of 2 reasons. I don’t know how well they’ll stick, and are they one time use? Knowing I’ll have to change the battery once a year, I want to make sure I don’t have to change out my cases also. Plus, they are more obvious in my opinion.
On Your Remotes
If I would have had this, I wouldn’t have lost my remote for so long.
This one has tempted me. I’ve even looked for a case for my Fire TV remote. I lost it for a long time once, and I wished so bad it had a “find my remote” function. I mean, come on! why isn’t this a built-in thing yet? I digress. Remotes are one of the common uses for the stickable cases I mentioned before. My hesitancy comes from how bulky they are. I haven’t seen a remote solution that isn’t just totally bulky looking and functionally. Maybe if they come up with a design that isn’t so bulky or when the tags get thinner, I’ll add it. If this doesn’t bother you though, it would be a great addition to one of the most misplaced things in your household.
On Your Other Apple Devices
Trick heading! This is not necessary. I’ve been seeing cases and accessories for iPhones and AirPods, but these devices have Find My tracking inheritantly built in. The only exception I’d make is that I have noticed that my AirPods have find my for each earbud when they’re out of the case, but anytime I’ve lost them they were inside the case and they wouldn’t show up on tracking when in the case. While I can see that lending the solution to get an AirTag case for your AirPods, personally I would just prefer Apple to fix that so I can track the case too. I don’t want to have to give up my Capt. Jack Sparrow AirPod case.
As always, there are no rules on the best uses for where and how to use your AirTags. If you have any great ideas not mentioned here, please add them in the comments! These are more like guidelines anyway.
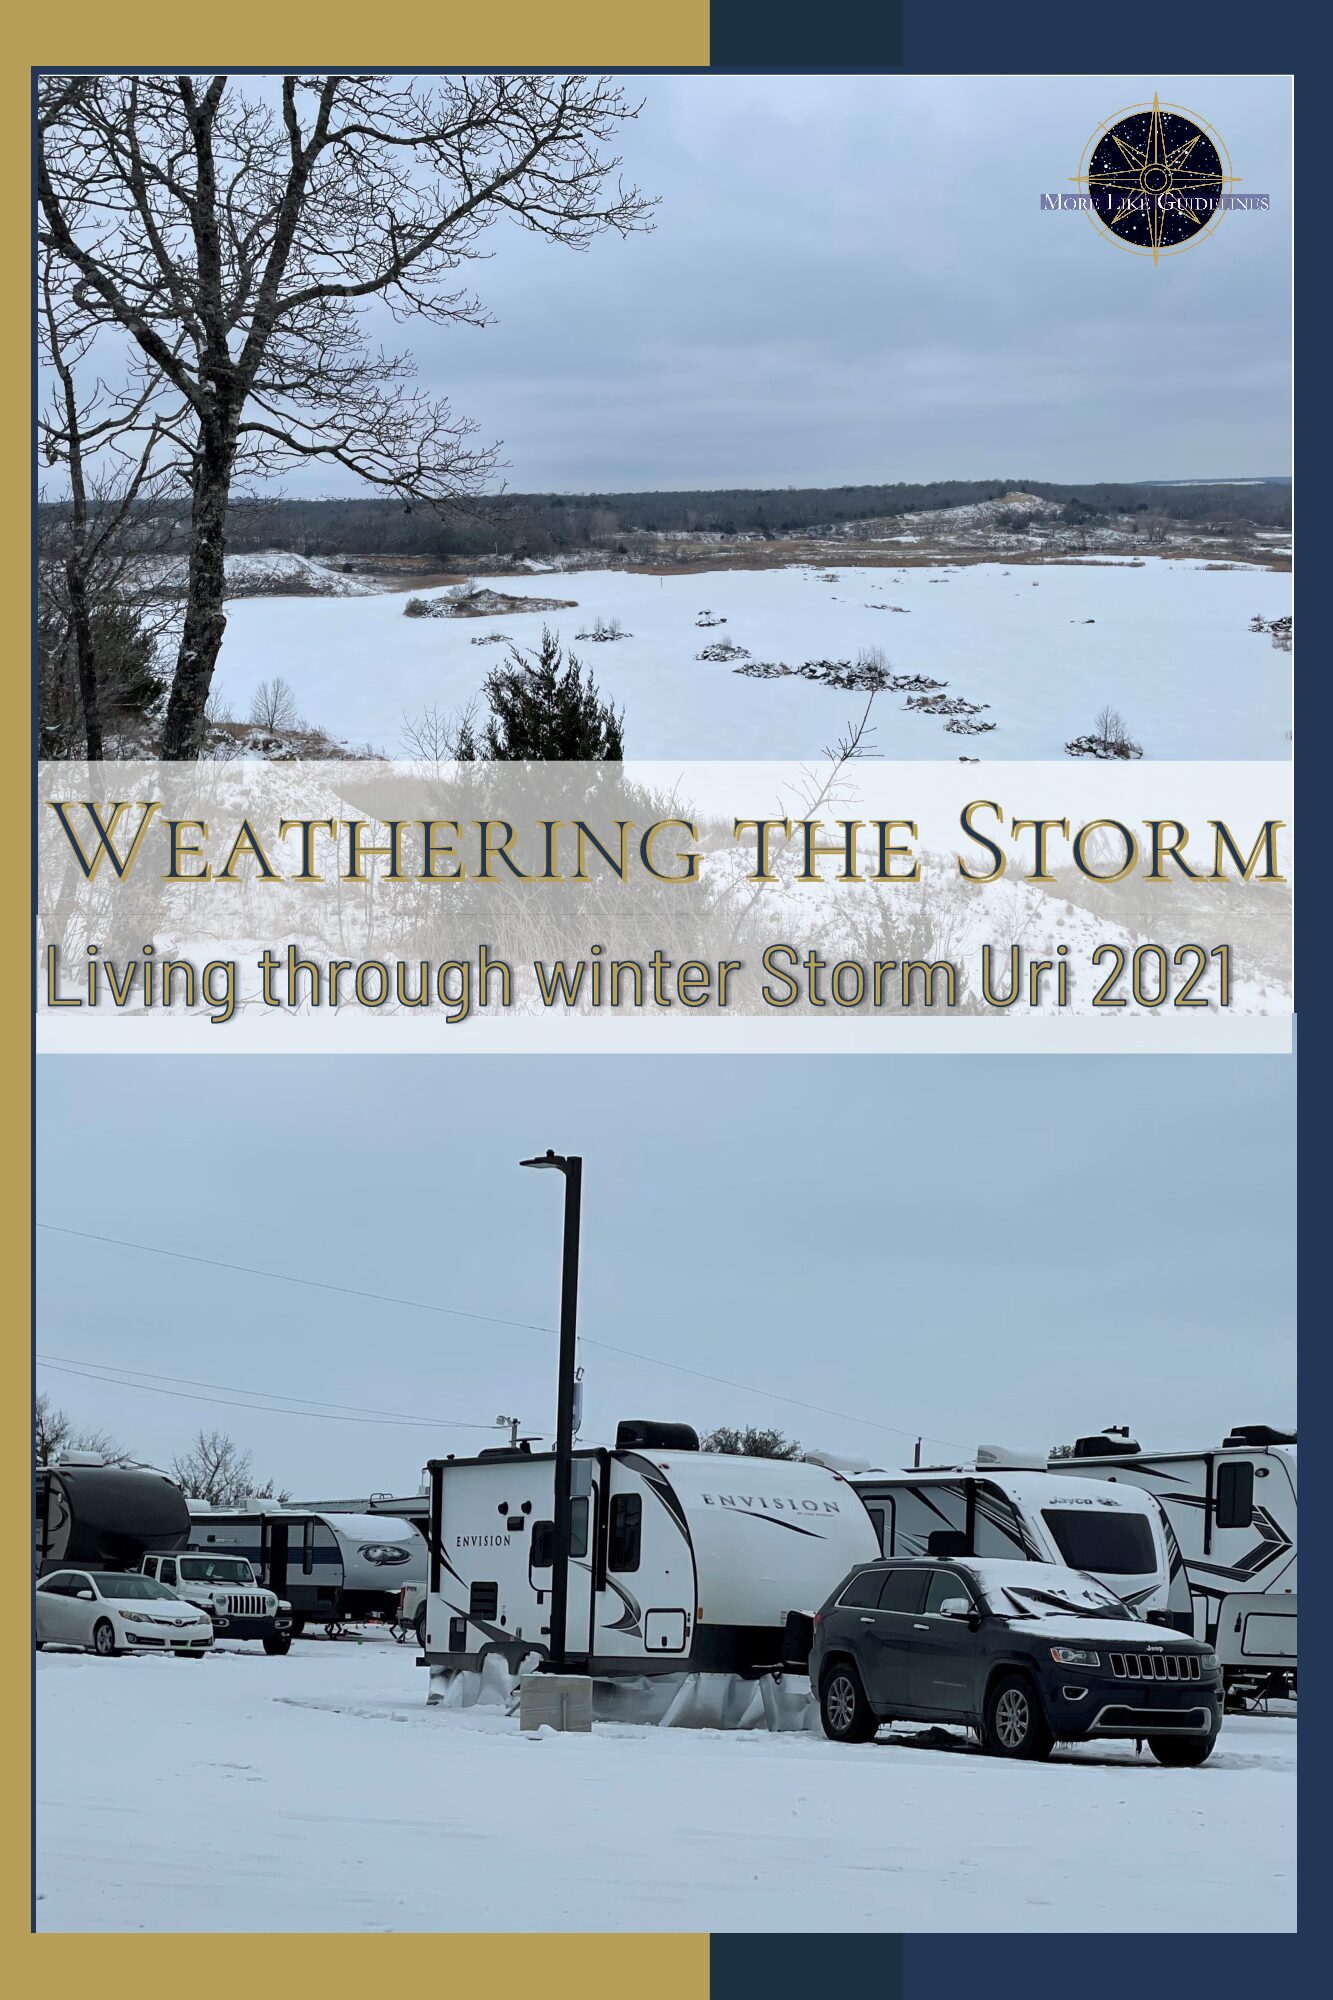
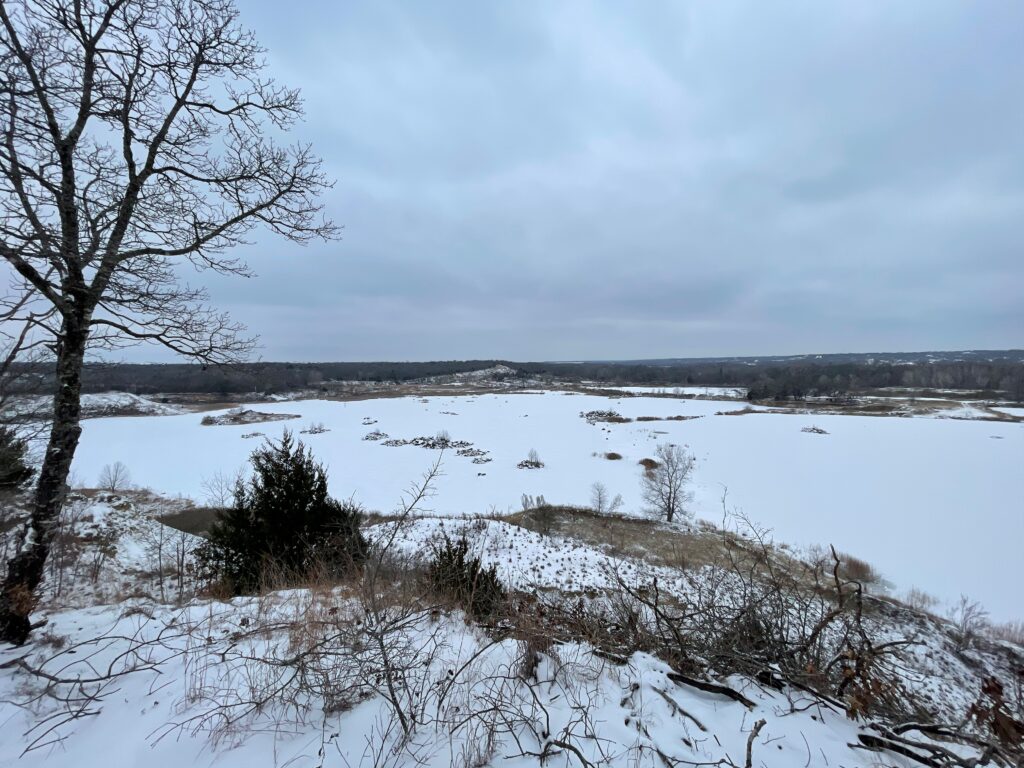
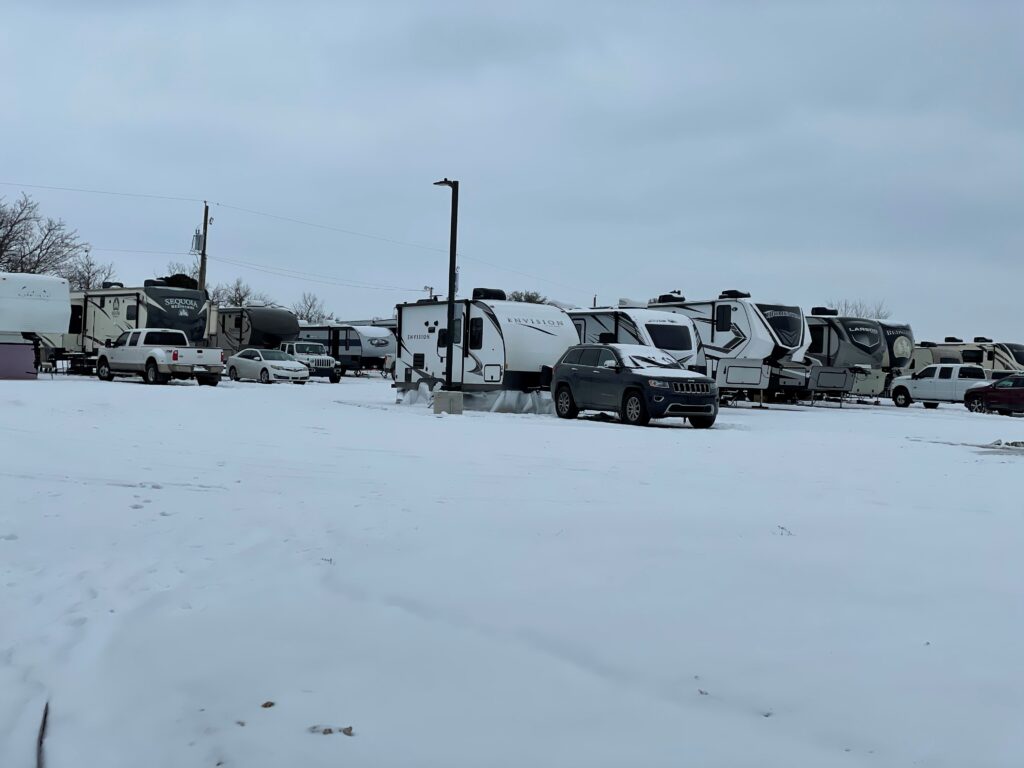
As part of my first full timing trip, I decided to drive down to Texas. When people asked, “Why Texas?” I’d say it was because it was warmer, there were no mountains between me and Texas, and I’ve never been there. Since I’m from the Midwest, we were in below freezing temperatures for the long term. I didn’t want to try living in an RV in freezing temperatures, especially since I don’t have a 4 seasons unit. As it turns out, Texas had another idea. Only 2 of my 3 reasons ended up being accurate. This is the story about what it was like to live through freak winter storm Uri, and what I learned.
I am not the best at paying attention to the weather. I’ve known for a while, and I’ve tried to get better. The way this started for me was finding out Texas was calling for snow. I befriended the lady who owns a food truck that comes to our campground on Tuesdays. She told me she had only had 1 customer the whole time she’d been here. That’s how I found out the temperature was around freezing. I had been working inside all day and just didn’t realize how cold it was. She then said she wasn’t coming the next week because they were calling for snow. I came to Texas to get away from snow! Luckily, I had already read up on all the ways to protect the RV from the freezing weather.
Lesson: Always check the forecast so you aren’t caught off guard.
Expecting to hit some cold weather in the Midwest, I bought supplies to try to protect my trailer back in September. I purchased 60 ft. heat tape – which is just a weird name for an electric cord you wrap around pipes and hoses to keep them from freezing, silver insulation, and a grommet kit to make my own RV skirt. Skirting an RV allows you to keep some heat under the RV and keep the wind from blowing under the rig. You can purchase RV skirting. You can even have it custom fitted and installed, but it’s expensive. I thought the silver insulation would be much more cost effective and easier to install than lots of other DIY solutions. I wanted to fit it before the cold weather came around, but my RV was in the shop for 3 months. When I got it back, it was below freezing and I didn’t want to try to do it in the cold. Since I was still winterized, it wasn’t essential at that time to have it skirted. When I got to Texas, I was planning to use the warmer weather to start working on the skirt. I had the materials, but they would need to be put together and attached to create the skirt. I’ll make another post about how I made my skirt. When I arrived, however, the staff I was talking to said I wouldn’t need a skirt around here. I noticed no one else in my park was skirted so I thought maybe I shouldn’t. I wish I had. When the cold weather rolled around, I wasn’t ready to skirt. I had to quickly punch all the grommets into the material (my hands were getting so tired), figure out how to attach the skirt, and hang it in the cold like I had intended to avoid.
Lesson: Never let anyone talk you out of your plans.
I used some heavy duty magnets that I already had on hand to attach the skirt to the metal frame under the trailer. They worked ok, but I definitely had to stay on top of any that came unattached. It is so windy here. I hadn’t got a chance to weigh the skirt down. I would have used some stakes, but I was parked on concrete so that wasn’t an option. I also needed to add a heat source for the skirt to keep inside. I got a work light from Walmart that puts off some heat and is made for outdoor use. I also put the light on a couple leveler blocks to keep it away from any potential water that might find its way under the trailer.
Day 1 of Winter Storm Uri – Valentines Day
First thing I did when the weather changed was open all of my cabinets. There’s even these openings you have to unscrew to get to the plumbing and other functional parts of the RV. These areas aren’t well insulated so removing the barrier between them and the warmth of the RV is just one more way to try to protect them. Once the furnace was running, I put a space heater in the bathroom to help focus on the plumbing there. Last thing to do when the weather turns, let your faucet drip or run slightly. The moving water will help slow down the pipes freezing.
Lesson: Education & preparation ahead of time is invaluable.
I let the pipes drip, but they were driving me crazy. I had been tracking down some loose pipe connections the weeks before so the sound of dripping water was the last thing I wanted to hear. I had turned it down as low as I could without turning it off. However, the temperature was so low it wasn’t enough. That evening I realized my water had frozen. First thing I did when the water froze was take some of my empty pitchers outside and scooped up snow. Then I set them in the shower so they could melt. I wouldn’t recommend drinking this, but I could use it for flushing the toilet and washing my hands. I was so stressed it was somewhere under the rig where there could be damage. Lucky for me, it was just the water filter that was frozen. I brought it inside to work on thawing it. I used hot water from my electric kettle to run through the filter to melt the ice inside. I kept a cup under the filter to catch water as it came out and poured it back through. That was the only way there would be enough to keep going. All the water I had were the two ice pitchers, and some water that was still in my Brita. I managed to get the filter thawed, then I had to get the small bit of ice out of the end of my hose. I chipped away at it with my Leatherman. I managed to get enough of a hole that water could come through. When I hooked everything back up, water sprayed everywhere. Not ideal for freezing weather. No matter how much I tightened, it still sprayed. About that time one of my neighbors stopped by to check on me. I didn’t think I needed help, but he gave me a rubber seal to help with the leaking. When that didn’t work, we realized the hose on the filter had busted a ring. Without the filter, it worked fine. For now, I decided to forgo the filter and just attached the hose directly to the RV.
Lesson: Accept help, even if you don’t think you need it.
Day 2 of Winter Storm Uri
I woke up around 2:30 a.m. because the power went off. I could hear it turn off because the heater turned off. I didn’t realize it at the time, but I think the campground’s streetlights suddenly going dark also contributed to waking me up. The spot I was in had a light directly outside the front door and windows so it lit up the camper a little bit. At first, I thought I blew a fuse. My fuses inside weren’t tripped so I went outside to check the electric pole for my spot. That wasn’t tripped either so I realized that the campground was dark, and it wasn’t just my lights off. I’m really glad I had my winter coat with me or I would have been in big trouble. I always carry some winter gear in my car just in case. I crawl back in bed because there’s nothing I can do. The lights come on, and then go back off a few minutes later. By this point, I’m getting really cold. My space heaters aren’t working since the power is off, and it seems that my furnace isn’t working either. Turns out, I had run out of propane. I finished my first tank a few days earlier and switched to the second. The first one lasted since September, so I never thought the second would run out in just a couple days. It couldn’t have run out at a worst time either. I keep my coat on, and pile as many blankets on as I could on myself in bed. I check our campground Facebook page to see if anyone has posted what’s going on. This leads to messaging another camper who was also up. Neither of us could go back to sleep so we end up messaging most of the night. He offered to let me tag along with him and his wife in the morning to get propane. I was quite thankful since I hadn’t changed my propane since buying the unit. I’m really wary of gas so I wanted to be sure I was doing it correctly. We went first thing in the morning, and we still had to try several locations before we found someone who had propane. We stopped at a couple hardware stores as well to pick up supplies. This is how I first met Jeff & Amanda from We Live Free RV. They are really great people, and have lots of cool videos on their YouTube. Be sure to check them out and subscribe!
Lesson: Always help out fellow campers when you can. & Never be afraid to ask for the help you need.
Day 3 of Winter Storm Uri
The next challenge was regarding my battery. While the propane runs the heater, the blower is run by the battery. We had been without power for over an entire day, and my battery was getting really low. I saw a lot of my neighbors using their cars to charge their trailers, but I didn’t really like that. I did give it a go a couple times, but I didn’t want to get stuck without gas. I chilled in the car for about an hour and it barely helped that battery at all. I then decided to go out and pick up a solar panel from Harbor Freight. When I arrived, they had just lost power and closed. No where else around me had solar panels. I tried to get food too, but everything was closed. I’m so thankful the electricity came on while I was out. It was off and on a couple times that evening, but at least that meant my battery was getting re-juiced right when it needed it. It’s bad to let your battery get too low so it was a relief that it wasn’t getting ruined. Not to mention, I got my heaters and appliances back. Lots of people around me had generators so they didn’t have to deal with the loss of power in the same way I did, but they were constantly running out for more gas. I decided a while back I don’t want a generator, I don’t have room anyway, and I would go with solar. I just hadn’t decided which panels to buy, and wasn’t in a rush.
Lesson: Be prepared to boondock even at a full hookup site.
Once I had my propane situation handled, I needed to deal with my water. With how crazy low the temperature was, and my heat tape not working because the electricity was off, my water froze again. I picked up a different hose while we were out. Jeff recommended a Zero-G hose instead of the normal RV hoses. I do really like the new hose. It’s much more pliable which made wrapping the heat tape around it easier. The hose was frozen in the same place as last time, where it connect to the trailer. That section was the section I couldn’t get the heat tape or the insulation around to protect it. The heat tape wasn’t working with the electricity out, but the insulation would help too. So there’s ice going into the water line at the connection point, and into the hose at the same connection point. Our electricity was still off and not coming back on so I couldn’t use hot water or any electric source of heat to thaw the hose. This is where I decided I was a mad genius. I keep some vodka water around as a cleaning product in a spray bottle. From what I understand, vodka has a lower freezing temperature than water. So I took it outside, set it to the direct spray, and sprayed it into the water inlet. It worked!! The ice melted right where the vodka-water hit. I was able to clear the whole inlet from ice. I did the same thing to the hose, but it had a longer chunk of ice so it took longer. I managed to get a tunnel through the center of the ice for water to flow through. I then took it inside to melt the rest of the way, and switch the heat tape to the new hose. I wanted to make sure it was done right this time. I lined the tape along the whole hose taping it with electrical tape every so often. Then I went back up the hose wrapping it around the hose. Then I took my pipe insulation and wrapped it as far as I could on each end of the hose being sure to cover the connection points. I didn’t have enough to do the whole hose because the stores ran out, but I could leave the center parts of the hose under the skirt. I had enough to cover each exposed end of the hose. The water took a little while to get through the pipes. There may have been some additional freezing that needed to be melted. Once the water came back to the faucets, I turned them both on high.
Day 4 of Winter Storm Uri
Everyone was saying this day was supposed to be the worst of it weather-wise. However, the temperature was supposed to be warmer than the previous days, but still below freezing. Of course, with my background with winter, I thought a bad snowstorm would be like 6-9”. However, when I looked at the forecast, it was calling for 1-2”. Let’s just say that made me chuckle. Frankly, in the morning I could hardly tell a difference from the day before. I was able to get the water on in the evening before, but the toilet water hadn’t returned for flushing yet. This morning, I found water shooting out the back of the toilet! It seemed to be coming from the hinge or a water connection. When I flushed the toilet, it stopped coming out the back. I also hand tightened a connection on the back for good measure. What seemed to happen in my opinion, was that there was pent up pressure, and when I flushed, it released the pressure. Then I just had to mop up the water from the floor and make sure there was no residual moisture. Thank goodness that it was the clean, incoming water and not the *ahem* outgoing water. As I flushed to release pressure, I noticed the black tank was so full there was no where for new materials to go. This didn’t really make sense to me because I had just dumped recently and this was too fast for it to have filled, I thought. I dumped and there seemed to be no problem, then a couple hours later the black tank was full again! Turns out, I was misinformed about my plumbing system. My understanding was that the toilet goes to the black tank, and both sinks and the shower go to the grey tank. What I discovered was that in many rigs with 2 sinks, the bathroom sink will also go to the black tank. I had been letting both my sinks run very strong to avoid any more freezes. I thought this was safe because I left the grey tank open to drain directly and not retain any water. Once I turned off the bathroom sink, the black tank stopped filling at this crazy fast rate. I would have maybe never figured out this misunderstanding on my part without this strange incident.
Lesson: Keep an eye on your plumbing for leaks and anomalies, but don’t drive yourself crazy like me.
Day 5 of Winter Storm Uri
By today you could feel this adventure slowly coming to a close, but only cautiously optimistic that the worst was behind us. The power and water stayed on consistently through the previous night, and ended up staying on all day. It was actually my birthday so I decided to go into town and get all those Birthday rewards restaurants and stores send. I thought it would be fun, and I had some errands I wanted to run to get some supplies. Honestly, it turned out to be a bummer of a day. The errand locations didn’t have anything I was looking to pick up, and all the places with rewards were still closed due to the weather and electrical situation. I was quite disappointed by the time I returned home. But my new friends Jeff & Amanda stopped by to surprise me with some cupcakes and a card. It was exactly what I needed at just the right moment. I’m again so thankful I met them. They are great people.
I have to talk about going to Walmart on this day. First of all, I don’t know why I thought they’d be restocked and back to normal by now. My mistake. They were crazy picked over. People were still in that apocalyptic mindset even though we were supposed to be above freezing the next day. At one point, there was an announcement that a shipment of milk had come in. They were requiring everyone who wanted milk to stand in line to get it, and there was a limit of 4 per family (which I was surprised as it seemed like a lot). The frozen pizzas were almost completely obliterated. I got a couple of the last ones. I only stopped by because there was a couple things I wanted, but by no means did I need to go grocery shopping, good thing. The things I wanted were weird. I was going to grab some real parmesan, microwave popcorn, and some random supplies. I couldn’t get hardly anything. Apparently, real parmesan and popcorn are priorities to more people than I thought. You should have seen this milk situation though. Herd mentality is strong. They were lined up along the whole side of the store and getting longer. The milk section itself was completely empty with 1 employee standing at one of the fridge doors being passed single gallons at a time from the back. I can’t really understand why everyone was so anxious to get milk. Especially, 4 gallons per family. That’s so much. Even my family of 7 never bought more than 2 gallons of milk at a time. We would never go through 4 in just a couple days (until weather was to return to normal). I don’t actually remember seeing anyone with 4 gallons, but I’m still shocked that’s what they decided to set the limit at. I still had milk at home, I don’t go through it very fast. Even so, I still felt that urge to join the herd. If they are all so desperate that it has to be tightly controlled, then certainly I should need it to, right? In the end, my logic won out and I waited. That was the correct choice for me. Like I thought, I didn’t run out of milk and picked some up the next time I went out.
The popcorn thing is what I really want to talk about. When I walked into the popcorn aisle, I couldn’t find it for a moment. It took me a second to realized that I couldn’t find it because they were all gone. Literally every single bag of microwave popcorn was picked clean off the shelf. There were still some packages of kernels for machines, and jiffy pop. I still don’t understand this. Microwave popcorn was completely useless during this emergency because we had been without power so the microwaves weren’t working. I was not picking it up in response to the emergency, but because I had run out before and had wanted some. I grabbed the jiffy pop because I could use that when the power was out over the stove or later at a campfire. Now this is what really baffles my mind. That same aisle was split into 3 parts: popcorn, nuts, and beef jerky. THE NUTS AND BEEF JERKY WERE UNTOUCHED!! Seriously, they looked just like they do every normal day of the week. The whole store is picked over, but these two items. Does no one in this area know the staples of survivalist food? There’s a reason trail mix/nuts and jerky are thought of as hiking snacks, because they are go-to for good nutrient, low prep, and shelf stable foods. Seriously, if you think you need to react to an emergency and stock up on food, these should be the first things to go. Now you might be saying, “well, you did the same thing. Bought popcorn and not nuts/jerky.” You’re right, but the only reason I didn’t is because I already have a lot of nuts, trailmix, and jerky in my trailer. Even so, I still thought about whether I should grab some because I know the value of them!
Lesson: Don’t get drawn into the panic frenzy. Know what you have, what you need, and don’t let your emotions get the best of you.
The next day was above freezing, and the snow melted so fast. You couldn’t even tell there had been snow there at all. The way the weather bounced back was about as crazy as how it came in. That weekend I was invited to bonfires, worked outside on my skirt, and was wearing shorts. 4 days later, it was 80 degrees and I was visiting a local park with waterfalls. People were wading in the streams, and I even walked through in my sandals. I’ll post about that later.
I know this was a long post. Thank you for reading. My biggest advice would be to research and prepare for freezing weather ahead of any inclement weather. Once the forecast predicts trouble, it becomes difficult to secure the supplies you need. Having them already in your possession is the first step to outlasting the storm. There are a lot of so-called rules floating around for freezing weather, but remember they’re more like guidelines.
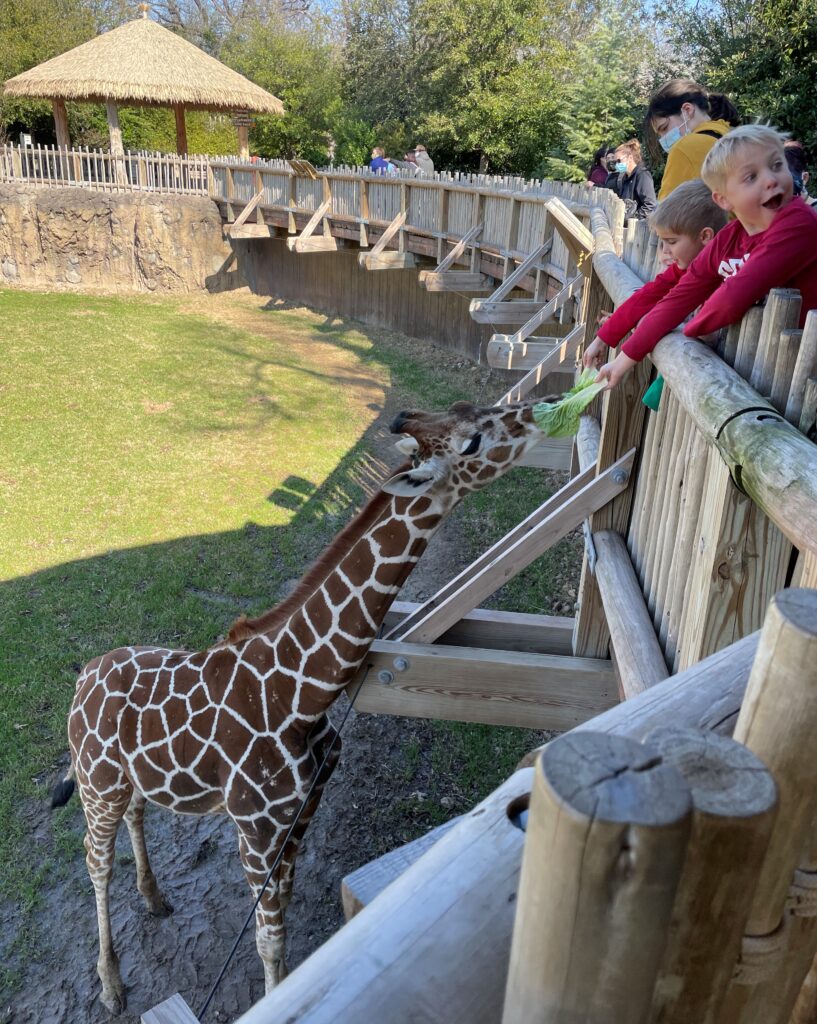
I’ve set off on my first true RV trip. Since it’s January, I wanted to find someplace warmer so I headed to Texas. I’ve never been to the southwest before. I’m currently in Fort Worth so I visited the Fort Worth Zoo. Apparently, it is the #1 zoo in the country.
First of all, who visits a zoo in January, right? I had the same thought, but I hoped it’d still be warm enough to see the animals. Second, the zoo is going through a major renovation. What better time to do that than with so many public places being closed or reduced, but I think they had this in the works already. Unfortunately, this means most of the savannah animals were off display. So sad because that included some of my favorites included tigers, lions, and the elephants. Technically, you could still see the elephants, but not clearly since they were in their smaller enclosures without good sightlines.
When I first arrived, it was nearly half an hour before I saw any animals. I walked around the World of Primates and didn’t see anything. It was cold so it makes sense they weren’t in the outdoor enclosures, but they didn’t seem to be in the indoor enclosures either. It was pretty disappointing because they had some very large and intricate enclosures. I heard some other patrons express their disappointment throughout the day too. Luckily, I circled back at the end of the day before I left, and saw a couple apes, but it didn’t seem like nearly enough for the enclosures available. Plus, they were all in the same small area that seemed to connect to a back room that they all eventually retreated into. Obviously, they need a place to take care of the animals, but keeping them there the whole time seems a bit fruitless. If I had been with my mom, she would have been extremely disappointed because the monkeys and apes are her favorites.
There was a small part of the savannah still open, the giraffe enclosure. I walked around the whole thing, but couldn’t find anything besides birds. Like I said, it was a cold 50 degrees so I can’t say I was too surprised. There was a funny ostrich poppin’ his head around. And then I ran into a large vulture just chillin on one of the walkway fences. He definitely was not supposed to be there. It was kind of funny. Luckily, vultures are carrion birds and don’t attack live prey so we weren’t in danger and walked past without an issue, However, this one guy, I thought he was part of the construction crew but he may have been a visitor, walked up to him and was like talking to him. The bird didn’t like that since he got much closer than anyone else. The vulture did kind of hissed at him and raised his feathers at that, but the guy just wanted to get between the bird and the walkway so the parents with small kids could feel safe passing.
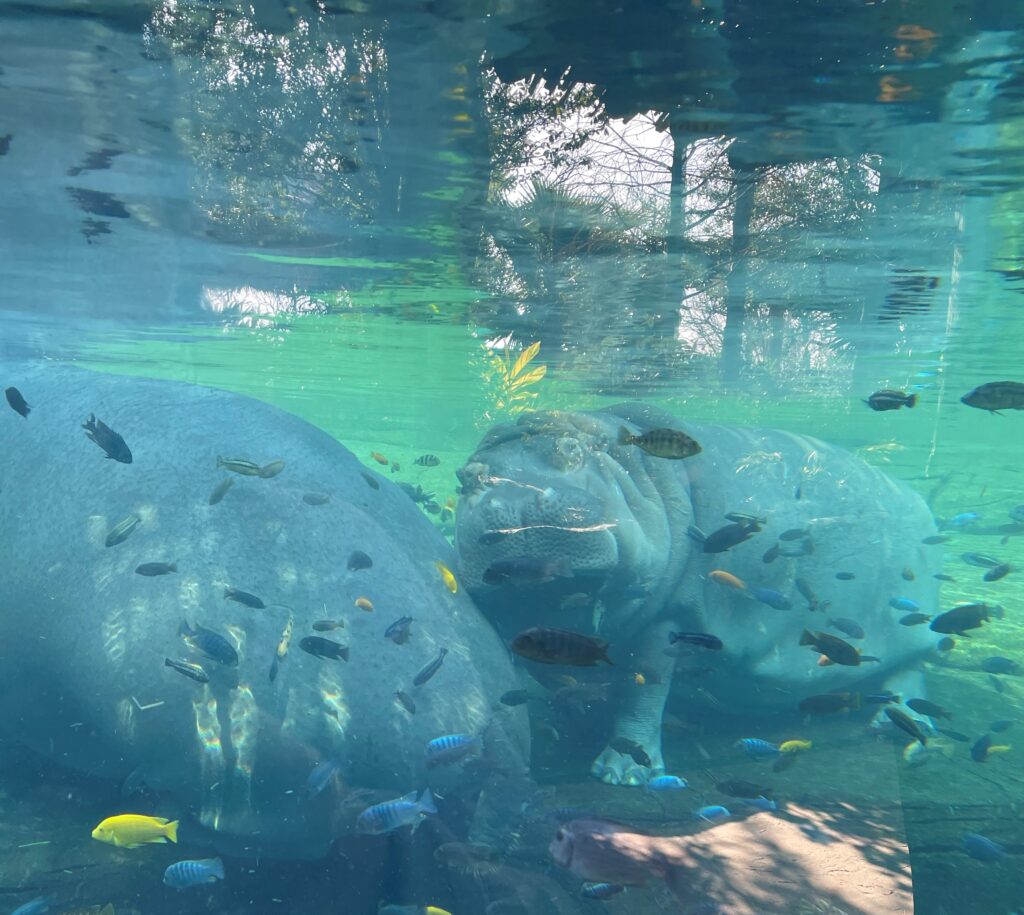
I did get to see the hippos pretty close. They have an aquatic enclosure and spent most of their time pretty close to the glass. In the morning, they were cuddled up sleeping. Hippos normally freak me out a bit since they are one of the most dangerous land animals on the planet, but these were so cute. The one was snuggled up on the other and looked like he was smiling. I saw these guys again later when I circled back, and they were trotting about the bottom of the pool. Definitely, a well set up area since the areas kept the animals wanting to be very visible.
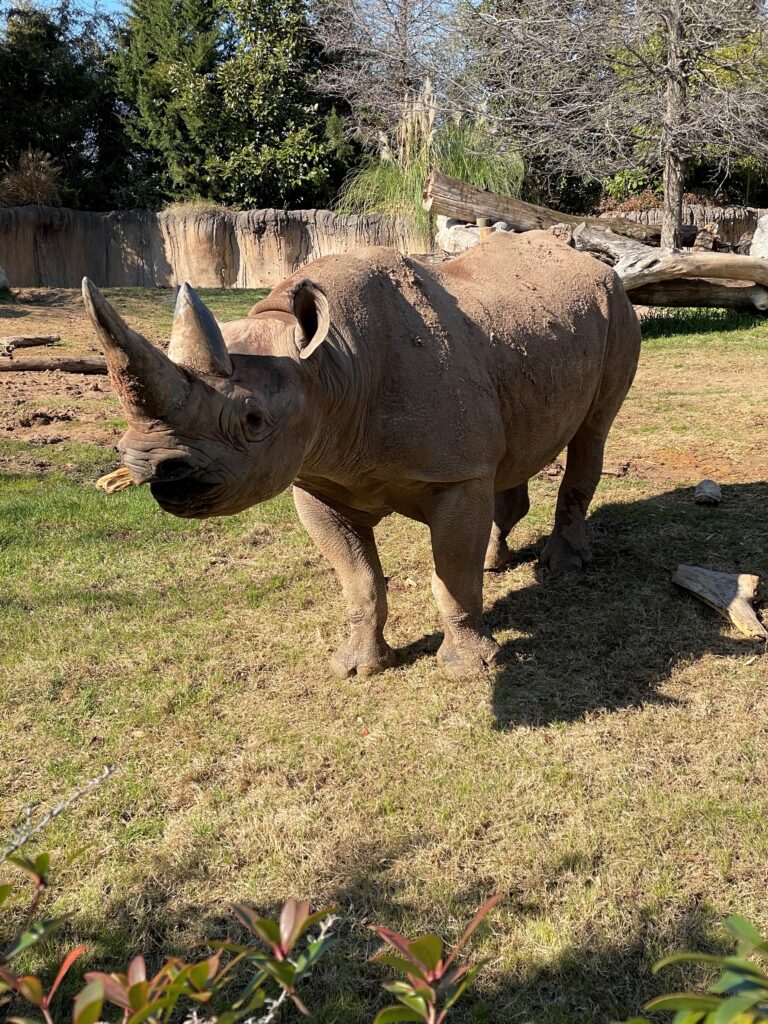
I had to circle back at the end of the day to see the other animals in this area. I saw a black rhino, and he also was fairly close to the pathway. I was also happy to see the giraffes were out when I came back. The tallest ones were on the far end of the enclosure away from the guests, but two of them came right up to the gate even so far as to duck under the wire to keep them back. They had to so people could feed them! I really like how the Fort Worth Zoo does their giraffe feeding. Other zoos I’ve been to have an area where only people who have paid for the feeding experience get to enter. This results in the giraffes only coming close to that area so everyone who didn’t pay doesn’t really get to see them. But not so at the Fort Worth Zoo. People buy the bundles of leaves and then line up wherever they can to feed the giraffes. This resulted in those who didn’t pay (like me) to still get to see the giraffes up close. I was next to several people who fed the giraffes, without taking away from their experience since it wasn’t crowded, and got to see the giraffes with them. I even helped out a mom by taking pictures of her kids while they fed the giraffes. The two smaller giraffes who came up to the fence even came up to me to check me out and see if I had anything for them. I really liked this set up because I’ve never been able to see them so close before. There was a staff member monitoring to yell at people not to touch the giraffes. They really were that close, and it was so difficult to keep myself from petting them. I wanted to so bad, but yeah don’t get any ideas. If you want to feed the giraffes, it is $6 for a bundle. “A bundle” is three leaves. They look like romaine lettuce leaves. $2 per leaf seems like kind of a rip off to me, but if you have your heart set on feeding the giraffes, go at it! I’ll stand by and watch.
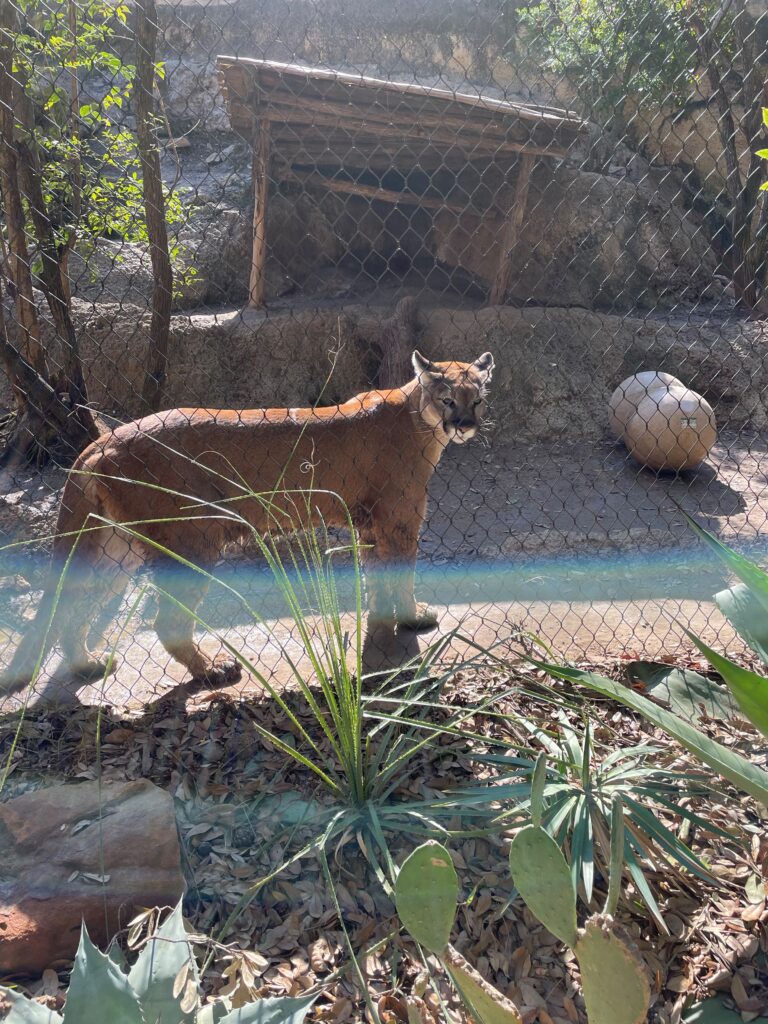
Walking through the rest of the zoo, I found myself constantly feeling like I had missed something or having to backtrack. There are so many little break always that lead to other animals. So pay attention so you don’t miss anything. When I walked into the Texas area, I got all the way through and back to the beginning before realizing I had totally missed the wolves, otters, and crocodiles. I had to go back and do the whole thing again. What happened was there was a fork and I needed to go right to see those animals, some of my favorites, but I went left thinking that right was the main path and I didn’t want to miss anything. Turned out, going right was actually a dead end and where the animals were. I couldn’t see the crocodile anywhere, I’m not sure it was there. I did get to see the cougar and jaguar. They were pretty active and easy to see. If I didn’t get to see the tiger, which I knew was off exhibit when I bought my tickets, then I’m glad I got to see these other large cats.
This zoo has a lot of birds. There was the vulture I mentioned earlier, many different flamingos, parrots, and lots of other birds. The ostrich I mentioned earlier was funny to watch again later when I saw the giraffes. He was messing with them. I literally saw this bird sneak up behind the smallest giraffe and then hiss at him to scare him into running away. I saw no purpose to this except just to mess with the giraffe. It was funny. I also saw an enclosure with hummingbirds and a red tail hawk together. The smallest bird with such a large bird of prey. The hawk actually started tracking me as I walked around the glass, and then it came at me! It didn’t come off its perch and hit the glass, but it lunged and got to the end of the branch coming at me. Glad there was glass in between and he wasn’t just chillin on the side like that vulture.
They also a had a pretty nice looking petting zoo in this area. There’s actually a branch off children’s area that includes the petting zoo. I didn’t go in there, but it looked like a lot of fun for little kids. There’s also a train that goes through the center of the zoo. There’s a station near the World of Primates, and another by the Texas Country area. You can also buy tickets to ride the carousel at the Texas station. The Hall of Wonders and Texas Nature Traders were closed when I visited so I’m not sure what those are all about. I bet they’re worth visiting if they are open when you visit.
They also have a small Australian Outback section with sharks, kangaroos, and penguins. There were no kangaroos out when I went by, and I didn’t see any sharks either. Kangaroos obviously need warm climates, but I don’t think that should have affected the sharks. Honestly, I don’t even remember seeing a place that sharks could have been so I’m not sure what happened or if I missed it. It’s a pretty small section with a simple path so I’m not sure how I could have skipped by the shark enclosure.
Overall, it is a nice zoo. I would very much like to come back in the spring or fall when it’s a little bit warmer, but not super hot. My visit would have been perfect for large cats I think. The new area they are building looks really cool! I’ll have to come back sometime after 2023 when it is finished and all those cool animals go into their new habitats.
A couple small tips from my brief visit. There are several places to get food. Many of them were closed because of covid and reduced admission, but the main ones were open. The Crocodile Café’s prices were slightly better than the prices at The Bluebonnet Café. Plus, at the Crocodile, if you get a good seat you can sit and watch the crocodiles outside the reptile exhibit while you eat. When I was there, they were on land sunning themselves right close up by the windows to the café. I didn’t end up eating at the zoo, but this is where I would have. The Bluebonnet has a western styling, but the setup seemed crowded to me (even though it was completely empty). It just had that feeling that it’d be a bit less relaxed when people are actually there. But it is really convenient to the Texas area of the zoo (it’s right inside the faux main street), plus it has Pizza Hut and Barbecue if that’s what you’re in the mood for. There are also a lot of smaller places and snack stops that weren’t open when I visited, but I bet more will be open in the height of their season.
My other tip would be to download the app. They had a sign at the entrance with a QR code to a map, but I didn’t realize they had an app until halfway through. The map in the app is a little outdated, but they’ll have to update when the expansion is finished. It didn’t seem to have anything incorrect though, just a “coming in 2019” over the petting farm.
They have half-priced Wednesdays. I took advantage of this, and it made the admission very reasonable. If you can go during the weekday, I’d definitely recommend considering this. It wasn’t busy at all while I was there, but I can’t speak for warmer days. I’d expect a lot more moms with young children on a Wednesday than on the weekend.
Finally, currently (Jan. 2021) you MUST make reservations to enter the zoo. They have staggered entry times, and not many people were in the zoo while I was there. It is off season, and the virus is still on the mind so I’m not entirely surprised. I didn’t make my reservations until the night before with no problem. I wouldn’t count on that though, and definitely make sure you have your reservations made before you leave home. You can keep it on your phone and scan at the entrance.
But hey there are no real rules to visiting a zoo, these are more like guidelines. Have fun!
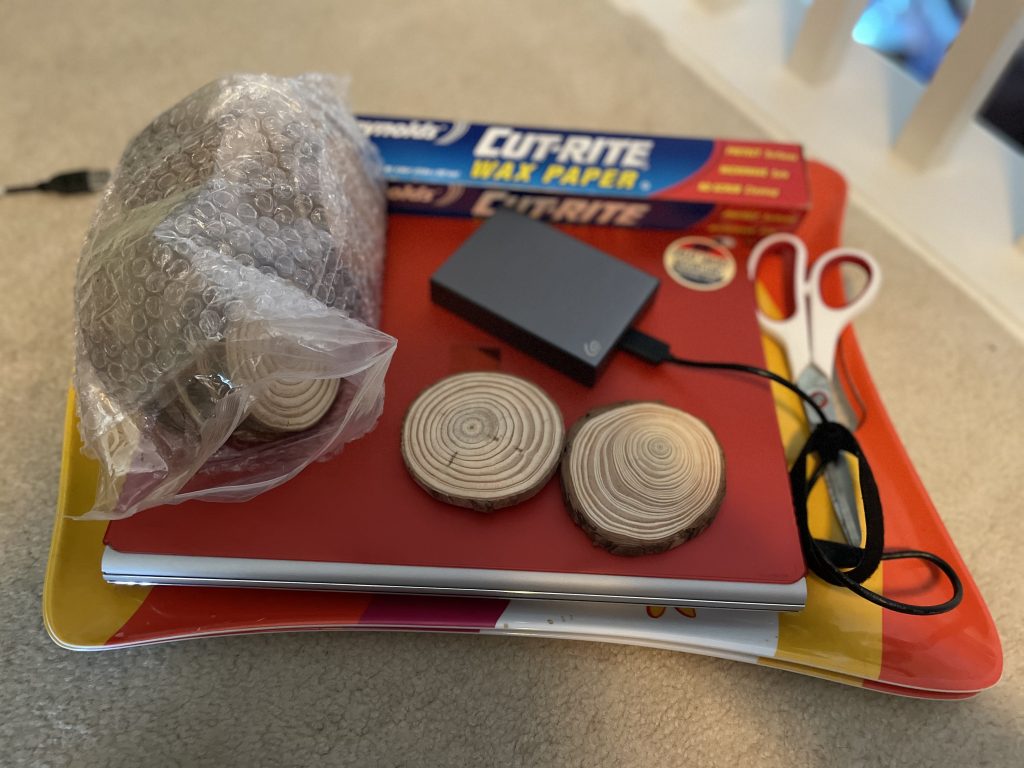
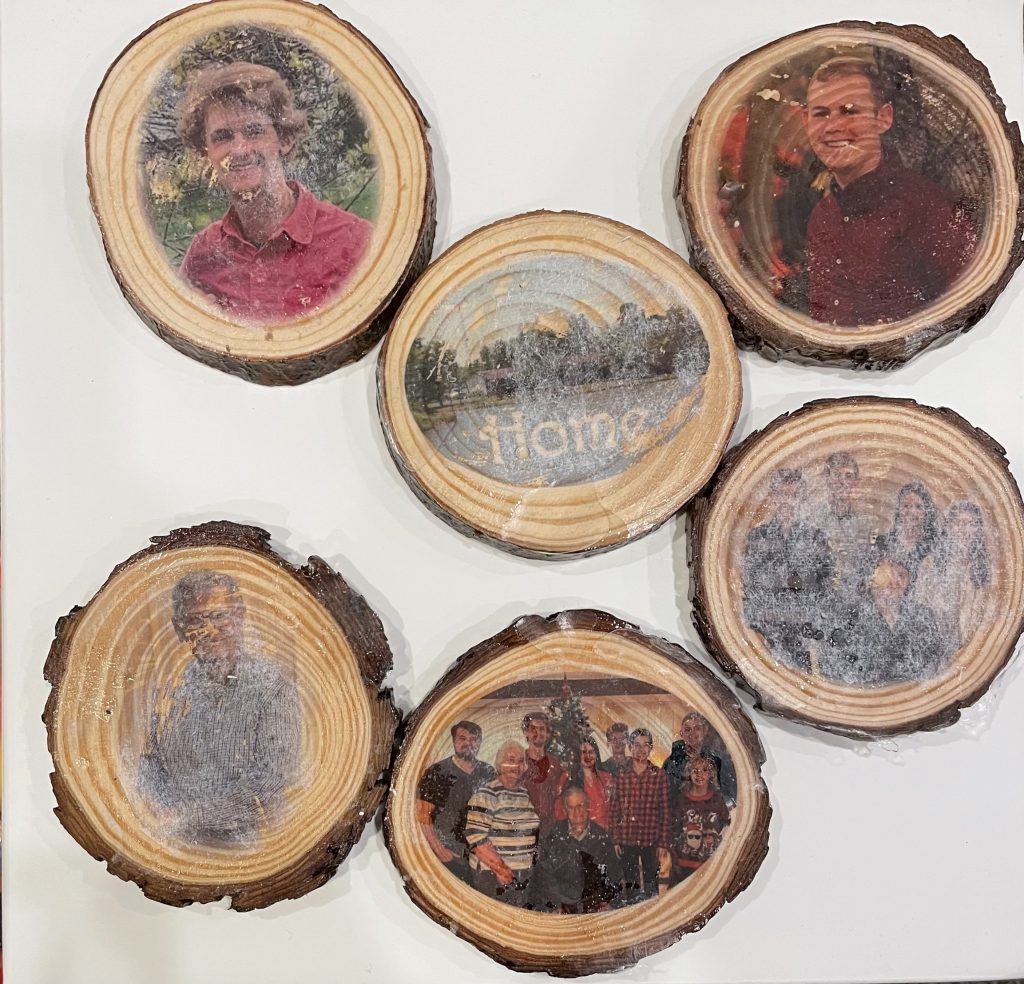
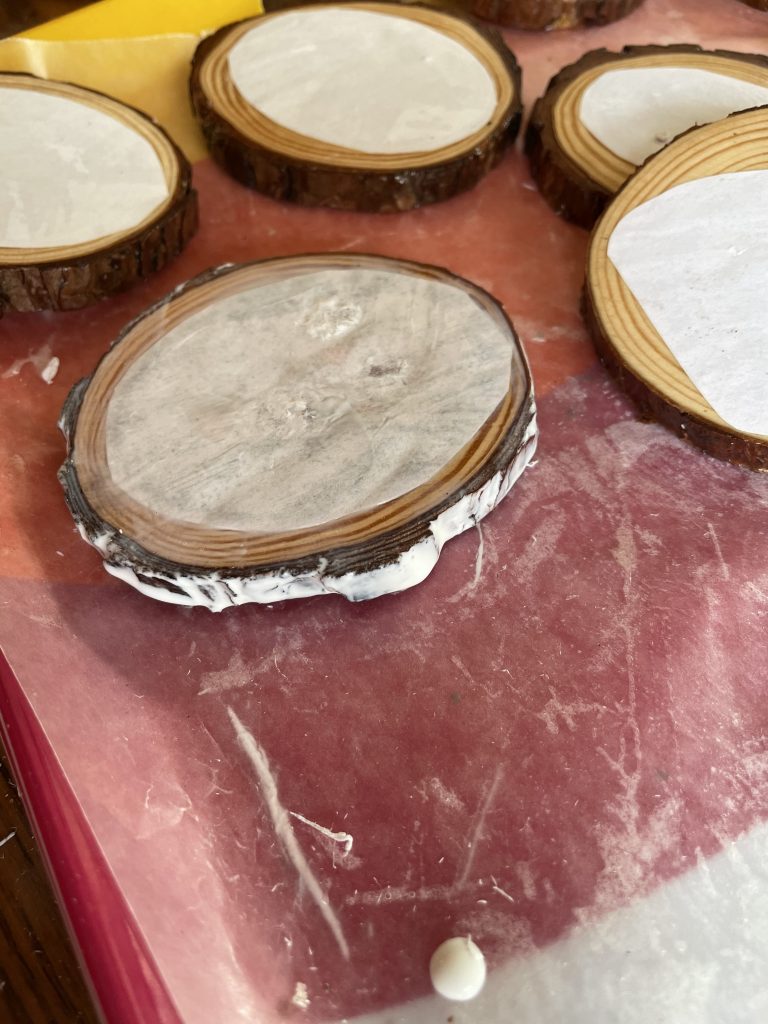
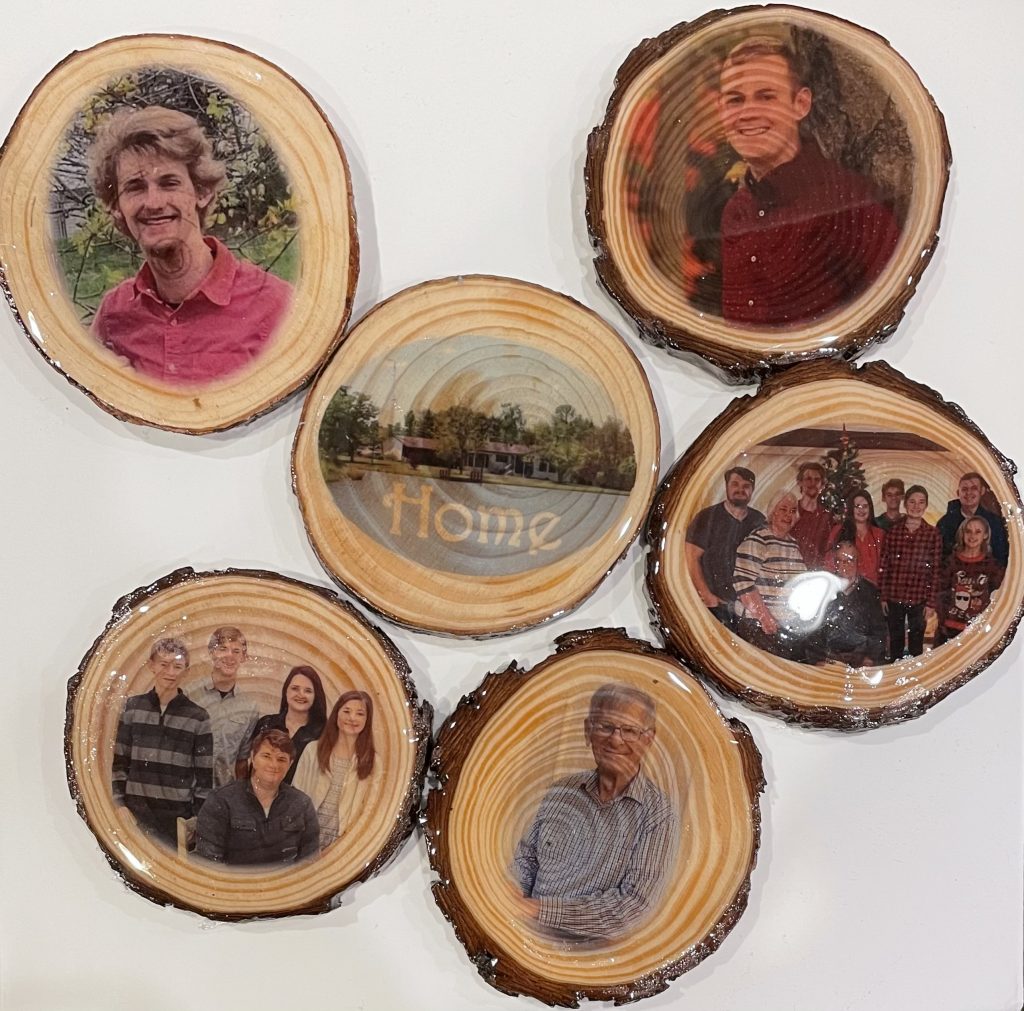
I made some coasters for my grandma as a Christmas gift. They turned out pretty amazing if I do say so myself. Coasters may seem like a lame gift, but with a thoughtful personalized touch, they can be quite nice. I’ll share with you how I went about making them. This project takes a few days from start to finish. Make sure you start with plenty of time!
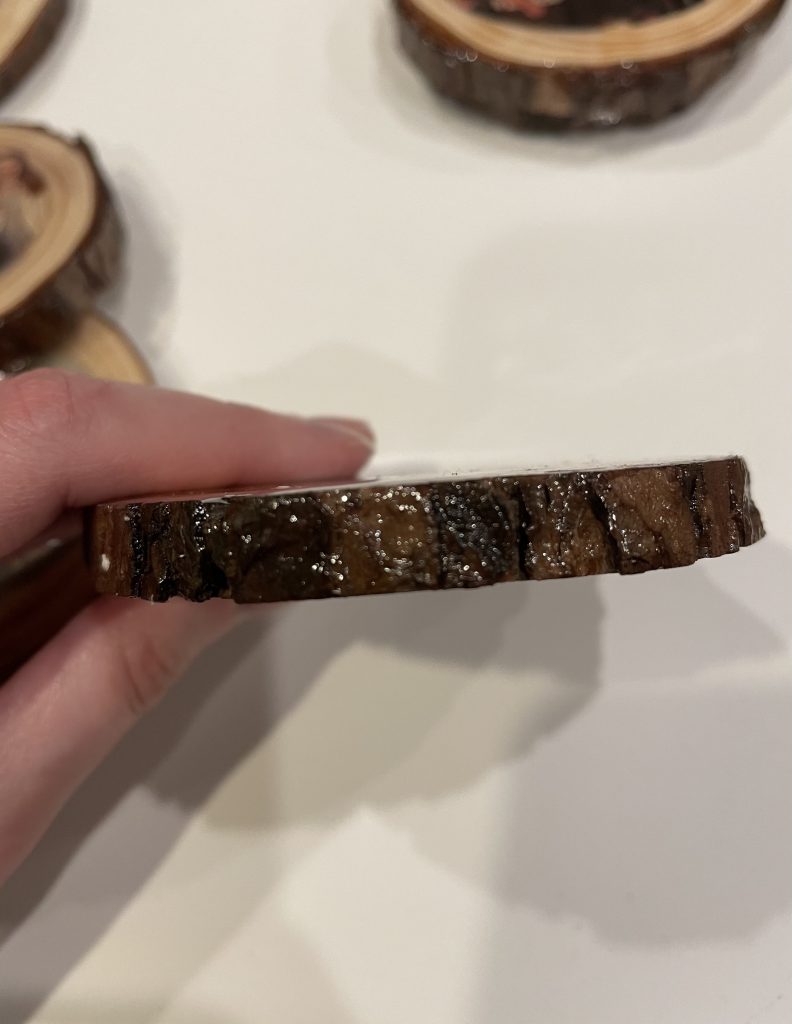
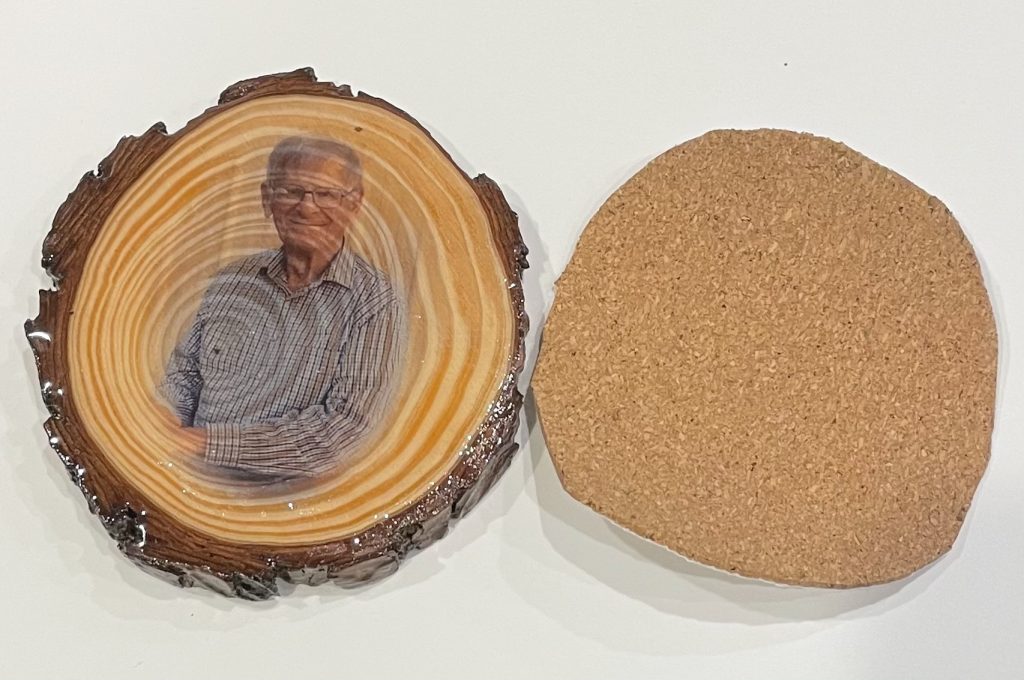
My original idea was to use wood rounds cut from trees on her property. They cut wood every year to use as fuel to heat the house, so I asked my dad to grab me some slices of rounds that wouldn’t be used for the firewood. This was a few years ago, and I tried a few different ways to smooth them out. Unfortunately to my frustration, I couldn’t get the rough slices out of it. I didn’t have the proper tool for the job, which would have most likely have been a sanding belt. I had to give up, but I didn’t want to give up on my idea. Finally, I just decided to buy some already smoothed rounds on Amazon. You can find them here. I’m really pleased with the quality of the rounds I received. Very smooth, and had nice details. I specifically choose some with the bark still on since that was part of my original plan. If I could change anything, I would like the rounds to be slightly larger diameter. These are probably the minimum that could be used for coasters.
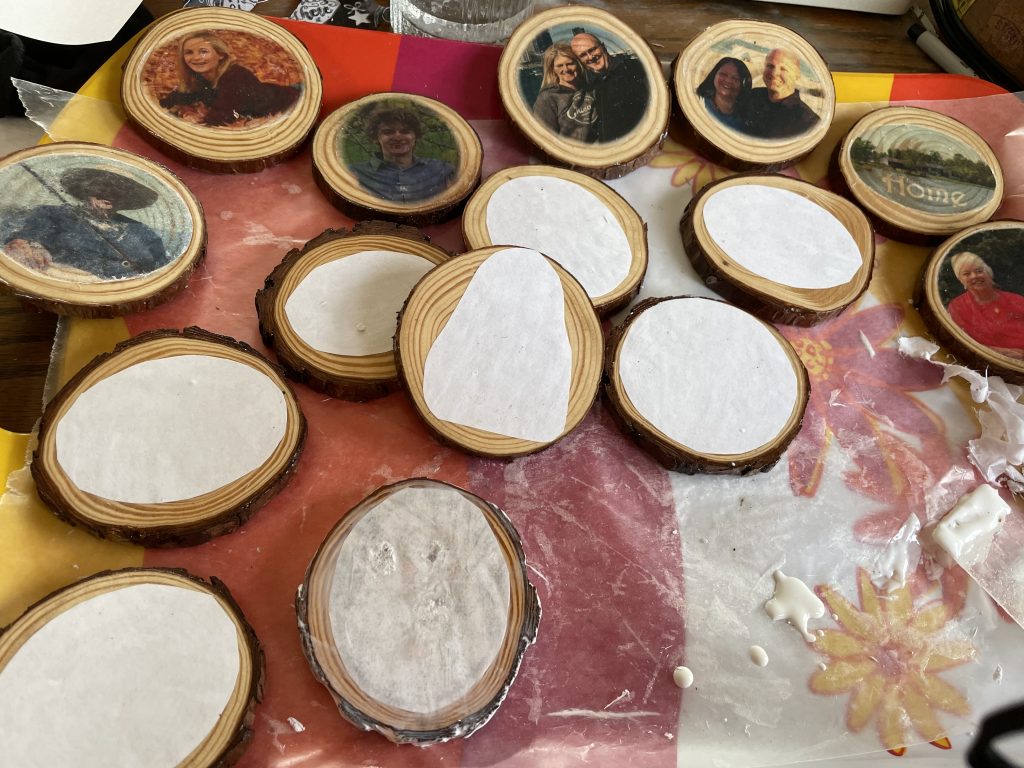
While those are on their way, pick out the pictures or items you want to use to personalize the coasters. I used photos of our family, but you could use some Mod Podged items also. I considered using a maple leaf on one of them, but ended up not doing it so it won’t be included. Keep in mind that bright colors with variance will show up the best. Pictures with dark backgrounds, especially if the subject has dark hair, just didn’t quite look as good as the lighter ones. However, whites will not show up at all. They will end up transparent and replaced by the wood. I actually really like how this turned out in mine, but if I had gone with a picture of us in white shirts, well, that wouldn’t have worked out so well.
Close up shots will also turn out better than far away or ultra-detailed pictures. Most of mine were single portrait shots, but I had a few family pictures. Because of the size and transfer techniques used, the smaller faces and details aren’t nearly as impressive as the closer up portraits.
Edit Your Pictures for Effect
I wanted my pictures to fade into the wood grain, but if you like a stark line or you’re going to go edge to edge, you can skip this step.
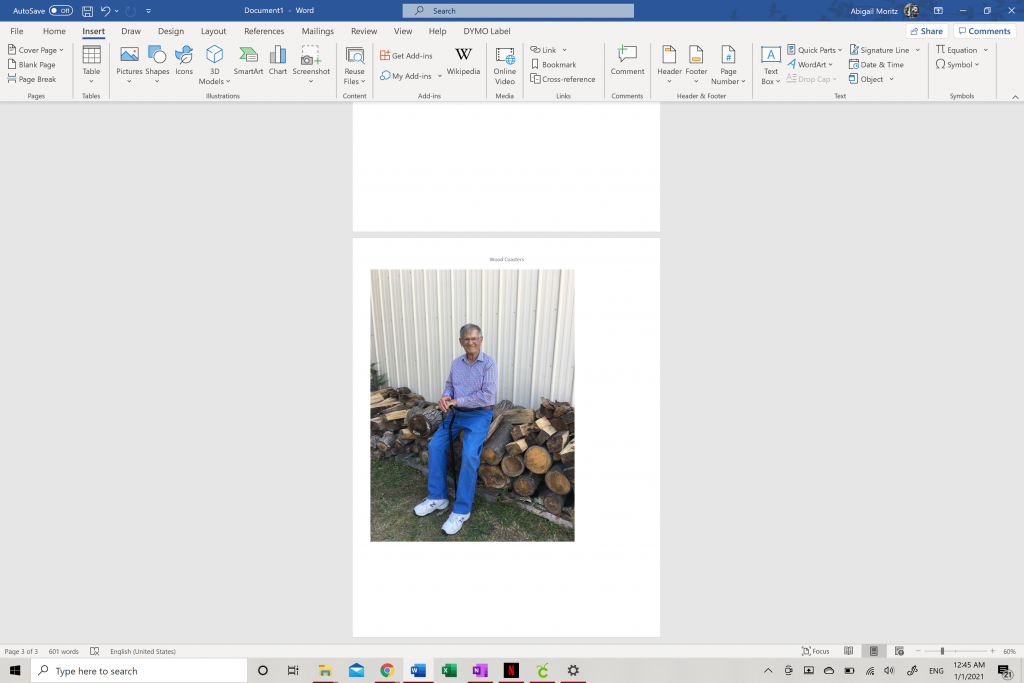
In a Word or Publisher document, insert your pictures to edit. This is really easy. After a couple times doing it, you’ll be able to fly through this step. Although I think I used Publisher, I’ll use Word for the demonstration as I think it’s more common nowadays.
Measure Twice
First things first, you need to know how large of a canvas you’re working with. Mine were about 3 inch rounds, although they weren’t all perfectly round being natural materials. So I first sized and cropped my pictures to 3 in. You’ll lose a little bit of length from the effects we’ll use later, but I didn’t mind. You can always adjust that later if you want.
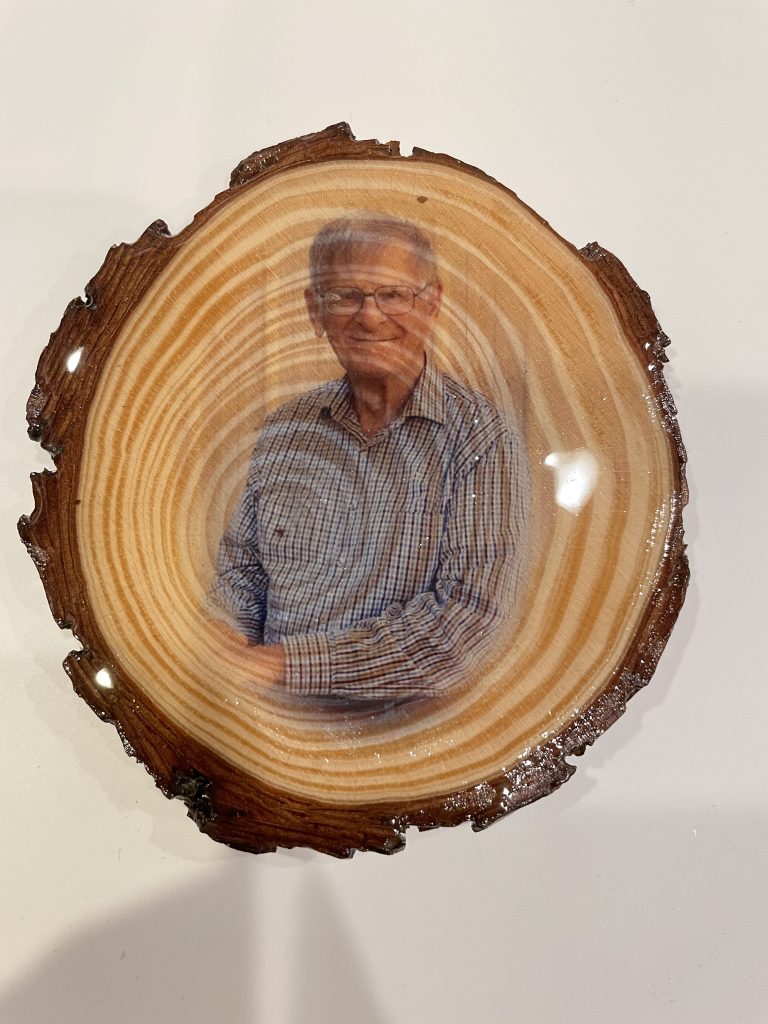
For this, I’ll use one of the pictures from my project of my great grandpa. I really like this picture. Take a look at the bright colors and light backgrounds. This background almost completely disappeared in the final product, but I really liked it.
Insert your picture into Word
Resize & Crop
First, you’ll need to resize and crop the image to the correct size for your project. Select your picture to bring up the “Picture Format” menu where you’ll be able to dictate the size and crop the image to suit your purpose.
Reveal the Format Picture menu by selecting the image.
Since my coasters will be circular shapes, I’m going to use a “crop to shape” to get the correct shape. You can find it under the drop down arrow under “crop”. Crop to the size and closeness you want to use. Be sure to use a good amount of space around the main focus of the photo. Cropping too close looks bad, and will end up cutting out the meat of your picture later.
Crop to Shape under Crop Menu
Once you have your initial cropping where you like it, it’s time to make sure it’s the correct size for the project. Again, select your picture and then go to the far right of the “picture format” menu to the “height and width”. Since I’m working on a 3 inch diameter, both of these dimensions should at or under 3 inches. Don’t change the aspect ratio, or your image will get distorted. Unless you have a perfect circle, both numbers won’t be the same. That’s ok, just make sure they are both less than your max work space. In my case, the width is more than the height. When I change the “width” to 3”, the “height” is automatically adjusted to maintain the original ratio of the picture. That’s what we want to happen.
Adjust the Height and Width of your picture to fit your coaster.
Finally, you should horizontally flip your images so they are mirror images or backwards. This will make it so they will come out in the correct orientation on the final product. Click on your image and go to the “Picture Format” menu. On the right next to “Crop”, you’ll see “Rotate”. This is a drop down menu. When you click on it, you’ll see the option to “Flip Horizontally”. Click on this and then you’ll images will be reversed, and any words in the image will suddenly be written backwards. Again, since the final image will be reversed, they will come out correctly in the end. This part is really important for anything with words or other such oriented things to come out correctly.
Flip horizontally so the final image comes out correctly in the final product.
Add Soft Edges
Now that it’s cropped and sized correctly, we will add the effect that will help the picture appear as if it’s blending into the wood. Since we’re cropped fairly small, you can use the slider in the bottom right corner of the screen to zoom in. To add effects, select your picture and go to the “Picture Format” menu. In the center of the menu, you’ll find “Picture Effects”. Click on that to see a drop down menu of effect options. Select soft edges and you’ll see another menu slide out to give strength options. There are default strengths of 1pt, 2.5pt, 5pt, 10pt, & 25pt. You can select any of these to see the differences. If you don’t like any of the defaults, you can click on “Soft Edges Options” to select your strength manually and with more precision. I left quite a bit of background on my picture when I cropped, so I went with the 10pt font. As you can see, the soft edges cut down on the picture. If I went with 25pt, part of my grandpa’s head would start to be faded out. I really like this effect, especially for the coasters. Again, if you want the stark edge lines, then just skip this step.
Select your effects and the strength.
Pro Tip
Something else to take into account, using white space to your advantage. In one of my pictures, I inserted a bold “Home” as an added effect for the picture of my grandma’s house. I went ahead and removed the background of this section of the picture, but now I realized just making it white will make it so there is no pigment there. Instead the wood grain and color would show through. It turned out great! Especially when using words, make sure to flip the image or your final product will be backwards!
Print
Once you have all of your sized, cropped, and effected pictures arranged on your Word doc, save it as a PDF. It’s time to print! You’ll need to print these on a laser jet printer. All we have at home is inkjet, so I had my dad print them on his office printer. I think most industrial printers are laser jet, so you may be able to take them to a business that prints things like Staples or FedEx. Just check with them which kind of printer it is first. I’d recommend printing 2 copies of them if you have to make a special trip to get the prints. That way if you make a mistake, you can try again.
Cut Once
After you have your prints, go ahead and cut them out. Don’t worry about cutting too close, in fact I left some white space on all of mine. Since you have the fade effect going, too close of a cut will create a stark line. Let the effect do it’s thing by leaving just a little white space. Gives you a break from perfectionism too! In the end, the white won’t be visible.
Transfer Your Pictures to the Wood
To transfer the images to the wood, we’ll use the Mod Podge method. I use Mod Podge Gloss. I believe this is a basic Mod Podge, but I’ve read there is a Mod Podge specifically made for photo transfers. However, that one will keep the white in the pictures from what I understand. I haven’t used any other formula, so I can’t speak to their quality or affects. As I mentioned, I like the white disappearing and even used it to my advantage. This formula worked well for me. If you tried another formula, let me know the results and any differences you noticed!
I recommend having some newspaper or wax paper down for this next step. It can be messy!
Take a healthy amount of Mod Podge and glop it onto your coaster. The first time I did this, I used a really thin layer. It was not enough! The images didn’t transfer well enough and started peeling off during the reveal step. No good. Glad I had second copies of my pictures! The second time I used a really healthy amount on each and the images came out so much better! Use an old gift card or one of those cards that come with screen protectors to spread the Mod Podge around the surface of the coaster. I wouldn’t recommend using anything you will want to use again for this.
I didn’t use enough Mod Podge on my first try.
After spreading the Mod Podge, place your picture face down on the Mod Podge. Take your scraper and smooth down the picture and squish out the excess. No need to scrape it dry, in fact probably don’t, just make sure there aren’t bubbles and the paper appears to be laying flat. The Mod Podge may run down the sides. Either just wipe it up or use it to your advantage! My wood pieces still had their bark on them. The bark tended to be a little fragile and easily broken off as you can imagine. I used my finger to rub the excess Mod Podge over and in the cracks of the bark. This made it a bit more protected and less fragile. Don’t worry if it looks too opaque white, it’ll dry clear.
I used the excess Mod Podge on the sides of the coasters, but it dries clear.
Do try to avoid getting the Mod Podge too much on top of the paper. This will be a little difficult with the smoothing step, but if you can leave at least a little bit uncovered by Mod Podge, it’ll make your next step that much easier.
Let Them Dry
This is the easiest part! Just set them aside and let them dry. I saw a tip that said to give it 72 hours to dry. Seems excessive, but I think it really did help! That way the pictures get plenty of time to really transfer to the wood and dry.
The Reveal!
It’s time to see how the picture transfer went! This part can be really satisfying, but also takes some patience and a gentle hand. Now that your pictures are dry, we’re going to get them wet again. Get a a glass of water and a rag you don’t mind getting dirty. I don’t think this will ruin your rag, but let’s not risk it.
Dip a corner of your rag into the water, and gently rub it over the top of the paper. It should start to get damp and roll and tear. If you can grab a piece, you may be able to gently tear the paper to get the top layer off quicker. Once everything is wet and the top layer has come off, start using your finger to gently roll the paper layers off. The rag is like the equivalent of sand paper for this so the closer you get to the image, you’ll want to be more careful.
Some coasters rotating through getting their paper peeled.
As it gets wet, you’ll be able to see your image through the paper. Just keep gently rubbing the white paper off to reveal your image clearer. Be extremely careful and gentle. Don’t spend too much time or push too hard on one area all at once or you’ll end up peeling the image off the wood. As the image dries again, you may see little white fuzzies show up again over top the picture. I find it’s easier to do this in steps of wet – let dry – wet again. Always being careful and gentle, seriously it’s so easy to take sections of the ink off with you at this stage. Feel free to start a new coaster and come back to a started one later just to let it dry. If your edges that we didn’t cut off earlier are still there, you can rub those hard to remove. Just be sure not to accidentally rub any of the image away!
Eventually, you should be able to clear all of the white from over top the picture to reveal a really great image. I was so pleased with the color quality and clarity of my pictures! Some of my pictures had little parts come off, but it is completely possible to do this without any of the picture coming up. The plentiful Mod Podge, and longer drying times greatly helped boost my success!
You may notices that some of the rings and natural colors of your wood will show through the image a little bit. I considered this a bonus to the design I was going for, but you may want to take in the placement of especially dark circles. A couple of my siblings got a particularly dark center in the middle of their faces which looks a little funny, but by no means ruined the picture.
I experimented with spraying some almond wood polish we have on the rounds. They didn’t do much with all the Mod Podge preventing it from getting to the wood. I did try wiping some blanks down with it before transferring the image. It makes the rings of the wood stand out a little more, but not so much that I’d say you need to do it.
Let Them Dry Part 2
We just want to make sure that there is no residual moisture hanging around when we go to do this next part. It’ll also help you double check that the pictures are really clear and ready to go. If you find any white spots, just wet your finger, remove gently, and come back to this part after.
Finishing Coat
Make sure you definitely have a protective layer between your projects and nice surfaces for this one. We’re going to cover the coasters with a resin-like finish. I use EnviroTex Lite Pour-On High Gloss Finish. This stuff finishes beautifully, but can be a little tricky to get right. I messed up the measuring on 1 of my dad’s coasters a few years ago, and I think it might still be sticky! It just never set properly. Be sure to measure carefully & accurately. Most of all, be sure to follow the directions carefully!
Everything you use to mix, pour, and stir this stuff you will want to be disposable. The directions mention a way to possibly clean them, but it dries hard and permanent, so I’ve never risked it. I’ve used a little measure cup like you get off of cough syrup in the past. This time I used some materials I found at Dollar Tree and was really careful to pour to the same line both times. I really like these clear bowls for mixing (or these would be good!), and popsicle sticks are a classic for this kind of task. The directions do recommend something with a flat edge for scraping the bottom and sides, so I broke one end of the stick so it’d be flat. I also used these little cups for the initial measuring. It’s not very precise, but luckily it turned out great. If you can find something like this, that’d be much better!
Make sure you have all of your coasters laid out ready to dry and not touching each other. Once you mix, you will need to move quickly to get everything covered before it dries.
Mix thoroughly according to the directions, then pour a glob onto the center of your coaster. Use another old gift card or other disposable flat spreader. Be generous with your amount and get it thick and evenly spread out. It may run over the sides when it’s drying, but that’ll not be too big of a deal. After covering them all with a thick coat, leave them to dry. Read the directions for ideal drying temperatures and time.
TIP: You will want to breath on the unset project periodically to get rid of little bubbles. Apparently carbon dioxide is what makes the bubbles go away, not heat.
Once they are dry, you should have a clear, hard beautiful top of a coaster! If you have any resin on the bottom that is making it uneven, you should be able to peel it off no problem since it is most likely not completely covering the bottom. If it isn’t affecting your coaster in any way besides looks, don’t worry about it. We’ll cover up the bottom with the next step anyway.
They look so nice with the final coat applied.
Add a Bottom
What’s the whole point of coasters in the first place? To protect your furniture! So you will want to make sure your coasters don’t do more harm than good, especially a hard material like tiles. Add a little layer of cork at the bottom really finishes this project off, and adds a bit of quality about it. This is the one I use.
I’ve gotten a lot of mileage out of this roll, and I don’t even feel like I’ve barely scratch the surface of it. It has a sticky backing, but I still use glue to permanently attach it to my projects. Usually I’ll use hot glue, but given the specific materials in this project, I opted for wood glue.
Measure your pieces. With something as inconsistent shape like this, I traced around each coaster individually. I think it’s best to have the cork just slightly smaller or flush with the edge of the coaster, so I would cut a little inside the outline I made. You can trim it down after attaching, but it’s best and easiest to get it right before attaching. Simply spread some glue on and spread the cork so it’s flush. Wipe away any excess glue seeping out, and let it dry. So easy!
Just glue the cork on the back to finish the piece.
Enjoy Your Spoils!
These coasters come out so good, you’ll hardly believe you made them yourself! My grandma absolutely loved them.
My aunt actually suggested I start making these and selling them. I’d be willing to give it a shot, but I don’t know if anyone would be interested. If you’d be interested in commissioning some of these, contact me!
Of course, this is just how I do it. You can make it your own! These are more like guidelines anyway.
Some links may be affiliate links. These may or may not provide a small commission from using the links at no cost to you. I only suggest products I like regardless.
As I mentioned in another post, I recently purchased a new travel trailer. When I came by to pick it up and do my walk through, the dealer had a folder with a voucher for free camping from Outdoor Adventures. Free camping??!!! Right? Um yes, please! He told me that the rep who gave it to him said it’s just a 90 minute tour the first time you come and then they validate your certificate for 21 days of free camping. Kind of like a timeshare meeting, but he promised it wasn’t super pushySounds pretty good to me! So I thought I’d write out what my experience was like.
First of all, the folder says to call in order to to activate your 21 day voucher. Lies! Well, not completely. It’s the first step, but it won’t activate your voucher. They will then try to schedule a time for you to come take your tour. They won’t validate without the tour, even though the paperwork and indicate it just takes a call. I’m not mad though, I suspected as much. They want you to take the tour so they can make the pitch for their membership. That’s fine. She said when you confirm a tour reservation, they will send you the voucher for 21 days of free camping, your parking pass, activity wristbands, and a $50 Walmart gift card! Sweet. She also said if you were just coming for tour and not staying to camp, they’ll give your lunch and ice cream.
It just wasn’t convenient to me because most of their resorts are in Michigan with 2 in New York and 2 in Ohio. I don’t live in any of those states so popping over for a tour isn’t exactly easy. I hoped to do it when I was ready to use my first campsite, but my camper was stuck in the shop for awhile. Then it was winter so I wanted to make use of my passes when it’s warmer, and I can use all the amenities. However, while I can use the passes 21 times anytime for up to a year, they said I needed to activate the pass as soon as possible. I was in the area around Thanksgiving so I just did the tour then with no overnight stay.
I visited the Arrowhead Lake campground for my tour. Ok so I’m going to clarify something now that was a little confusing to me. So I was given information, and was in contact with someone from Outdoor Adventure Resorts, but when I arrived the company name everywhere was Venture Out Resorts, and then they started talking about Coast to Coast which I’ll talk about later. So basically these are all their own individual companies that like partnered up as one thing? I know that Venture Out is an affiliate of Outdoor Adventures and you can get all the same benefits. Coast to Coast isn’t a name I heard until I met the sales guy. Yeah so that came out of nowhere. Here’s what I learned.
Apparently, Coast to Coast is a travel company owned by Good Sam. They have campgrounds all over the country, hence the name. They also have some in Canada and Mexico. So with the membership you can camp at the campgrounds in your home network for free, in this case Outdoor Adventures and their affiliates. Then you can use all those other campgrounds for $10/night.
The tour was mostly just a sales spiel. We did take a drive around the campground. The one I visited was a new addition and had a lot of upgrades planned to make it as fancy as the others. You can see a couple pictures I took below. The cabin-trailer was really cute. It was more like a tiny home. After the long explanation of everything they do and then breaking it down to show me “how it would work for me” they offered me lunch. It was just a cold turkey sandwich with a store bought cookie, chips, and string cheese so don’t get too excited. They didn’t offer me any ice cream, but it was a bit cold out. They did give me the $50 Walmart gift card first thing when I arrived, and at the end they gave me the 21 day punch card for the free days of camping.
These trailers make such cute tiny homes to stay in.
All of the highlights they push are as follows:
Camping & Cabins Free or $10/night
Discounts on vacations including condos around the world as low as $100/wk
Bring friends/family to use with you. 3 campsites or a campsite and cabin. Up to 10 people per spot.
RV Storage – I never heard a price. They implied free.
They’ll move it to a spot for you the night before you arrive.
24 hour security
Open yearly (not all campgrounds)
Ok not gonna lie. That sounds pretty good. Of course, the sales guy starts doing the math. The national average (according to him) is $45/night. That seems to be about what I’ve found. So it sounds like you’d be saving money, but of course this all cost money. They have 3 plan tiers. They’ll only tell you about the top one at first, then they’ll bring the other ones out to hook you on. You’ll think that sounds great, but too expensive. Then they’ll say you can have it all for this much cheaper and it suddenly seems like a no brainer, but it’s still a lot of money. The tiers they showed me were as follows:
Top tier: $17,000 You get all the things I mentioned before and it’s a lifetime membership and it’s transferrable to your children if you so choose along the line.
Middle tier: $13,000 You get all the benefits except it’s a lifetime membership that is not transferrable.
Bottom tier: $8,000 All the benefits for 10 years and it’s not transferrable.
You do have the option to upgrade one of the lower tiers to a higher tier and the money you’ve already paid will count towards that higher tier.
They only broke down the lowest tier for me because they acknowledged that the others didn’t make sense (and that I wasn’t going to even consider spending almost $20,000!) so those are the numbers I’m going to use now.
The way it broke down according to the sales guy, it would break down to $96/mth. Assuming $50/night, you’d only have to stay 2 nights to save money. Well, he conveniently forgot to factor in that extra $10/night because I won’t be staying exclusively in Michigan. Still seems like a good deal, maybe.
So….what’s the kicker. That’s what I’m trying to figure out the whole time. The first thing that is a red flag is that they want you to buy right there and then. They told me that the offer is only good that day. I asked multiple times if I could think about it, maybe wait and try out after I use those free camping days they’re giving me (why give it to me if I don’t have a chance to try it out, right??) They said that they couldn’t because they tell everyone they have to buy that day so if they didn’t make me, other people would get mad. I don’t see why they wouldn’t let everyone think about it if there isn’t some kind of catch I’m not seeing right then and there.
Then you have to notice that the $94/mth is only the first year. Why? Because there’s a yearly maintenance fee of $492 at the time of writing. That’s on top of the $8,000+ and it doesn’t go away even after you pay off the membership fee. There was no guarantee that price would stay consistent either. He said that in the past current members haven’t been required to pay the additional fee when the prices increase. He said there are current members who signed up the first year who are still paying under $200 for their yearly fees. But like I said, there’s not guarantee that’ll be true for you.
Finally, they really bury the lead on this one. It’s not so much a yearly membership subscription as it’s a purchase. Meaning those numbers are financing numbers! It’s a loan. I only figured this out because I asked what the cancellation policy was. He told me you cancel up to 3 days after. When I pushed for the long term cancellation, then he said that the bank isn’t going to just forgive the note. So it’s a loan. So all those numbers aren’t taking the interest price into consideration. They kept talking about the numbers for good vs bad credit ($94/mth is the good credit price). They told me that for bad credit the interest is 15%. 15%!!! That’s a really high interest rate. Of course, I asked what the lowest rate for good credit was because I do have good credit, and it was 14%! That’s basically no difference! That’s it, that’s the catch. My uncle said “so they’re loan sharks” when I told him about it. He’s not wrong. They are definitely making money off the poor financial decision to open a loan at that rate. The salesman said if it were him, he’d take the 6 months of no interest and then refinance with a personal loan from his credit union. While that sounds like a smart plan, certainly smarter than sticking with 15% interest, I don’t feel comfortable with all the uncertainties in that plan. I’d want to do my research and I’d probably just open a loan from the get go to get a rate I’m comfortable with, but honestly I’m not comfortable with any interest rate for this kind of purchase.
As you can guess, I walked out without making a purchase. I’m not upset that I went. They were really nice, and I got a gift card and free camping out of it. They never did send me the package in the mail with the passes and everything.
I tried to look up reviews online. They are definitely mixed. I saw one lady comment that she was excited to mostly use the international condos and vacation discounts, but later comment that after a year they never were able to use it because Coast to Coast’s prices were always higher than the other local options. I’ve also read reviews that said when they booked campsites in network that were supposed to be $10/night, the campgrounds blindsided them with additional fees that ended up costing them more than if they had just booked it normally without going through Coast to Coast. I find these quite concerning on top of everything else I already felt uncomfortable with. Makes me happy I didn’t get pulled into their sales pitch.
This was just my experience with one sales staff and your experience and pricing may vary. If anyone has used Coast to Coast, I’d love to hear your feedback!