Categories
Food

My Favourite Homemade Pizza

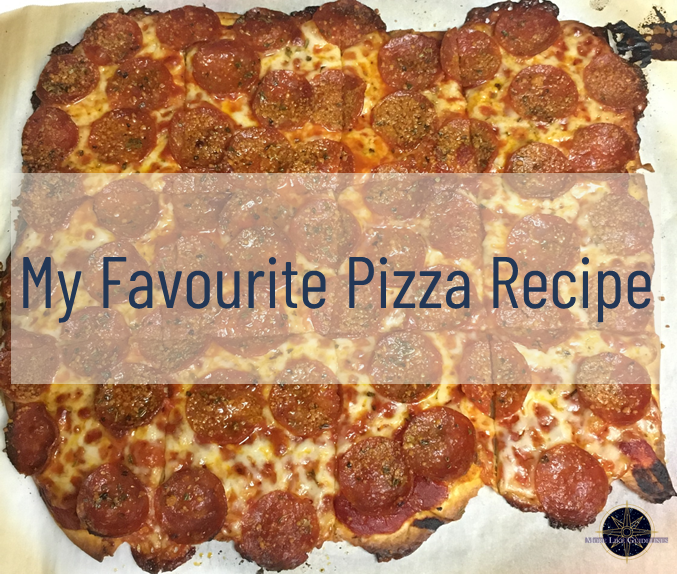
My favourite food by far is pizza. However, it can be an expensive habit when you’re young and on a budget. When I moved to Atlanta, I was searching for a great recipe to replace one of my favourite pizza places and save some cash.

The biggest change you can make to a pizza is the crust. Finding a good crust was the biggest challenge. I found some good options along the way, but this is my go-to now.

I really like this crust because it stretches and gets thin easily. That was actually one of my biggest struggles when looking for a good crust. So many doughs were too sticky or would tear too easily so it was impossible to get the kind of crust I was trying to emulate. There are so many crust varieties, and I know people have very strong opinions on them. The way I make this crust is to copy Ohio pizza, which is a thin crust, similar to Donatos if you’re familiar with that chain.

Ok first things first, what do we need. I’ve adjusted this down to make 1 large thin crust pizza for 1 – 2 people. If you want to make more, it is easy to scale up.

Supplies

  • Mixing bowl or stand mixer
  • Spatulas
  • Measuring Cups and spoons
  • Pizza stone
  • Pizza peel or cookie sheet
  • Parchment Paper
  • Rolling Pin
  • Rolling Mat (highly suggested not required)

Ingredients

  • 1 cup Flour
  • 3/4 tsp Yeast
  • 1/2 tsp Salt
  • 1/2 tsp Baking Powder
  • 1 1/2 tsp Oregano
  • 1 1/2 tsp Minced Garlic
  • 1 1/2 Olive Oil
  • 3 oz. (6 Tbsp) Warm Water

Steps

Somethings you may notice are odd about this recipe. First you’ll see yeast, but no sugar. This recipe breaks some yeast bread rules, but bear with me. Rules are meant to be broken so we’ll just consider them guidelines.

  1. One thing that makes this easy, first step throw all the ingredients into your mixing bowl in order.
  2. Combine ingredients. If you aren’t using a stand mixer, I find it easiest to use a spatula to combine all the ingredients. Combine until it becomes a ball. Continue to work and knead it for 2-3 minutes. If the dough isn’t coming together or is too dry, add a little more water. If it is too sticky, add a little flour.
  3. Drizzle some olive oil over the dough ball and on the sides of the bowl. Roll the ball so that all sides are coated and won’t stick to the bowl during the rise.
  4. Let the dough rise for 30 minutes in a warm place until doubled. Cover the bowl with Glad Press ‘n’ Seal or saran wrap. A damp towel works too, but not as well. I’ve found that you get a much better rise with a good seal like Press ‘n’ Seal gives.
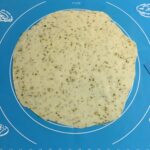
  5. Spread your rolling mat onto the counter or sprinkle some flour if not using a mat. If you can get the parchment paper to stay in place, you could also try rolling on that.
  6. Roll the dough as thin as you can or like. Be sure to vary the direction to push the dough into a round shape. It probably won’t be a perfect circle, but if that’s important to you roll is past your max size then cut to shape.
  7. Transfer dough to parchment paper before dressing.

Garlic & Oregano Pizza Crust

A nice workable dough to make a wonderful thin crust pizza crust.
Prep Time10 minutes
Cook Time15 minutes
Rise Time30 minutes
Total Time55 minutes
Course: Main Course
Cuisine: American
Keyword: Bread, Crust, Pizza
Servings: 1 Large Pizza Crust
Calories: 524kcal
Cost: $3

Equipment

  • 1 Mixing Bowl
  • 1 Spatula or stand mixer
  • 1 Plastic Wrap
  • 1 Pizza Stone Highly Suggested but not Required

Ingredients

  • 1 cup all-purpose flour
  • ¾ tsp instant yeast
  • ½ tsp salt
  • ½ tsp baking powder
  • ½ Tbsp oregano
  • ½ Tbsp minced garlic
  • ½ Tbsp olive oil
  • 3 fl oz warm water or 6 Tbs

Instructions

  • Mix all ingredient in order to mixing bowl.
  • Mix until ingredients come together in a ball. Add more flour if too sticky, and more water if too dry.
  • Knead in the bowl for 2-3 minutes.
  • Add some oil to the sides of the bowl and roll the dough so each side is coated.
    Let rise for 30 min. until doubled in size.
  • Roll dough out into a circular shape rolling until as thin as possible. Cut to size if too big for your pizza stone or baking sheet.
  • Move the dough to parchment paper before adding toppings.
  • Preheat the oven to 425°F with pizza stone inserted.
  • Sauce and add toppings as desired.
  • Cook for 13-15 min. or until crust is golden and crisp.

Notes

Nutrition Facts
Servings: 1
Amount per serving  
Calories 539
% Daily Value*
Total Fat 8.6g 11%
Saturated Fat 1.3g 6%
Cholesterol 0mg 0%
Sodium 1173mg 51%
Total Carbohydrate 100.6g 37%
Dietary Fiber 5.1g 18%
Total Sugars 0.5g  
Protein 14.6g  
Vitamin D 0mcg 0%
Calcium 175mg 13%
Iron 8mg 42%
Potassium 502mg 11%
*The % Daily Value (DV) tells you how much a nutrient in a food serving contributes to a daily diet. 2,000 calorie a day is used for general nutrition advice.
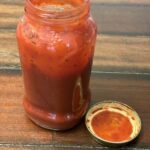
Sauce

This is my favourite pizza sauce. Of course, you can always use store bought, but I never liked the flavour. Turns out that was one of the reasons I didn’t like homemade pizza for so long.

This recipe, however, is so simple. It also is a pretty good copy of the sauce my favourite chain uses. I use this sauce regardless of the type of pizza I’m making.

Supplies

  • Jar or container
  • Spatula
  • Measuring Spoons

Ingredients

  • 6 oz. can of tomato paste
  • 1/2 tsp Basil
  • 1/2 tsp Salt
  • 3/4 tsp Sugar
  • 9/10 Can of Water

Steps

This is one of the easiest recipes ever.

  1. Take an empty jar. I reuse old sauce jars I’ve collected from my parents, but if you have mason jars or even pickle jars would work (after you clean them out, of course).
  2. Scoop out the tomato paste into the jar. I have a spatula I love for this, plus it came from the Dollar Tree so win-win! It is the perfect thinness to fit in the can, plus it is double sided so you can use it for the dough too. Red 2-sided spatula on black background
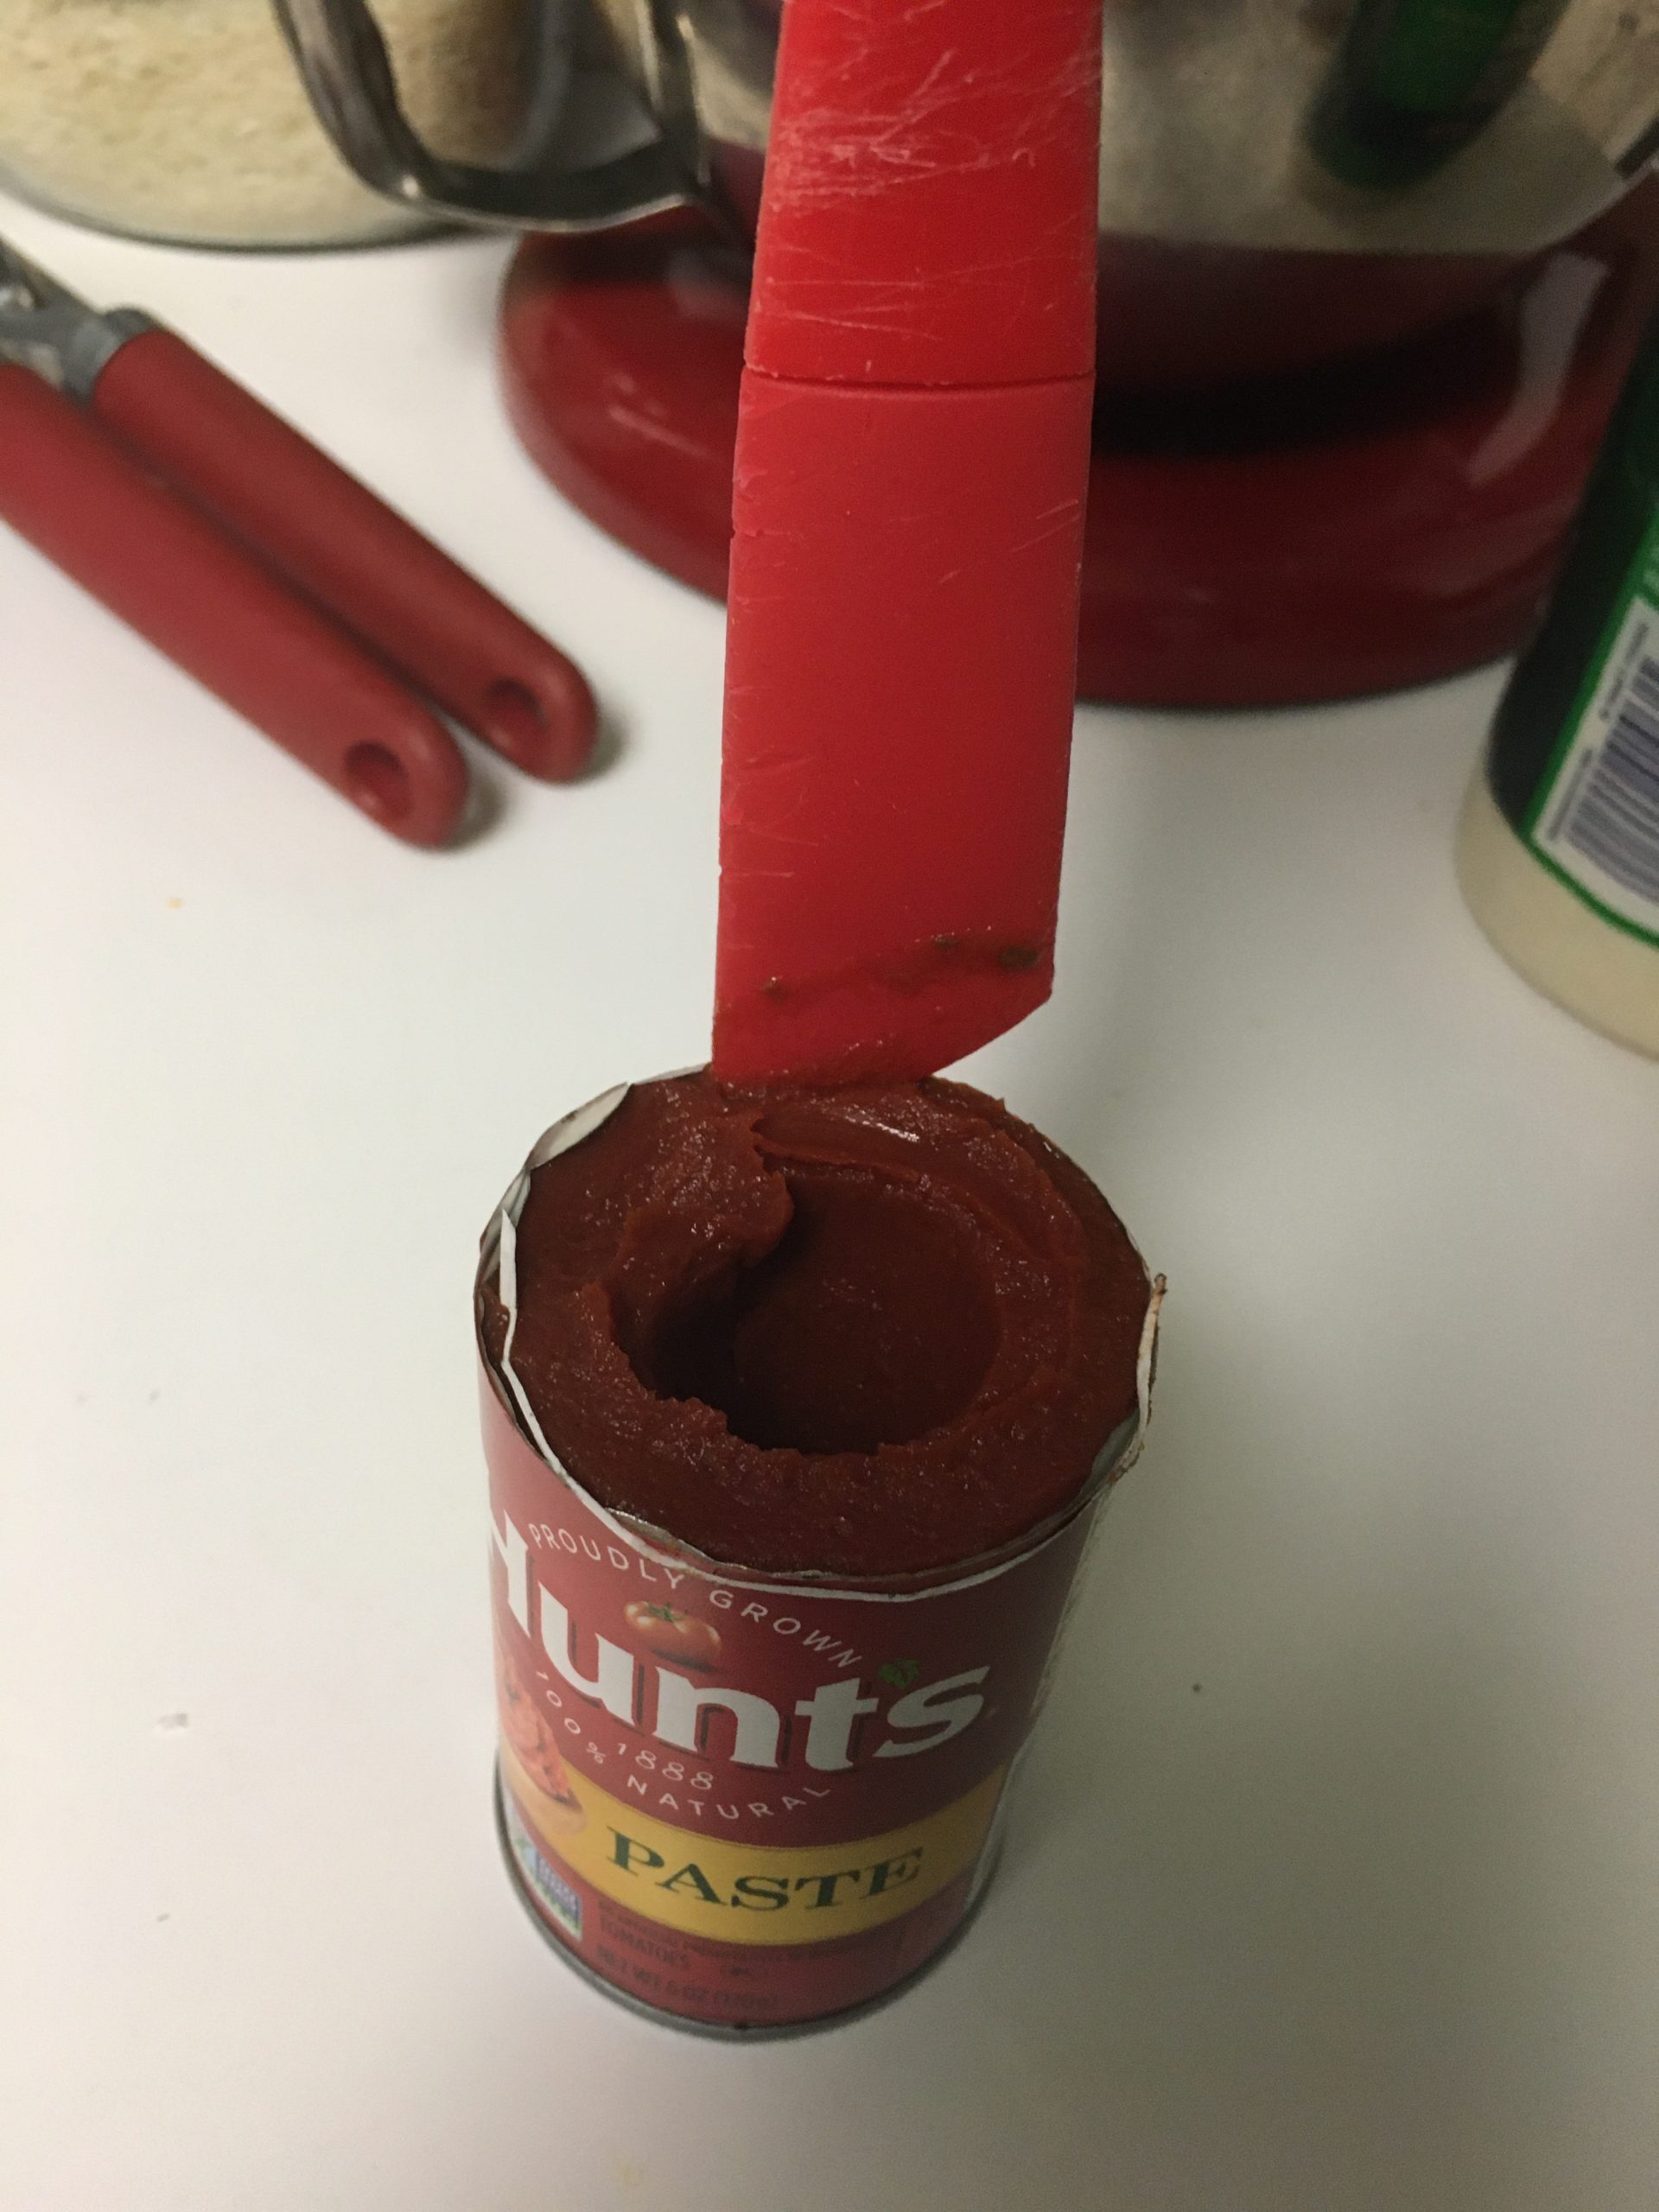
  3. Take the empty can and fill it 9/10 full of water, and add to the jar.
  4. Add the other ingredients.
  5. Replace the lid, and shake well to combine all ingredients.
  6. Let sit in the fridge for 3 days for optimal flavour saturation. Although, I’ve used it immediately too and it still works, but not quite as good.

Pizza Sauce

A simple excellent pizza sauce
Prep Time10 minutes
Cook Time0 minutes
Course: Main Course
Cuisine: American
Keyword: Pizza, Sauce
Servings: 1 jar
Cost: $1

Equipment

  • 1 Jar
  • 1 Spatula

Ingredients

  • 6 oz can tomato paste
  • 9/10 can water use the tomato paste can
  • ½ tsp basil
  • ½ tsp salt
  • ¾ tsp sugar

Instructions

  • Mix all the ingredients into the jar. Use the can from the tomato paste to measure the water. Fill to about 9/10 to the top of the can.
  • Replace the lid and shake to mix all ingredients.
  • Store in fridge until ready to use. Let sit for at least 3 days for optimal flavor, but can use immediately if needed.

Baking the pizza

After you’ve moved the dough to parchment paper. You can sauce it to taste, and add cheese and toppings. I have found that it is actually better to use provolone cheese instead of the typical mozzarella. Give it a try!

I also suggest after you add all of your toppings to add a sprinkle of grated parmesan or Italian cheese and oregano. It really takes it to the next notch of making it taste boughten.

Bake at 425°F for 13 – 15 minutes until the crust is golden and crisp. I find the best time to warm up the oven is after the dough rise. Make sure your pizza stone is in the oven before you turn it on so it warms up with the rest of the oven. I highly recommend a pizza stone. I use it for my breads as well.

To transfer the dressed pizza to the oven takes a bit of a learning curve. Using the parchment paper has made all the difference for me. Use a pizza peel or a thin cookie sheet. I actually bought the pizza pan from the dollar tree for this purpose. Since it is so cheap, it makes me not worried about cutting the pizza on it too.

So, take your transfer tray and line it up with the end of the pizza at the edge of your prep surface. Take the corner of the parchment paper and slide it over to the transfer tray.

Once it is on the tray, you can open the oven and slide the pizza onto the pizza stone. The paper should make it slide slowly and smoothly.

To take the pizza out again, just do the same thing in reverse. It is easier on the way out since the crust will be crisper and everything melded into one.

Cut and enjoy!

Pizza is a personal preference, there are no rules. These are more like guidelines anyway.

Categories
Food

Simple Grilled Chicken

A great staple meal is a grilled chicken. It can be paired with so many other things and is surprisingly easy to make well.

You can keep some frozen chicken breasts in your freezer to make a cheap meal available at any time. This also works with raw chicken too, so whichever you have available.

Grab a pan with a lid or you can also use a lid slightly smaller than the pan. It’s important to use a combination that allows you to have a seal when the lid is on. This helps cook the chicken thoroughly while making sure it doesn’t dry out.

Then drizzle some olive oil onto the center of the pan. This is to keep the chicken from sticking to the pan and also adds a little healthy fat and flavour.

Then you just set the chicken on the oil. I also drizzle just a little olive oil on the top of the chicken. This helps keep the seasoning on and a little oil for when you flip it.

Having a clear lid has been great for seeing how the cooking is coming along without breaking the seal.

Speaking of seasoning, this is also very simple. Just a little bit of salt and pepper, and the part that really makes it good, rosemary. Sprinkle a little bit of rosemary on there and it takes the chicken to the next notch.

Once you’re used to the basics, you’ll be able to experiment with other flavors you might want to try. I once added a slice of lemon to a dish with multiple servings. While I liked the flavour, it didn’t pair correctly with the rest of the elements of the meal.

After you dress your chicken, put that lid we talked about on. Turn the stove onto medium heat and don’t pick up the lid. The seal really is what keeps the chicken from drying out, so the less you lift it, the better. Just let it cook for a few minutes. You’ll probably hear the sizzling and see some steam. Basically, just listen and trust your gut, but try not to lift the lid more than once. When the first side is cooked well, flip it and replace the lid. I have found that it is easier to flip chicken by using tongs instead of a spatula.

You know it’s done when the center is cooked thoroughly. I cut into the center just a little bit before taking it off the skillet. As long as it’s not pink you’ll be ok. If you see pink, it’s not done and you could get sick by eating it. To check without cutting your chicken, use a meat thermometer. It should read at least 165°.

Find what works for you, these are more like guidelines anyway.

Categories
Food

DIY Recipe Book

I made a little recipe template for my brother and thought I’d share it with you.  It’s really simple. I’m including 2 different copies though, 1 with room for hole punches on the right side, and 1 on the left.

I made them to fit an A5 page. That’s about the size of a day planner or a small binder. Either would be great choices for your book.

I’m also including these with each of the recipes I post already filled out and ready for you. They will also have the Holes on Right/Left option so you can do front and back if you want or just one side. Your choice.

If you’re looking for a little bit of inspiration, I found an adorable recipe book at Marshall’s for only a couple bucks. I bought it for my cousin for her birthday and she loved it as well.  I almost bought it for myself even though I already bought a Cookbook from Goodwill.

You can fashion a cookbook yourself, or you might find a cute one like this. If you do buy one, make sure to scan some good copies of blank pages so you can print more later.

Make it your own. Personally, I love the dividers on these. So helpful.

 I don’t really know how I feel about the stickers….to each their own. I never end up using stickers because I don’t want to waste them.

Some Ideas for DIY a recipe book

I prefer something that lets you add, remove, and rearrange whenever you want. If you want something more permanent, do that.

While aesthetic can be important, make sure to focus on function over fashion. Yes, it will be great if you love to display it and that helps you use it, but if the base you pick doesn’t stay open on its own or the fonts are hard to read, you will never use the book. It will just be a decoration piece. Let’s make it both.

Make sure you know what size paper the base takes before you decide on yours. You don’t want to get a base that takes an unusual size of paper that you’ll never be able to refill. Doing a quick Amazon search will give you a solid idea for how available and expensive sizes are. A5 (half-sized) is fairly standard while letter sized is probably the easiest to obtain.

1. The Starter: Pick the base you like the best.

   The simplest base would be a regular, plain binder. You can pick these up anywhere you can get office supplies. There are even half size binders so you can have something smaller than letter size.

You can also find all kinds of designs and styles of binder, especially in full size.

Another option would be getting a day planner base. You can also find many of these in several styles. They can get more expensive if you’re not careful, especially if you’re buying from Office Depot or Staples. I have found some attractive and decently priced day planner bases an Amazon.

I bought this A5 or half-size journal cover for my day planner. It’s under $15 and really nice. I’ve had it for over a couple years now, and it has held up just fine.

As of Sept. 2020, my planner is unavailable. Here are a couple other ideas I’ve purchased for friends and family as gifts. The black one has a USB hidden in the clasp which could be a cool place to save your recipes digitally.

One more idea for a recipe book is an actual recipe book. There are several recipe books that are formatted in a binder so you could add more recipes to them. This option isn’t necessarily as cute as some of the other options, but it jump starts your book which is great if you don’t have many recipes of your own yet. This is what I’m working with right now and some recipe apps. A possible difficulty with this: the page sizes might not be a standard size so you will have some trial and error to find the right size or your pages will be different sizes than the book pages. I found a ring-bound recipe book at Goodwill that was just like new. It was very similar to this one except it was all kinds of recipes, not just baking. This baking book, however, is one we had in our house growing up and it has some of my favourite recipes.

There are also some very different options. I believe OfficeDepot has a journal system that lets you do whatever you want with pages and connect them with just a series of clips. It’s similar to a binder, but more personalized? Basically, just do a little research. If you have an idea for how you want it to be put together, it’s probably out there or available for you to make.

2. The Meat: Pick how the recipes will look

Like I mentioned before, you can use the simple format I provided at the beginning of the article, you can make your own, or find another download that suits your purpose.

Either way, make sure it has all the basic elements of a recipe (ingredients, directions, cook time etc.) and anything else you like to include. (Personal notes, decorations)

Feel free to browse recipes online, in old books, or even what you may have written by hand to get inspiration for what you want to include in your recipe book.

3. The Toppings: Extras to make the Book more Accessible or Appealing

You can get yourself some little dividers on Amazon or cut them yourself from scrapbook paper if you want.

 I got these (left) for under $10 for my day planner. They’d work great for a half-size binder. They are A5 size so be aware of that. This (right) is the paper I use to print my own planner pages, and they would work great for making your own recipe pages.

Adding information to the inside covers of your base or on your dividers can make for some better function and could be really cute too.

Some bookmarks could also be helpful for getting to those recipes you use all the time. Think non-traditional, some of my favourite things to use as bookmarks are paperclips. Maybe this is why they have all those fancy, shaped paperclips.

Don’t forget to just keep adding and cooking. It’s only as useful as you make it. Have fun with it and remember these are more like guidelines anyway.

As an Amazon Associate I earn from qualifying purchases at no cost to you. All opinions and recommendations are my own regardless.